Valentine’s Cake Pops: Easy, Cute & Perfect for Gifting!
If you’re looking for a sweet, eye-catching treat that’s as fun to make as it is to share, these Valentine’s Cake Pops are exactly what you need. They’re adorable, customizable, and perfect for everything from classroom parties to romantic date nights at home. With soft cake centers, creamy frosting, and a smooth chocolate coating, every bite feels like a little celebration.
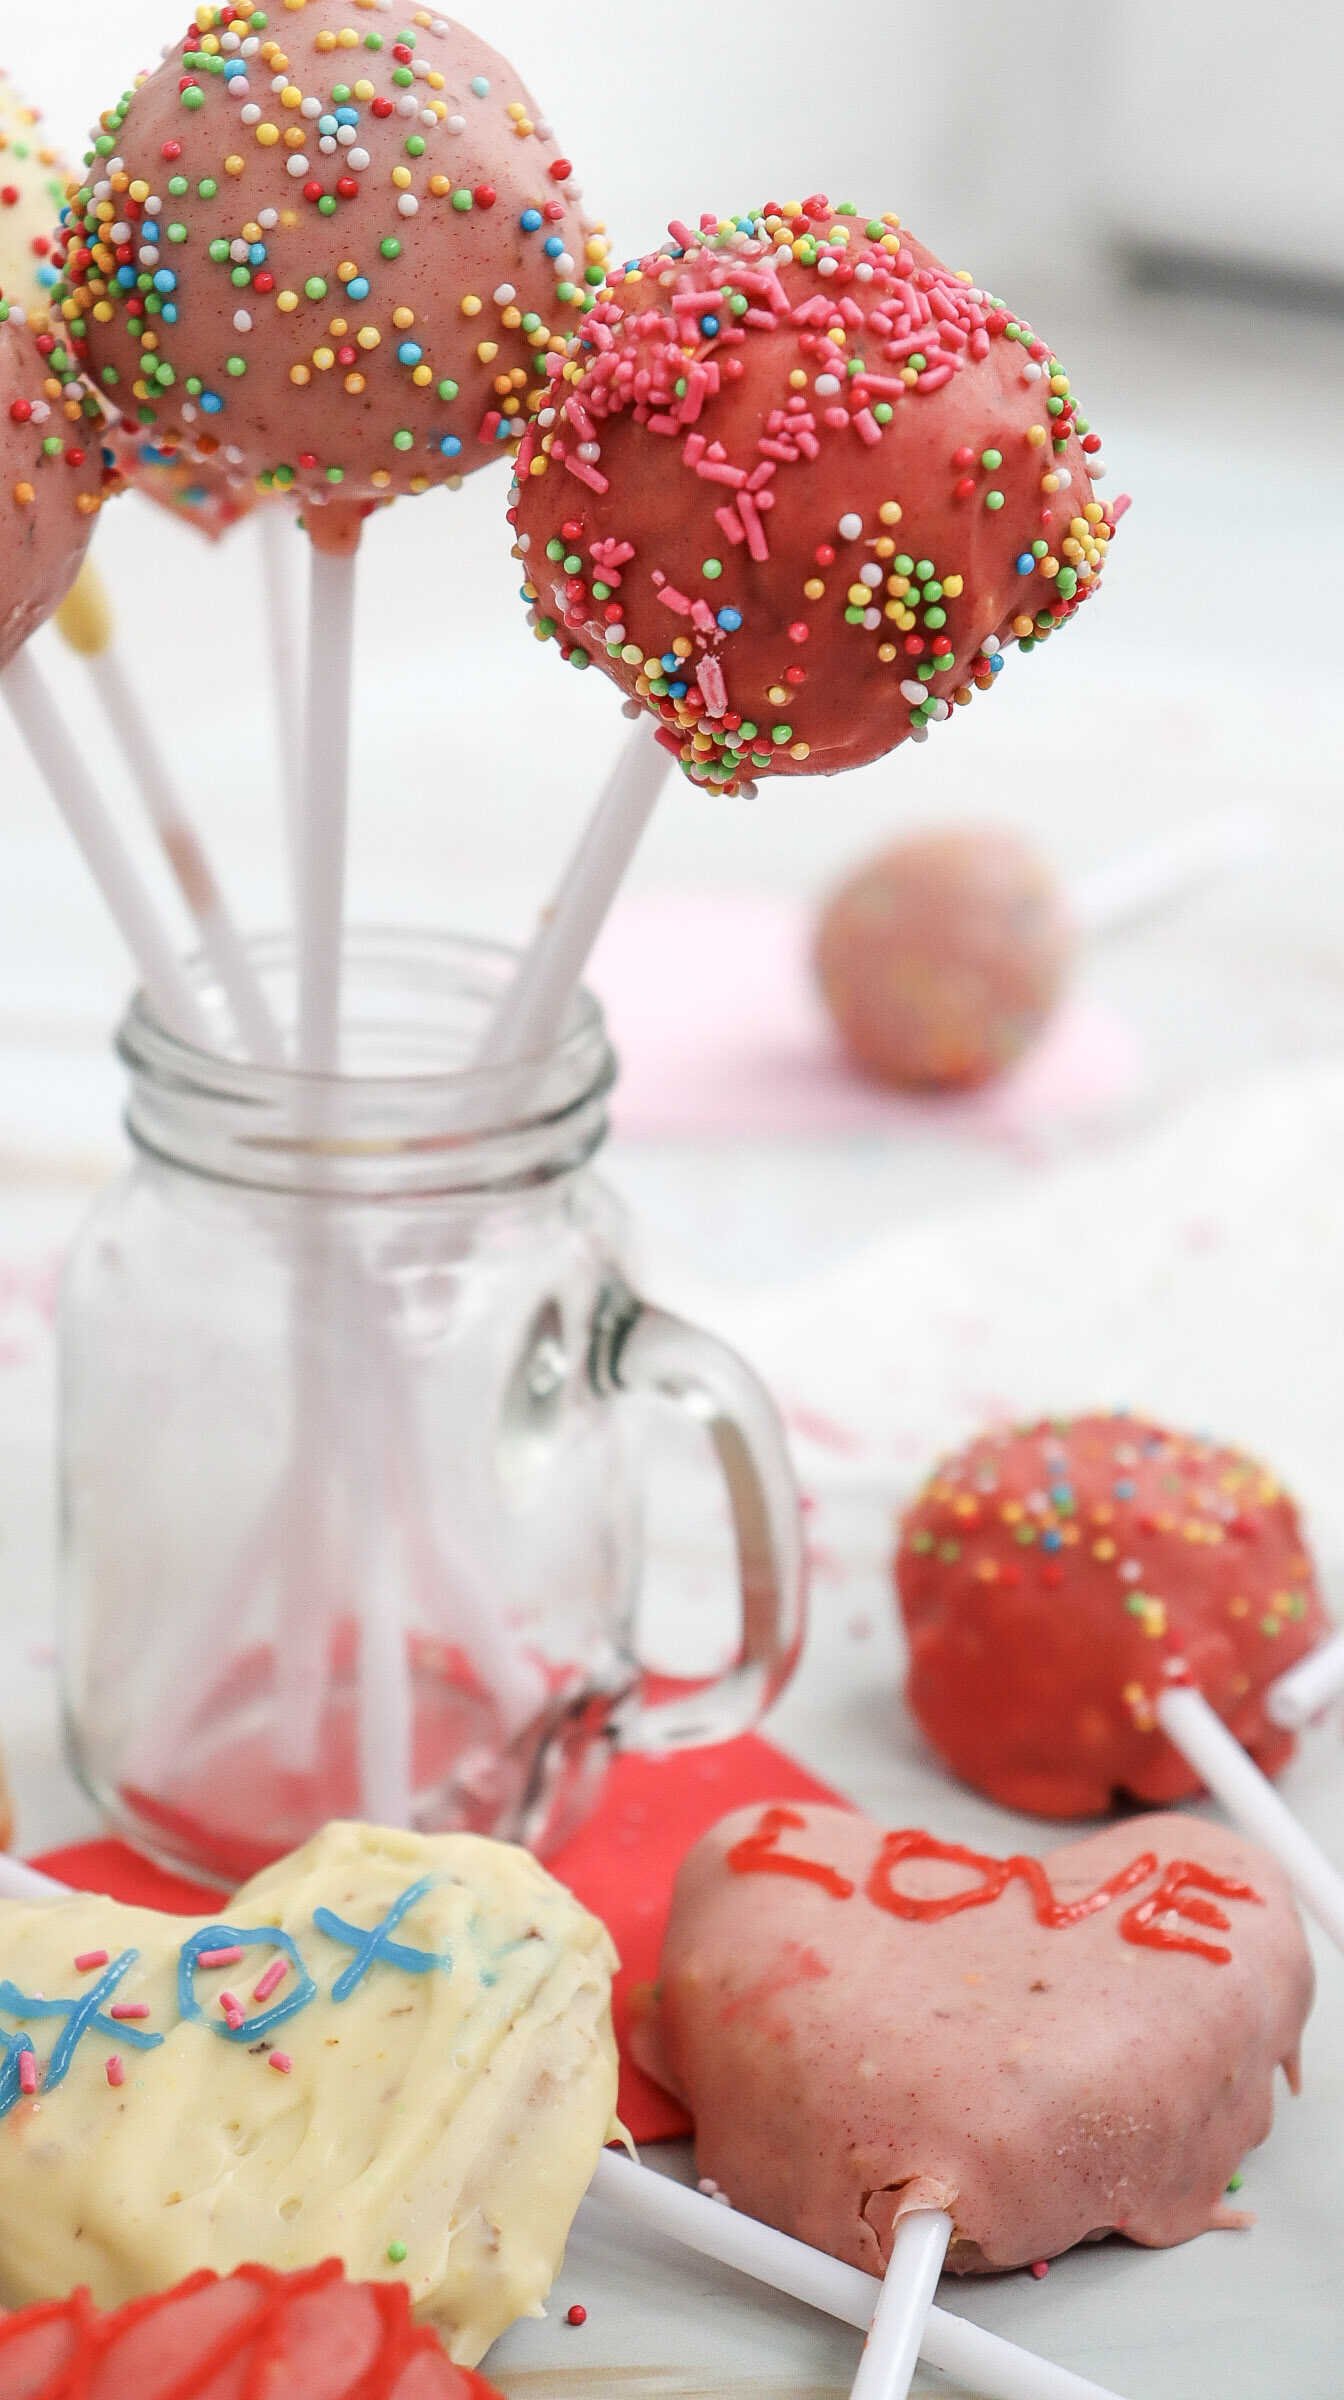
One of the best parts about cake pops is how versatile they are. You can use any cake flavor you love, decorate them in endless ways, and even shape them into hearts for that extra Valentine’s touch. Whether you’re making these with kids, gifting them to friends, or setting up a dessert table, this recipe is simple, forgiving, and always impressive.


Table of Contents
Why You’ll Love These Valentine’s Cake Pops
These cake pops check all the boxes for a perfect holiday dessert. They’re portable, mess-free, and easy to customize with colors and decorations that match your Valentine’s theme.
They’re also ideal for beginner bakers. Even if you’ve never made cake pops before, this step-by-step guide walks you through everything—from crumbling the cake to dipping and decorating like a pro.
Plus, they store beautifully, making them perfect for prepping ahead of time.
Recipe Overview
- Yield: Approximately 20 cake pops
- Total Time: 2 hours (including cooling time)
Ingredients
- 1 cake mix (9×13 inch) — any flavor you like (approximately 3–4 cups crumbled)
- 1 tub (15.6 oz) Betty Crocker ready frosting — any flavor that complements your cake
- 20 lollipop sticks
- 12 oz white chocolate chips (or melting white chocolate)
- Pink or red food coloring
- Heart-shaped chocolates or icing for decoration
- 2 tbsp sprinkles of your choice
- Writing icing (optional)

Step-by-Step Instructions
1. Bake the Cake
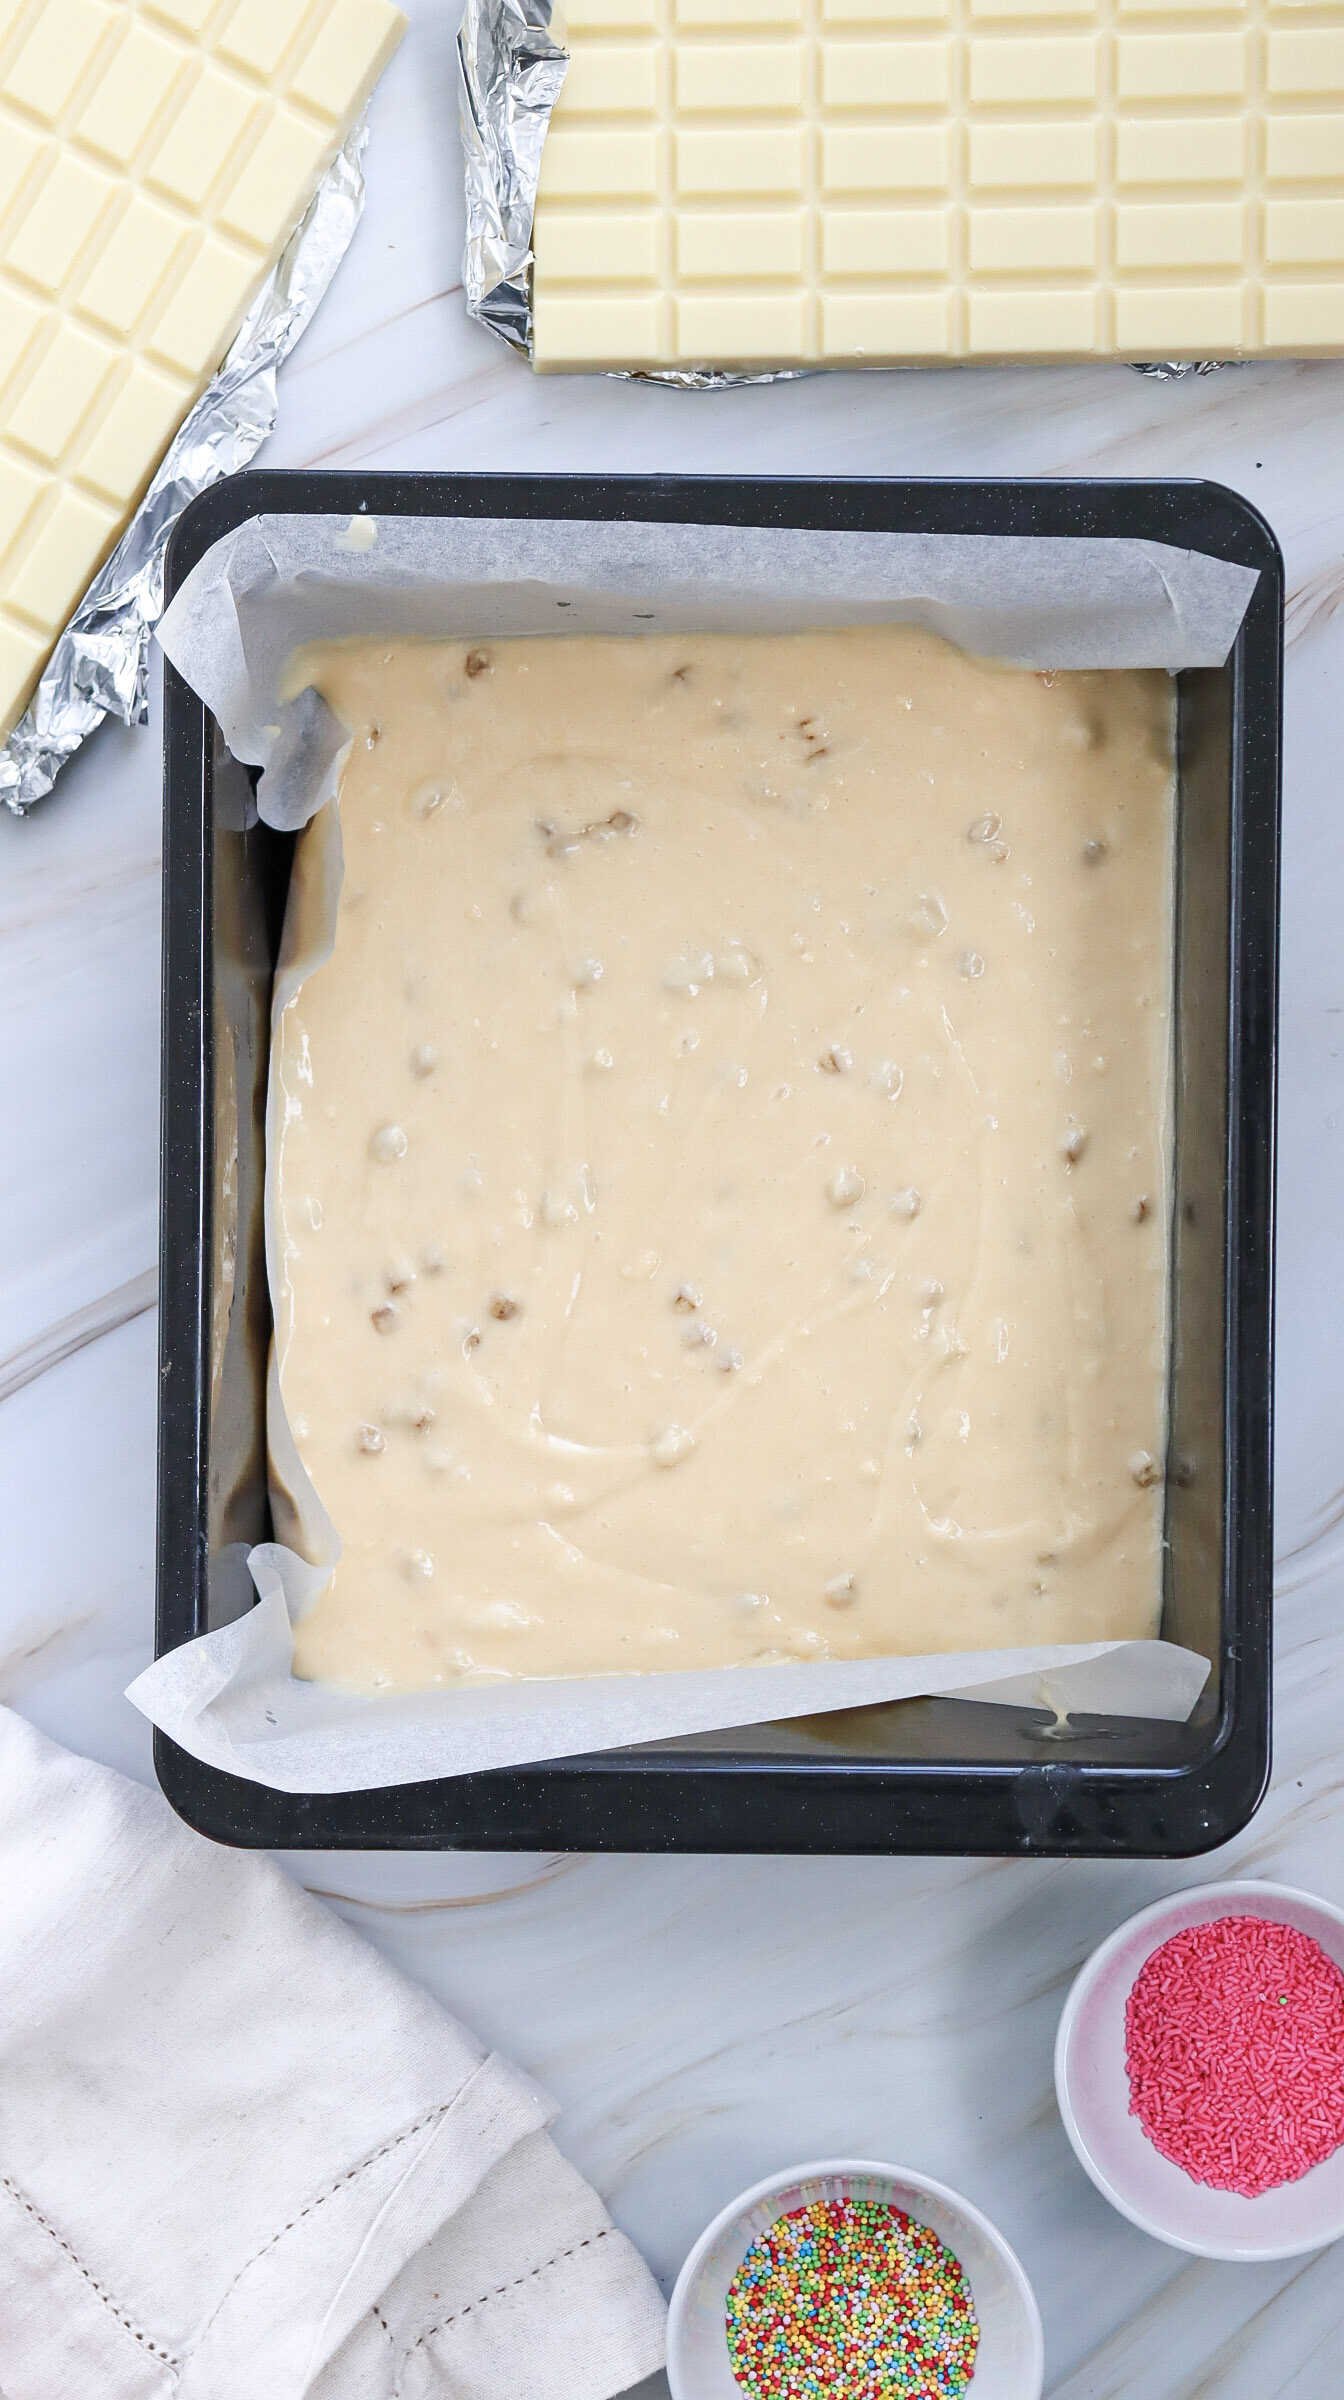
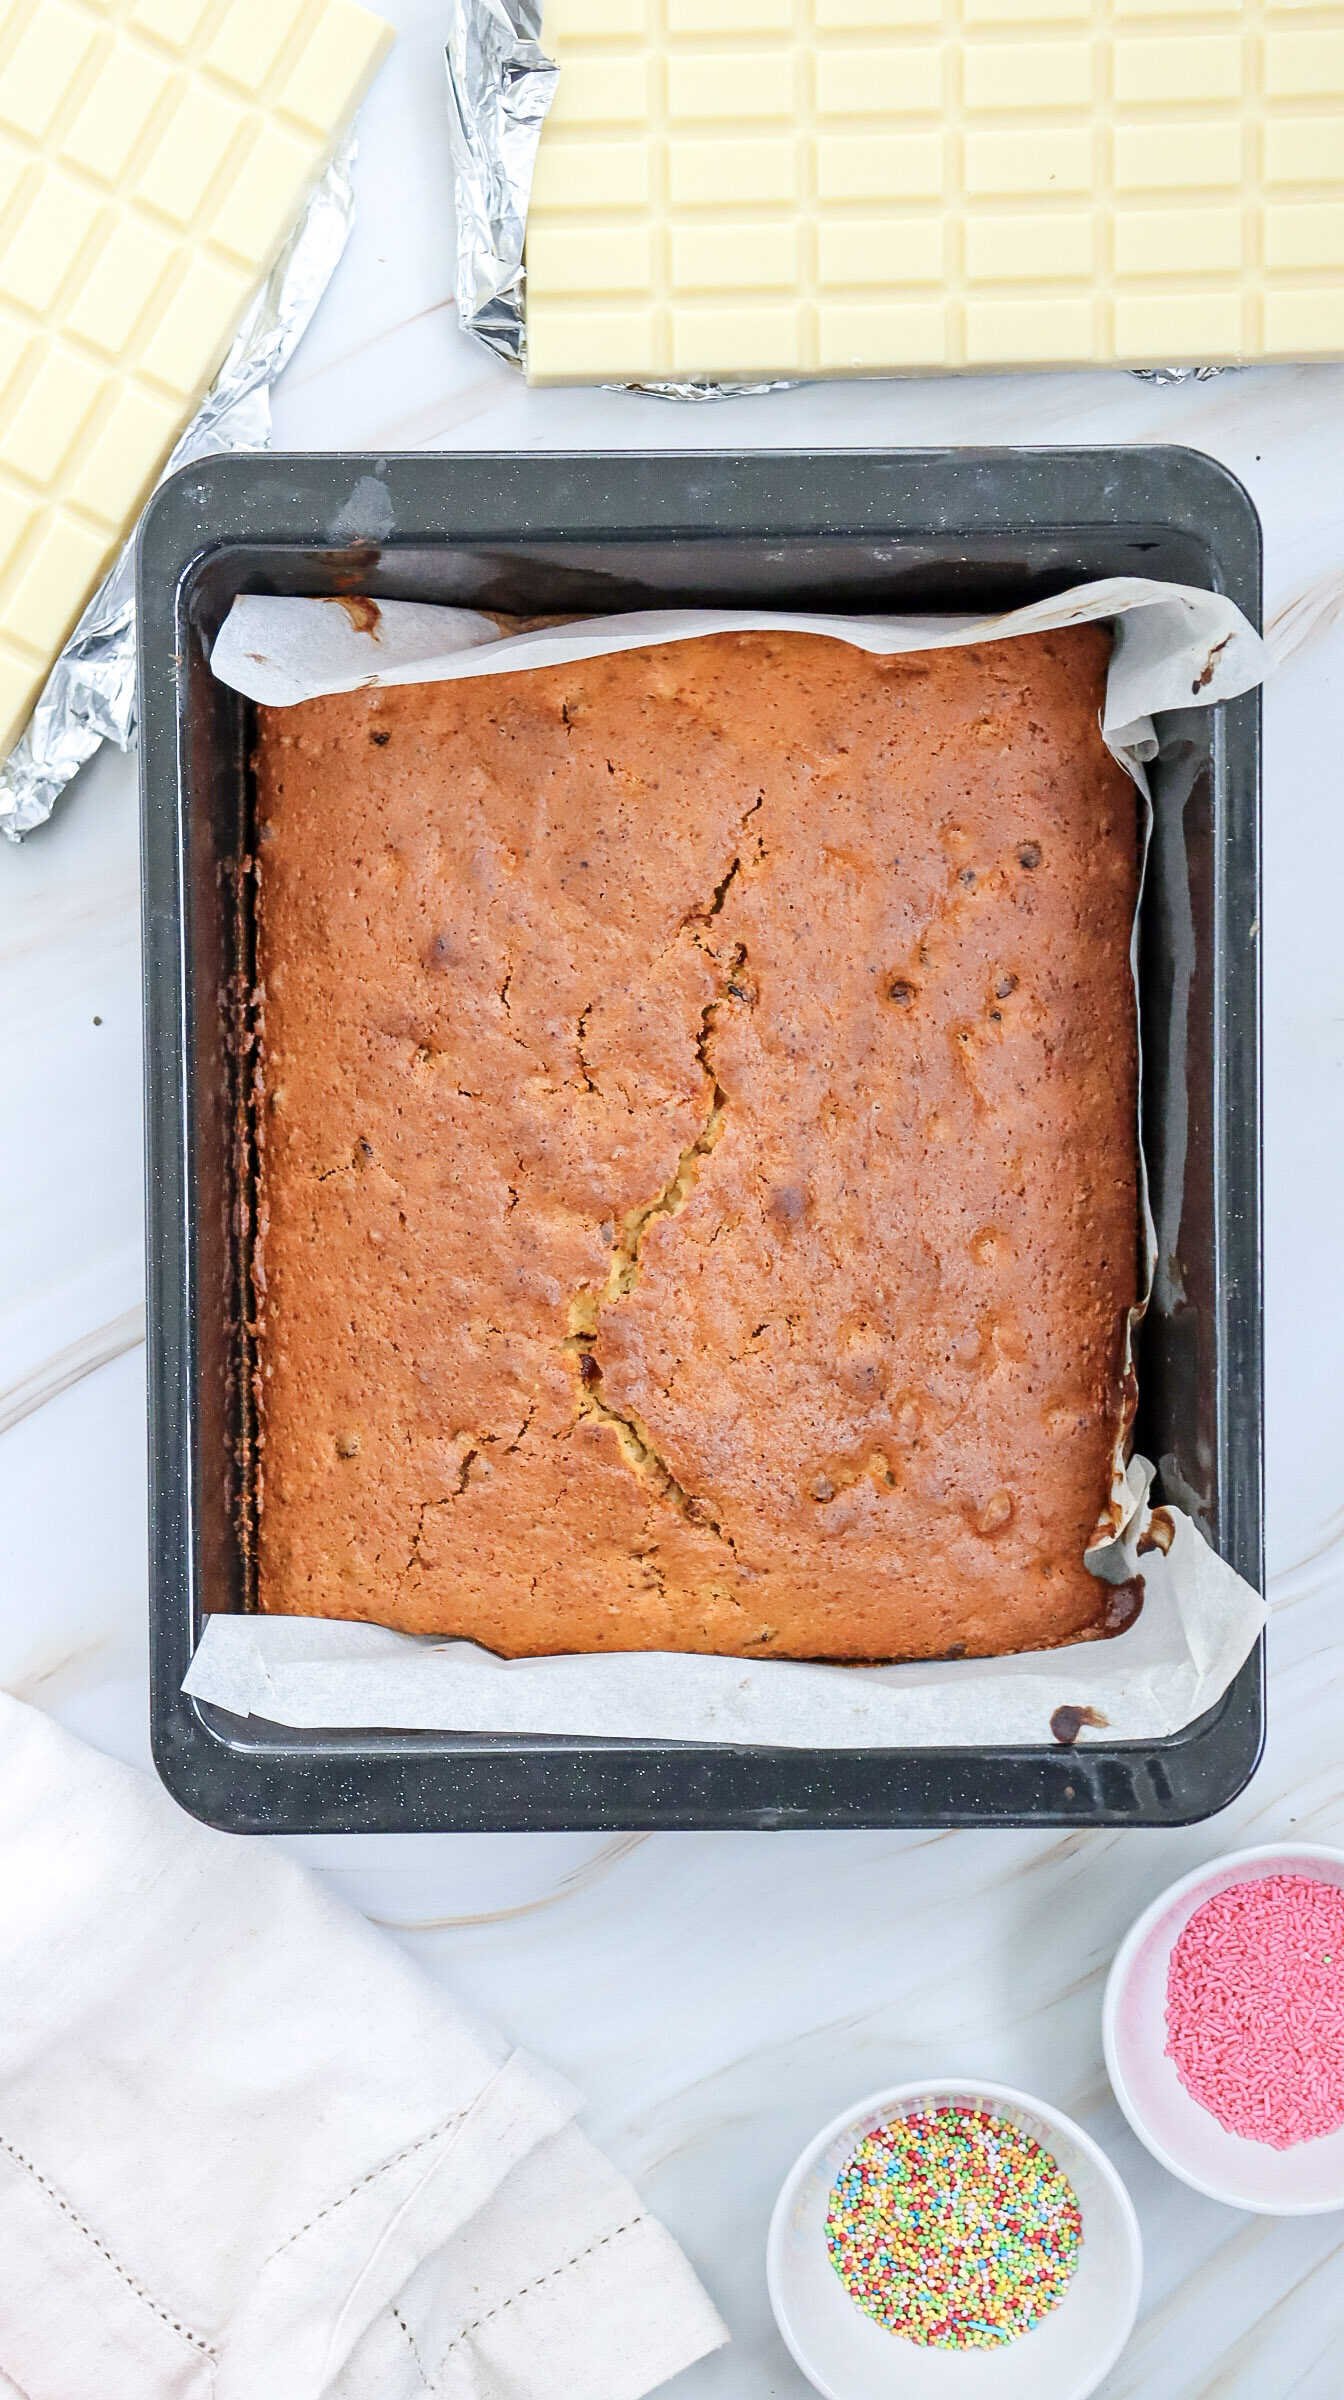
Start by baking your cake according to the package instructions or your favorite homemade recipe. A 9×13-inch cake works perfectly for this. Once baked, allow the cake to cool completely—this is important so the texture stays just right when you mix it later.
2. Crumble the Cake
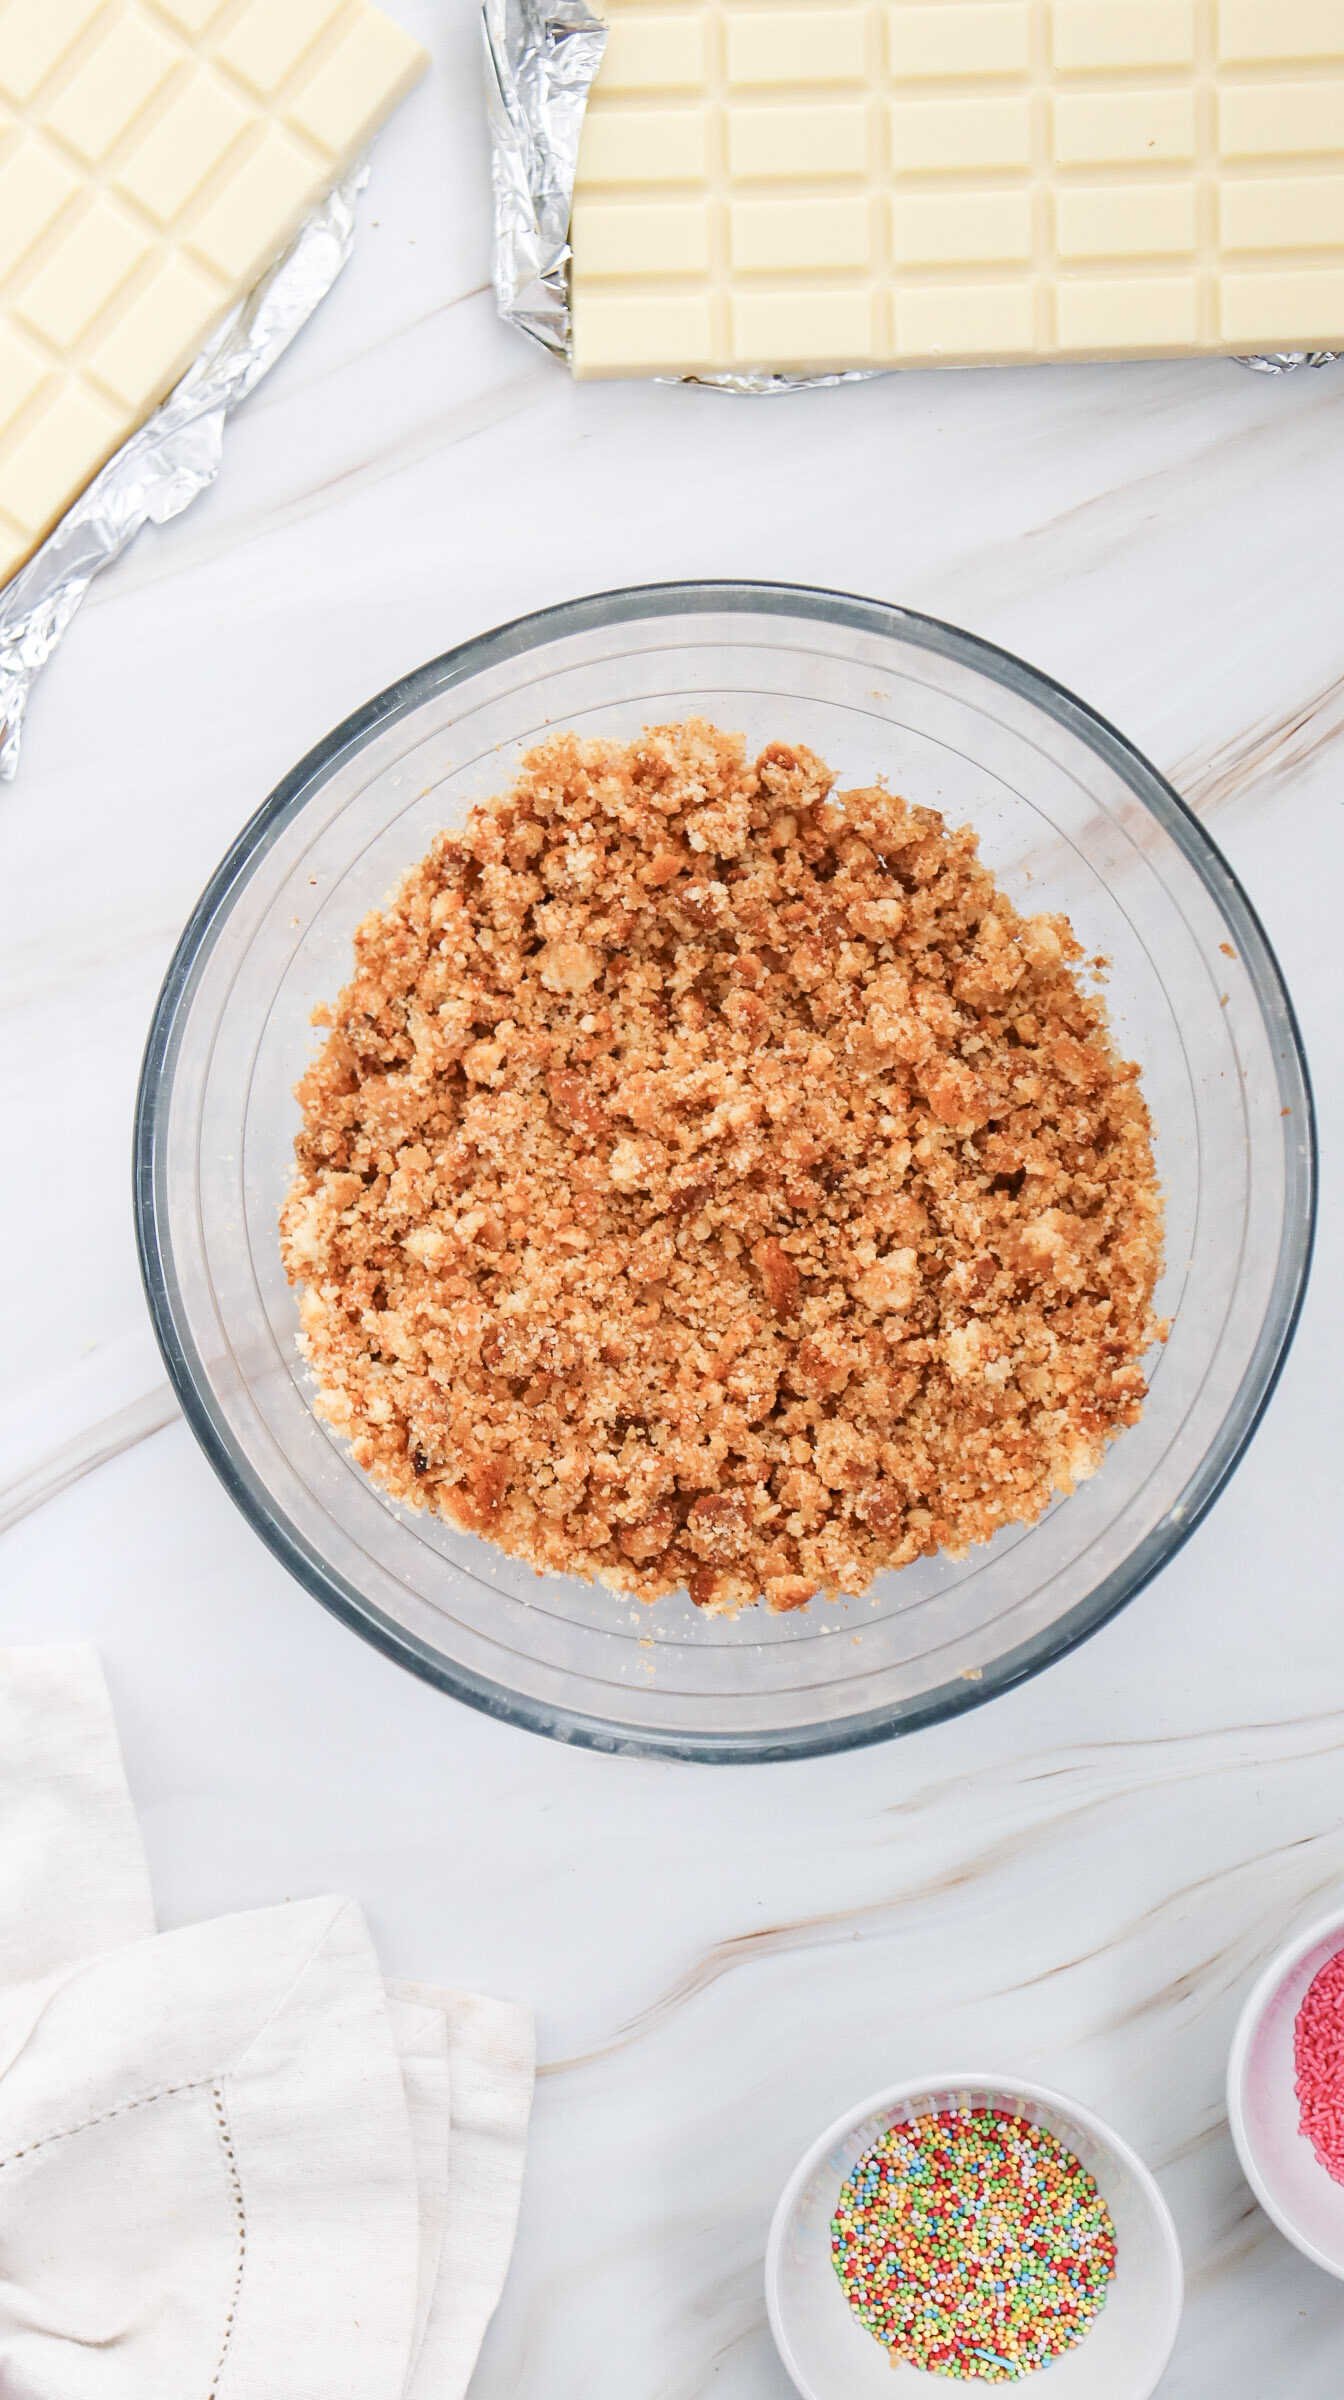
Once your cake is fully cooled, crumble it into a large mixing bowl. Use your hands or a fork to break it down until there are no large chunks. The texture should be fine and even, almost like soft crumbs.
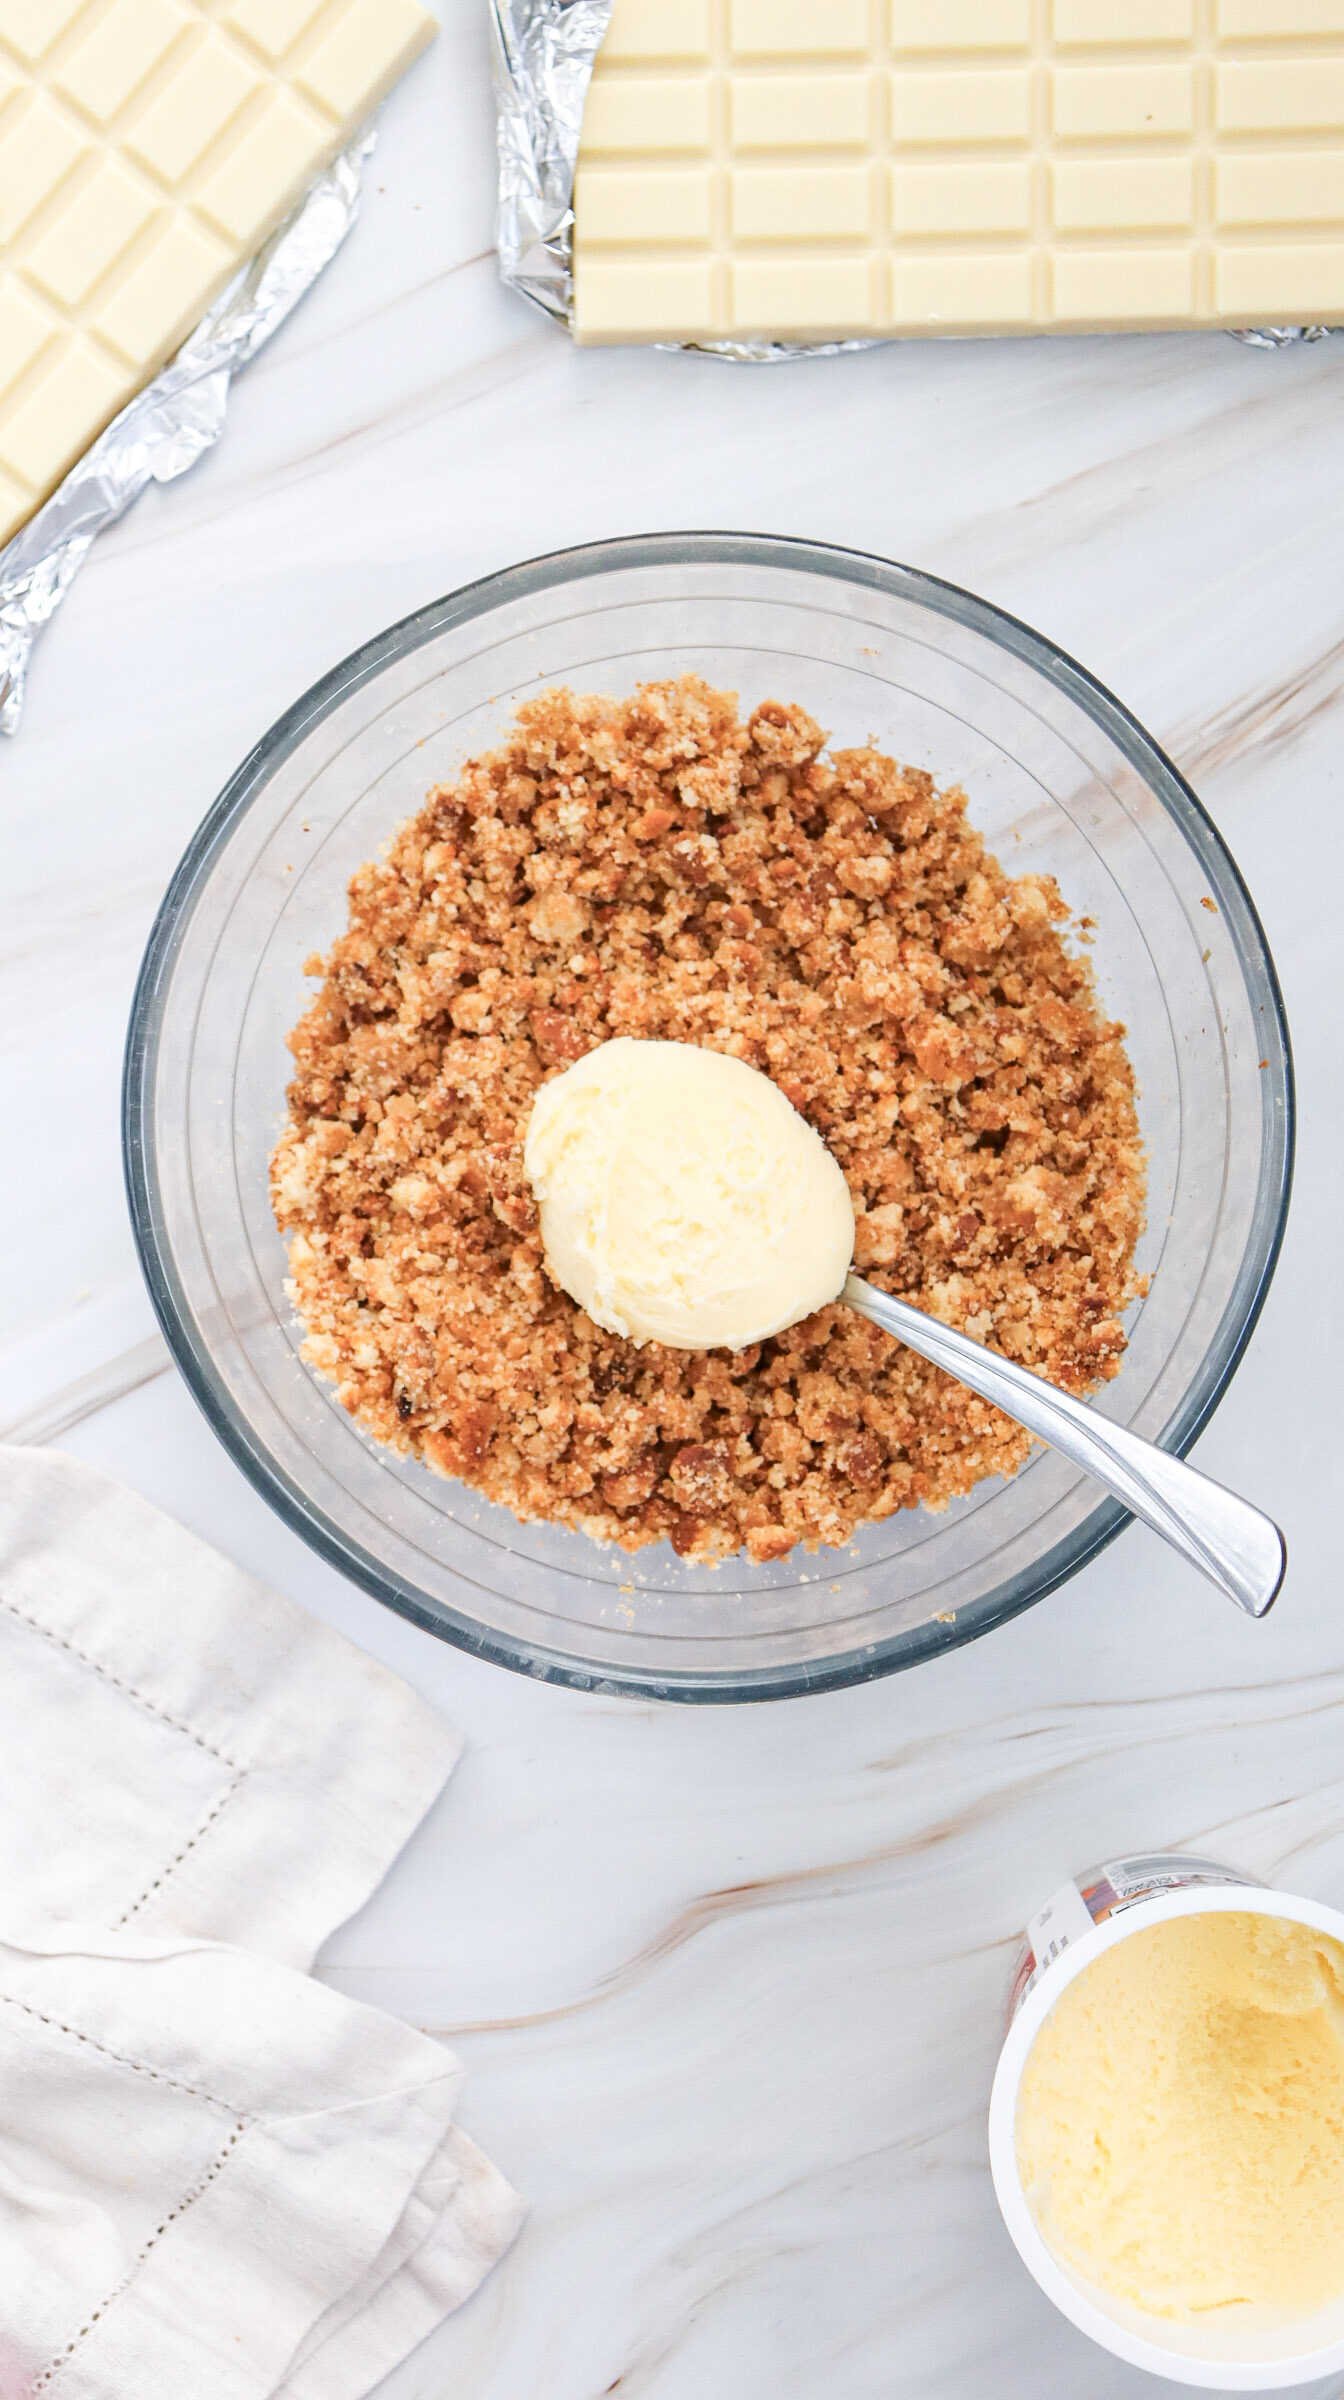
3. Mix with Frosting
Add the entire tub of frosting to the crumbled cake. Mix thoroughly until everything is well combined. The mixture should feel like a soft dough that holds together easily when pressed.
This step is what gives cake pops their signature moist, truffle-like texture.
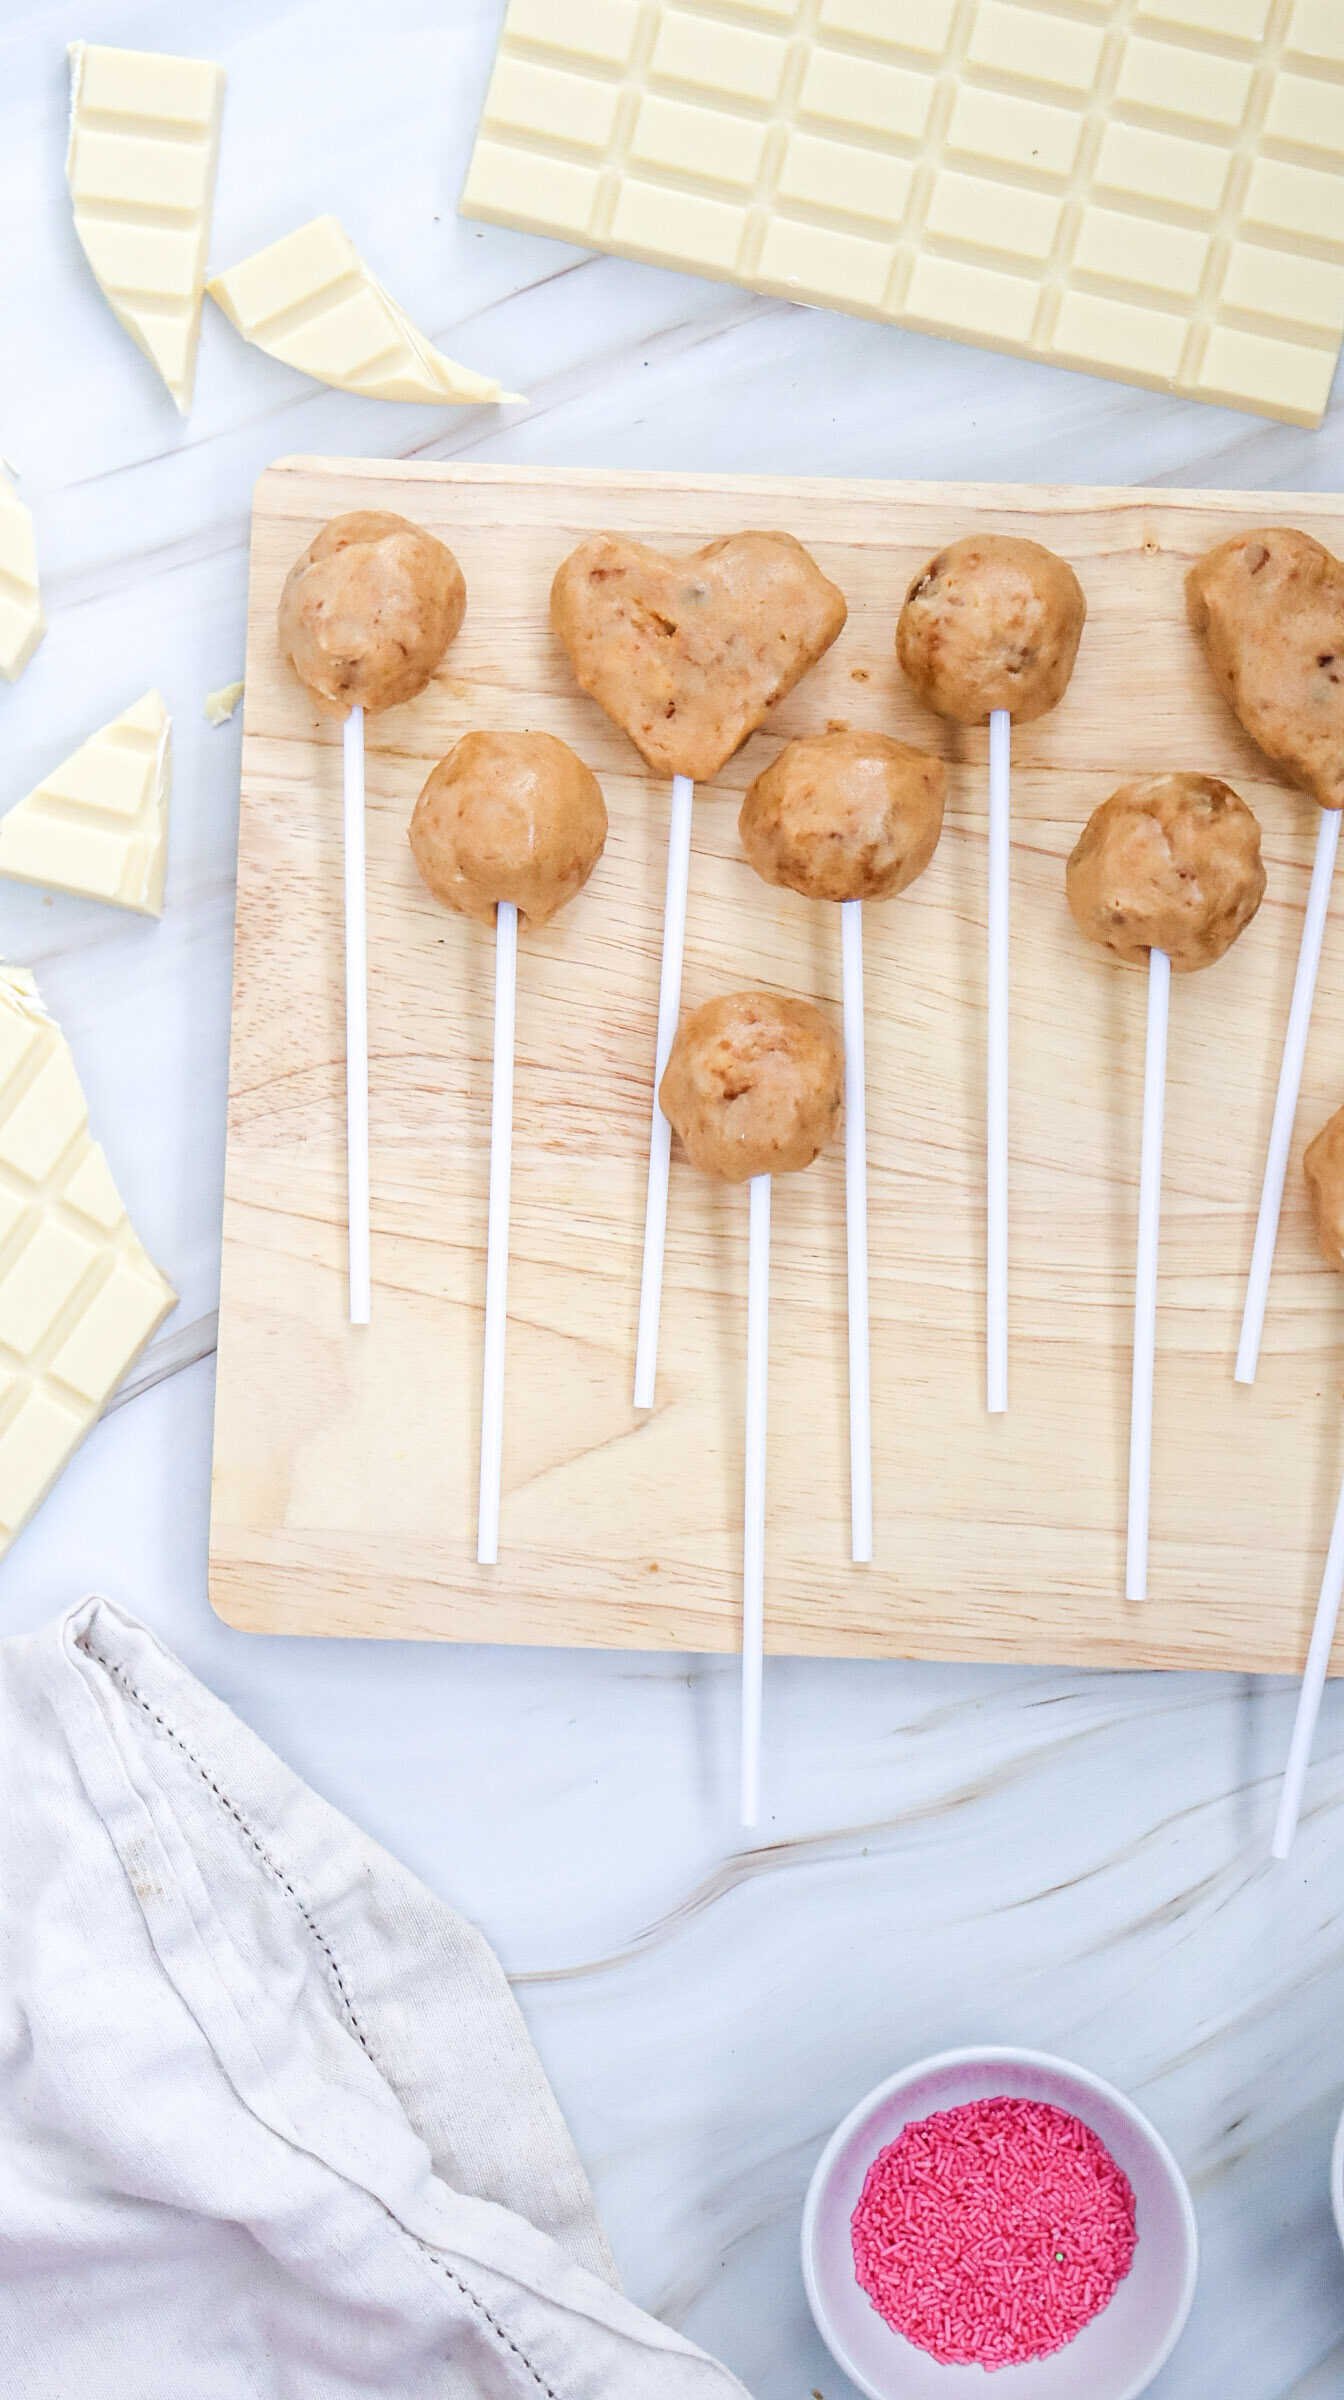
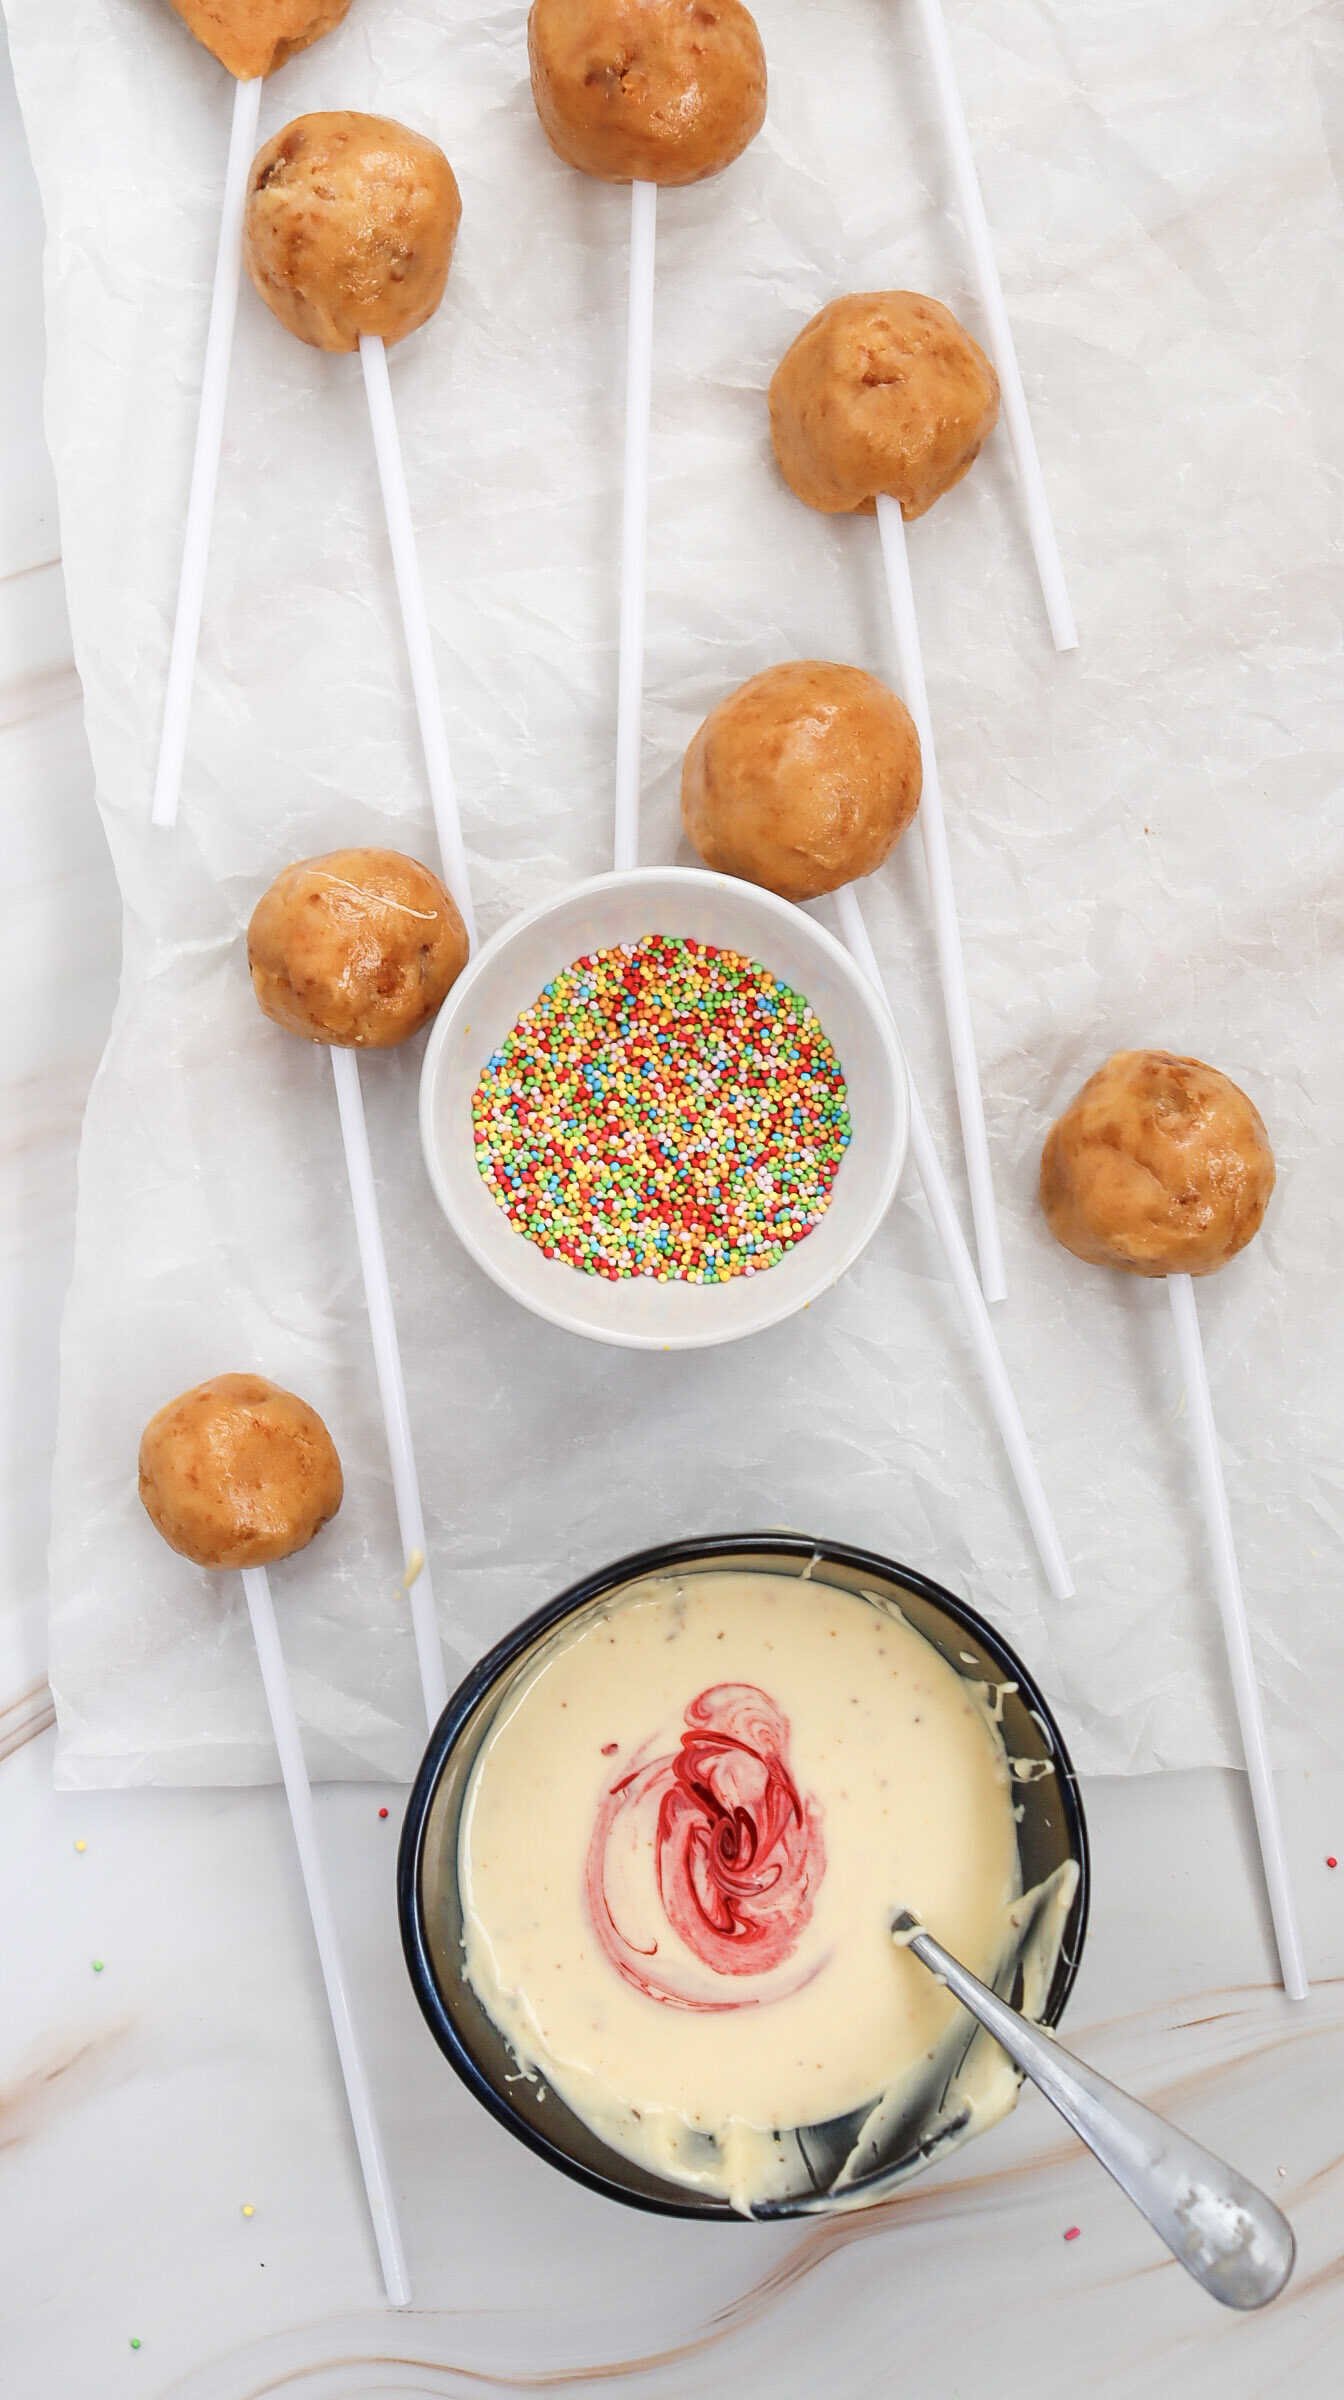
4. Shape the Cake Pops
Using your hands, roll the mixture into small balls about 1 inch in diameter. You should end up with around 20 cake balls.
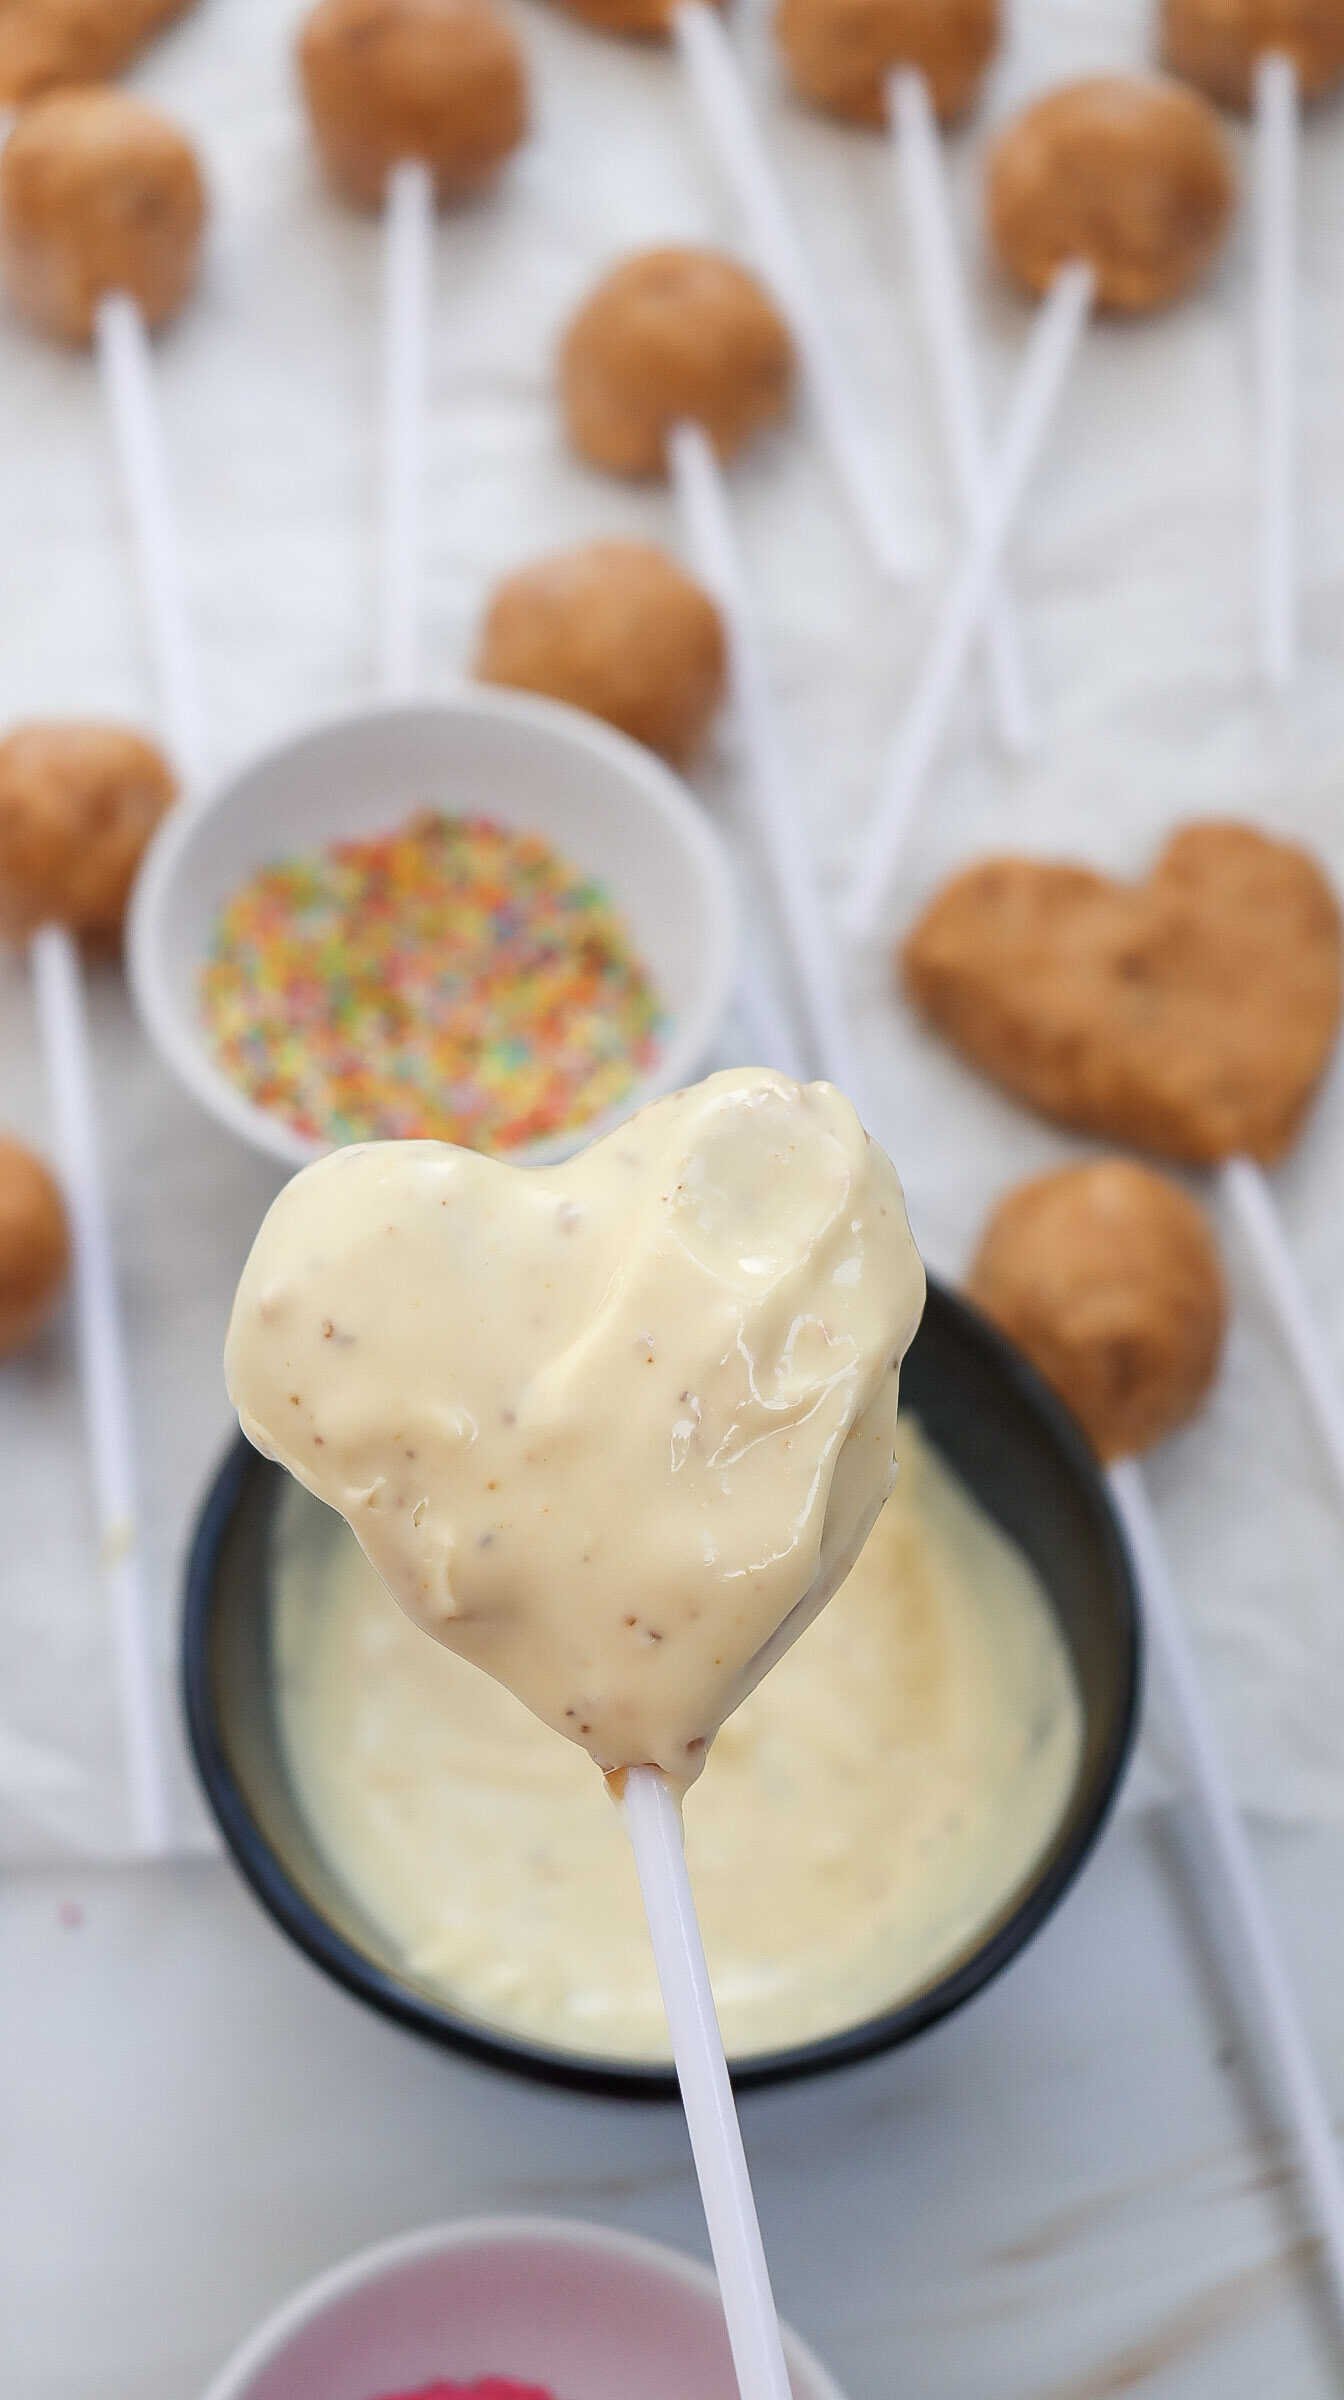
For a festive twist, shape some of the mixture into small hearts. Don’t worry about perfection—slightly rustic shapes actually look charming once decorated.
Place all your cake balls and hearts on a parchment-lined baking sheet. Refrigerate for about 30 minutes to firm up.
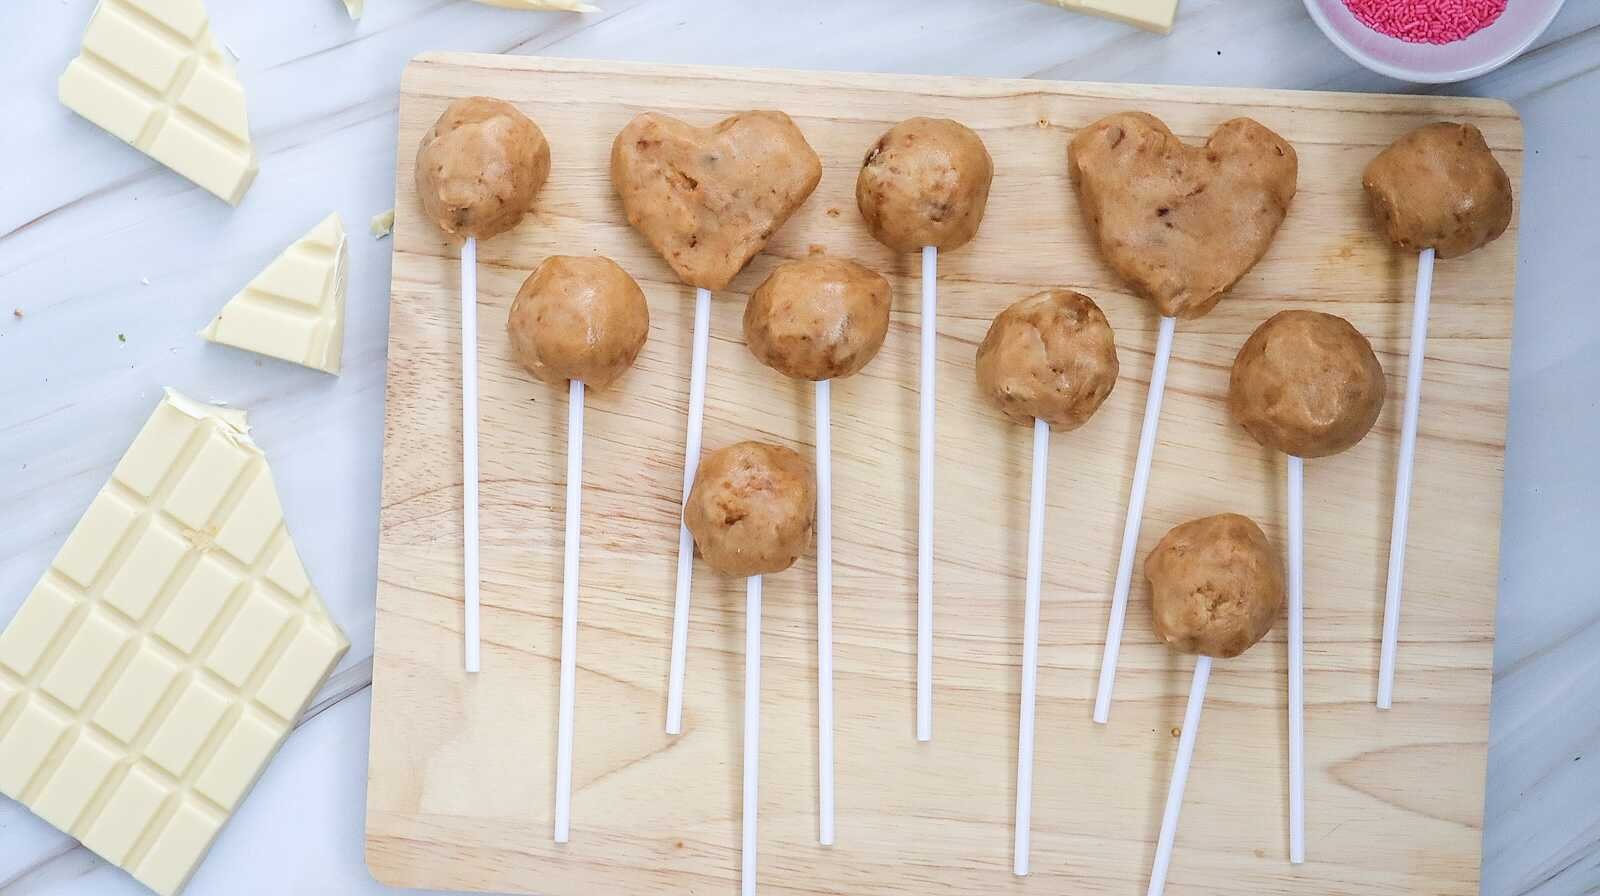
5. Insert the Sticks
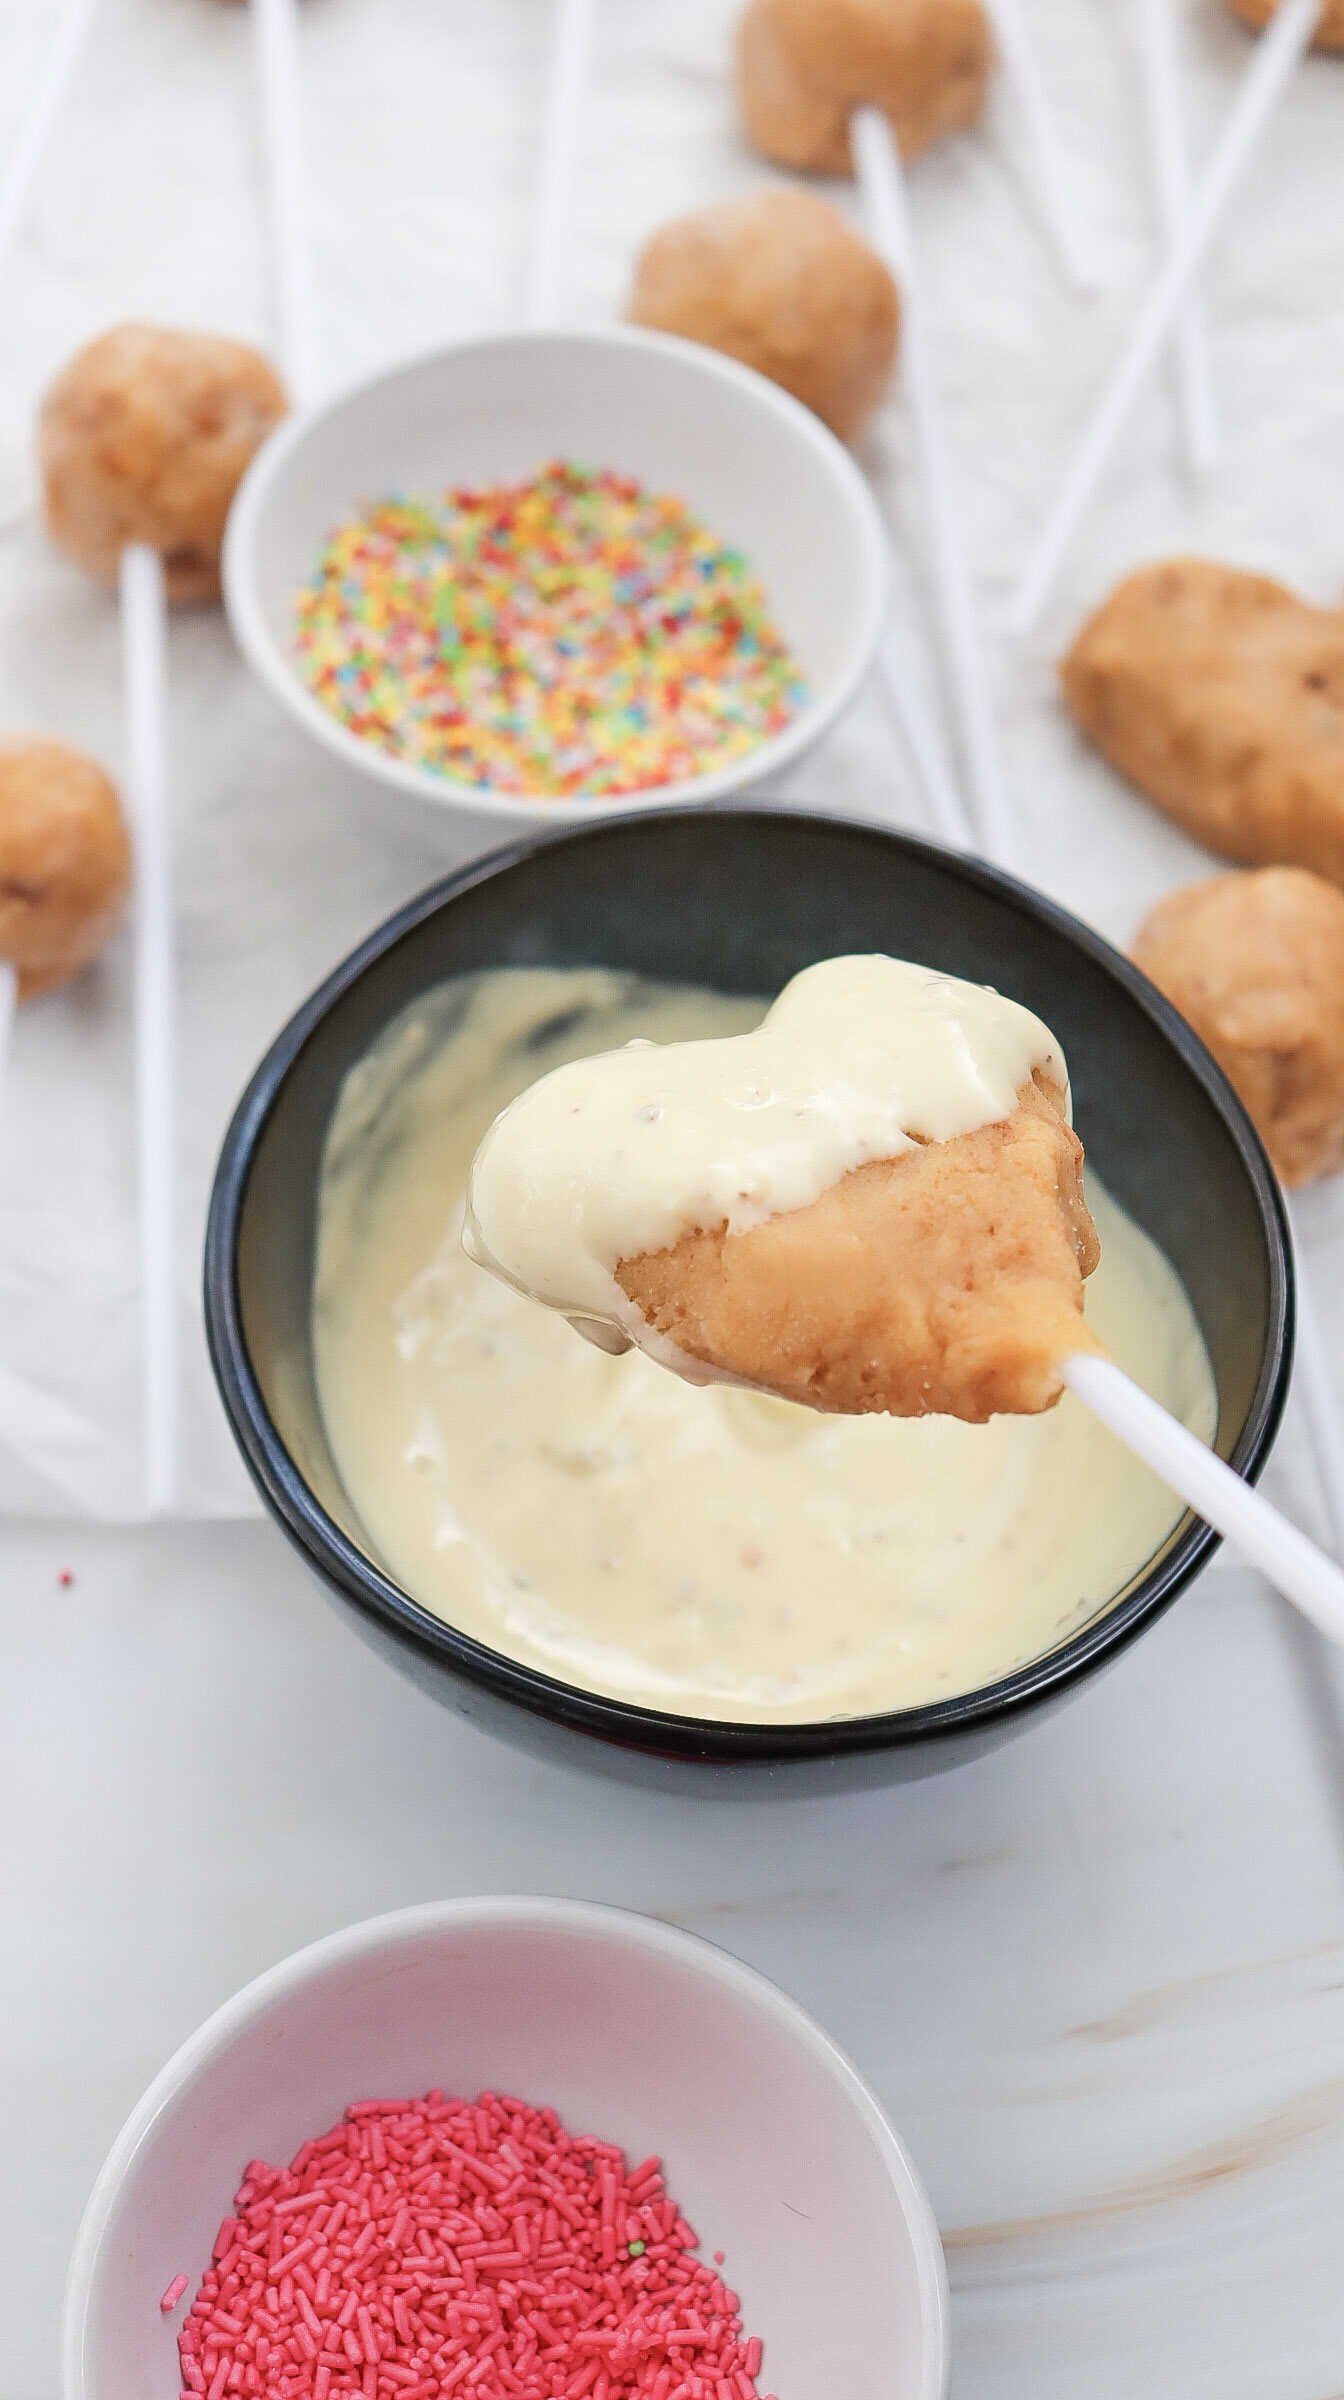
Melt a small amount of white chocolate (about 1 oz) in the microwave. Dip the end of each lollipop stick into the melted chocolate, then gently insert it into the center of each cake ball or heart.
This step helps secure the stick so your cake pops don’t fall apart later.
Return the cake pops to the fridge and chill for another 60 minutes.
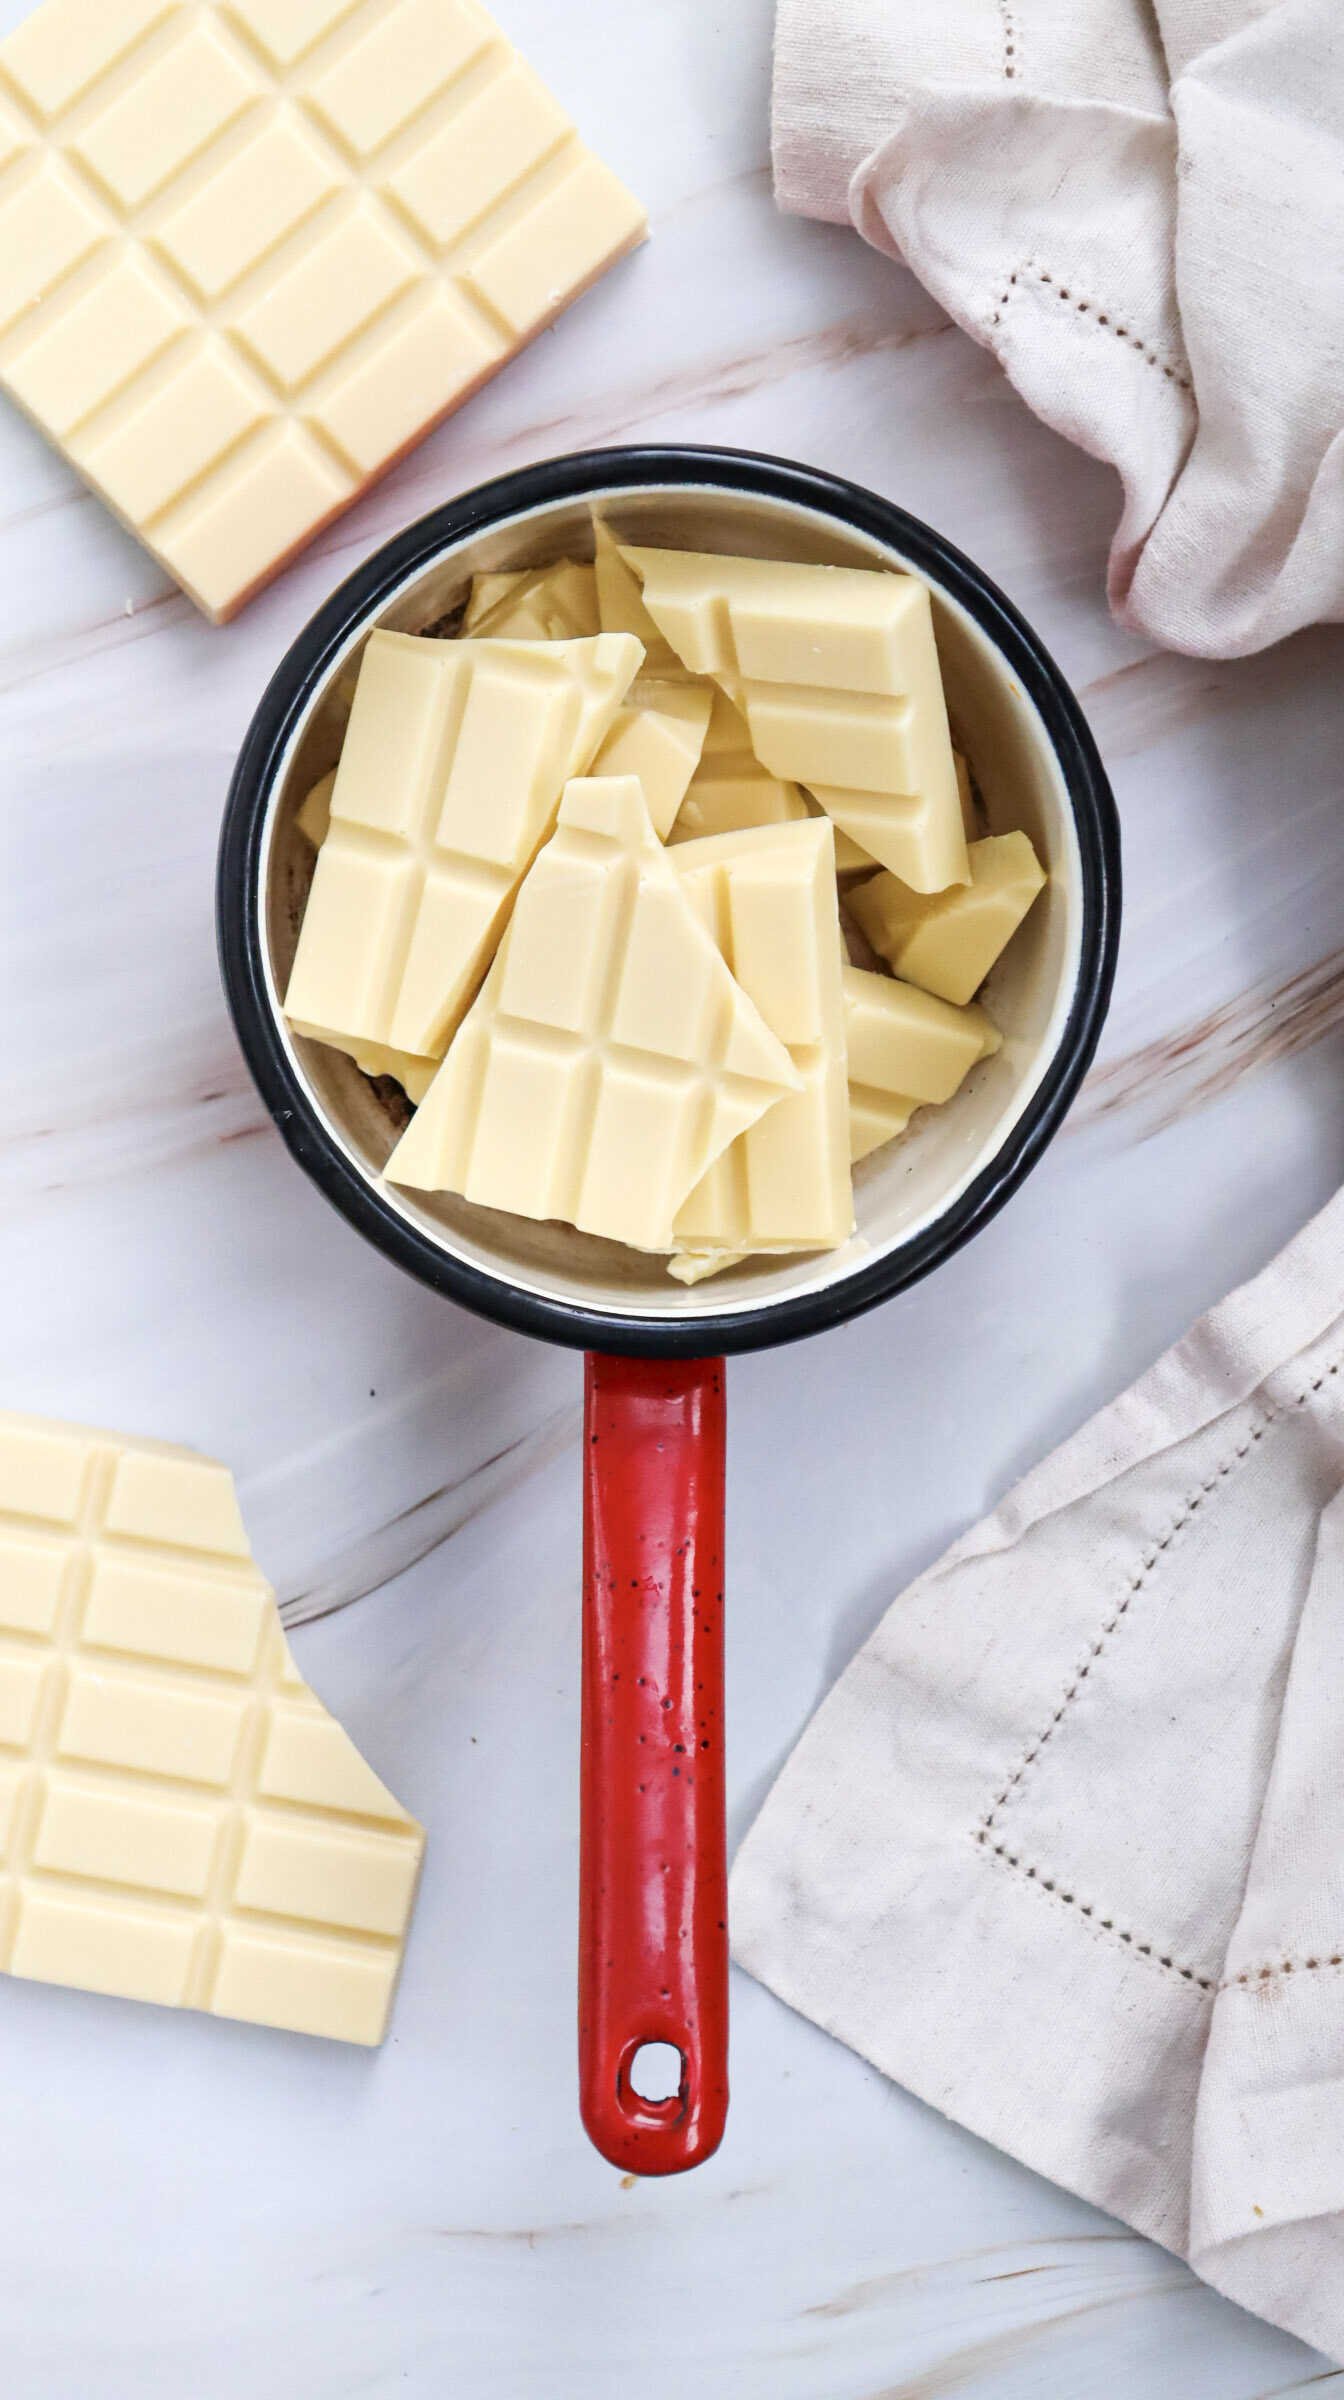
6. Melt the White Chocolate
Place the remaining white chocolate in a microwave-safe bowl. Heat in 30-second intervals, stirring between each round until smooth and fully melted.
Be careful not to overheat, as white chocolate can burn quickly.
7. Color the Chocolate
Divide the melted chocolate into two bowls. Leave one bowl plain white, and add pink or red food coloring to the other.
Stir until you reach your desired shade—soft blush pink, bold red, or anything in between works beautifully for Valentine’s Day.
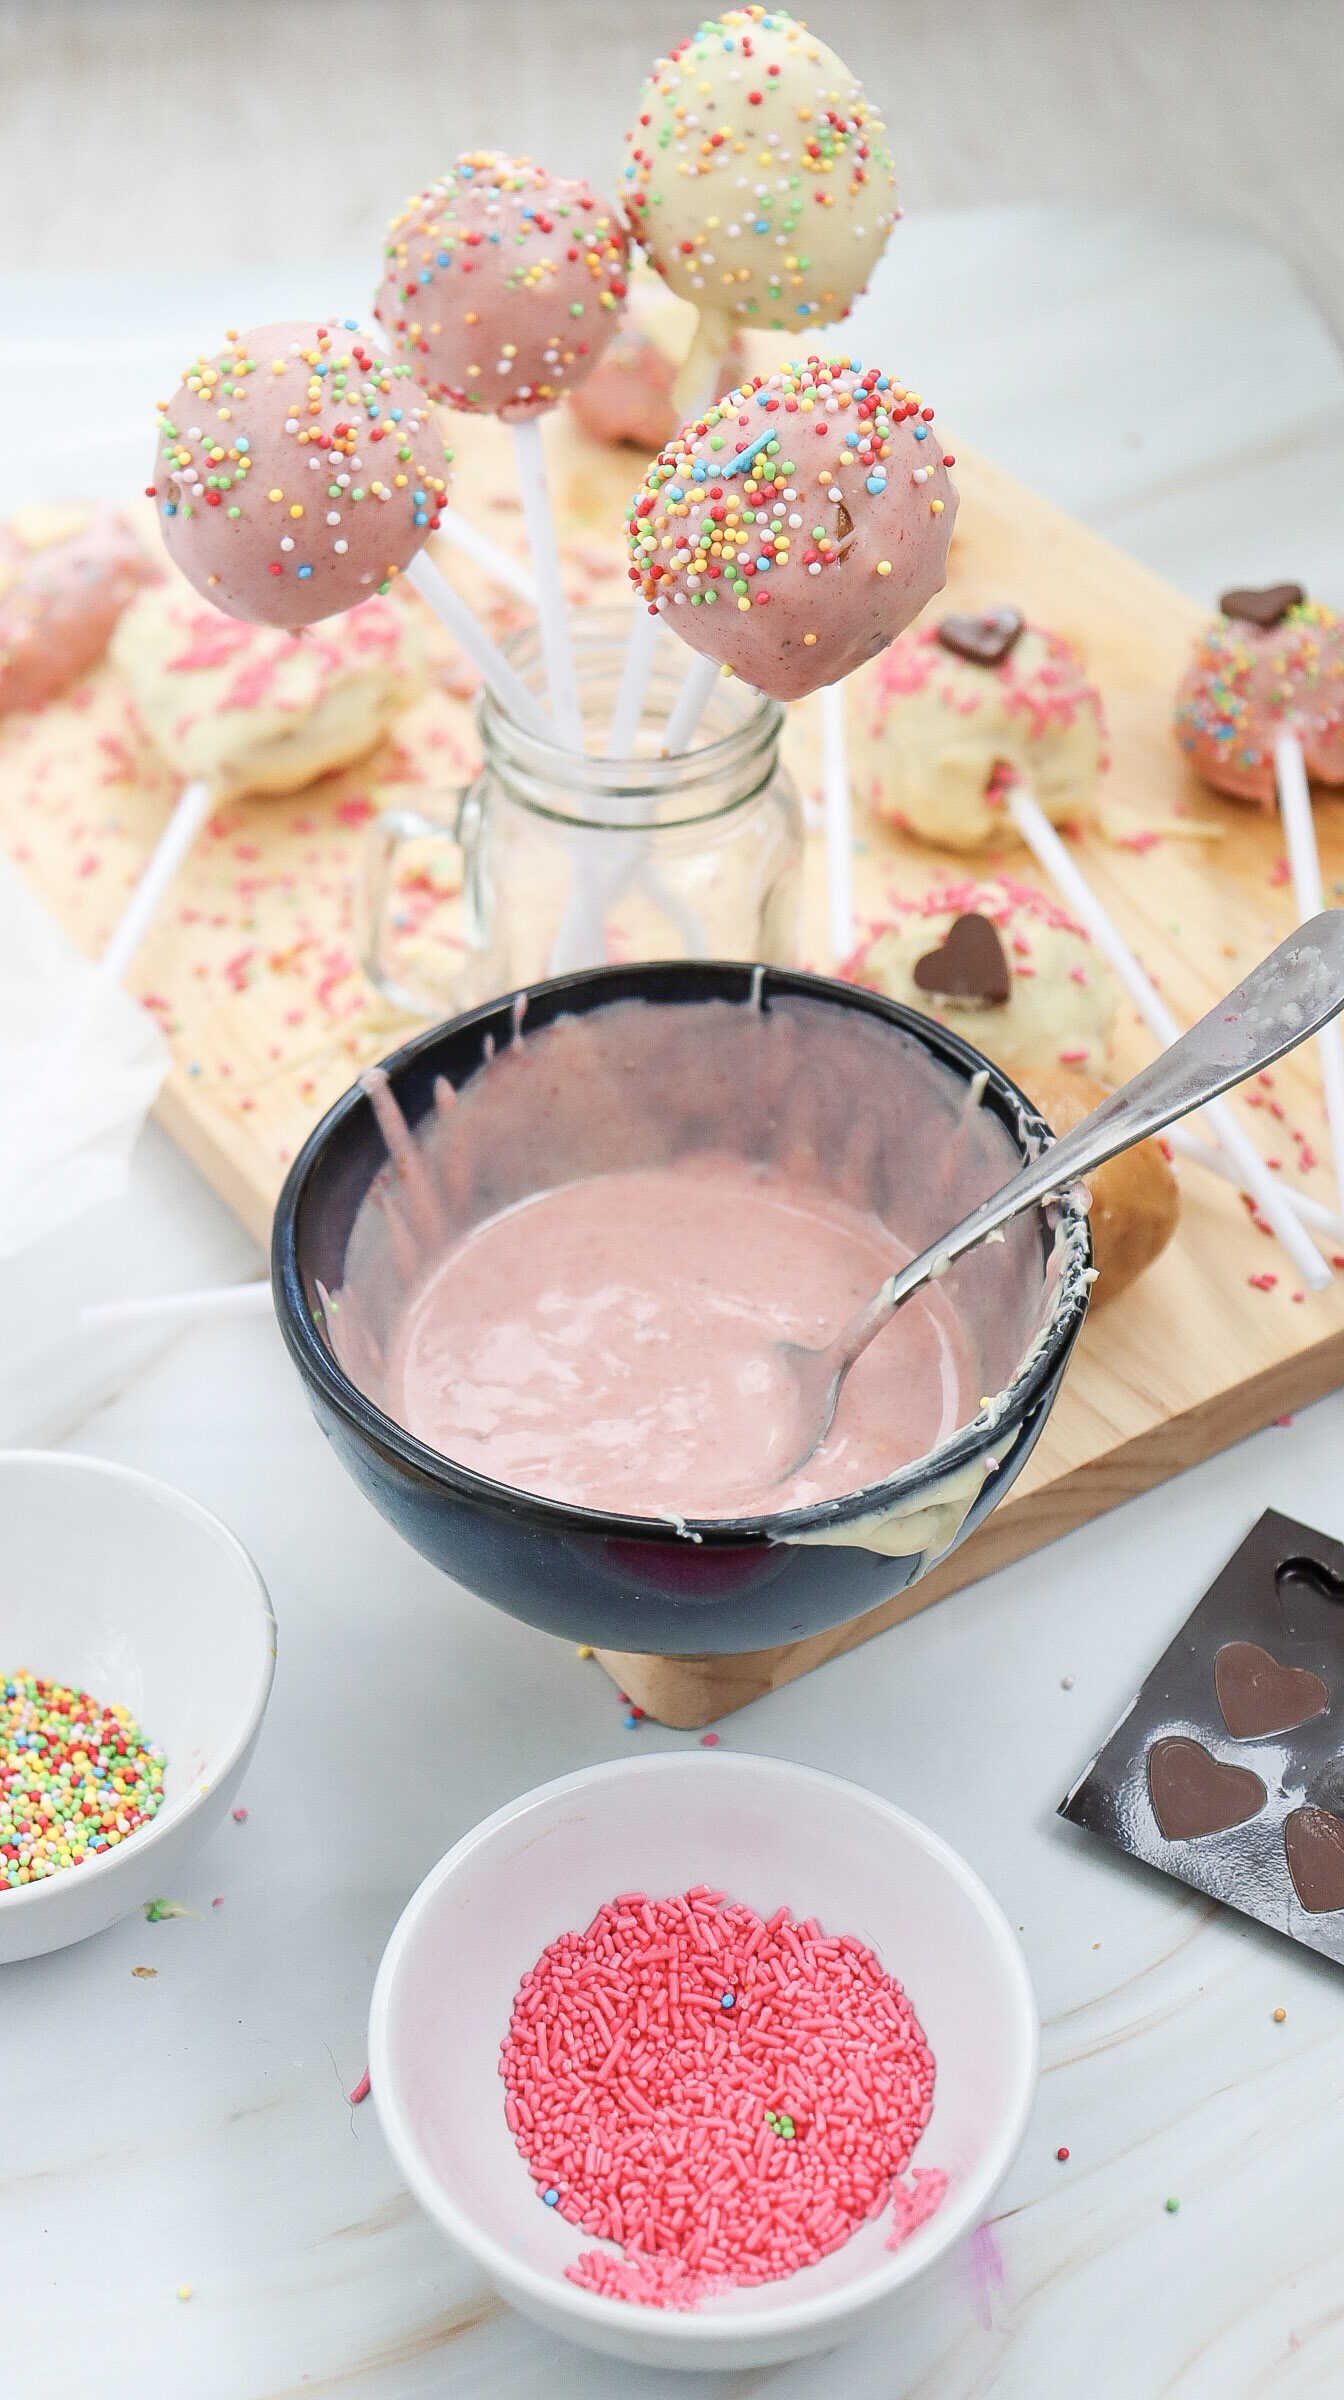
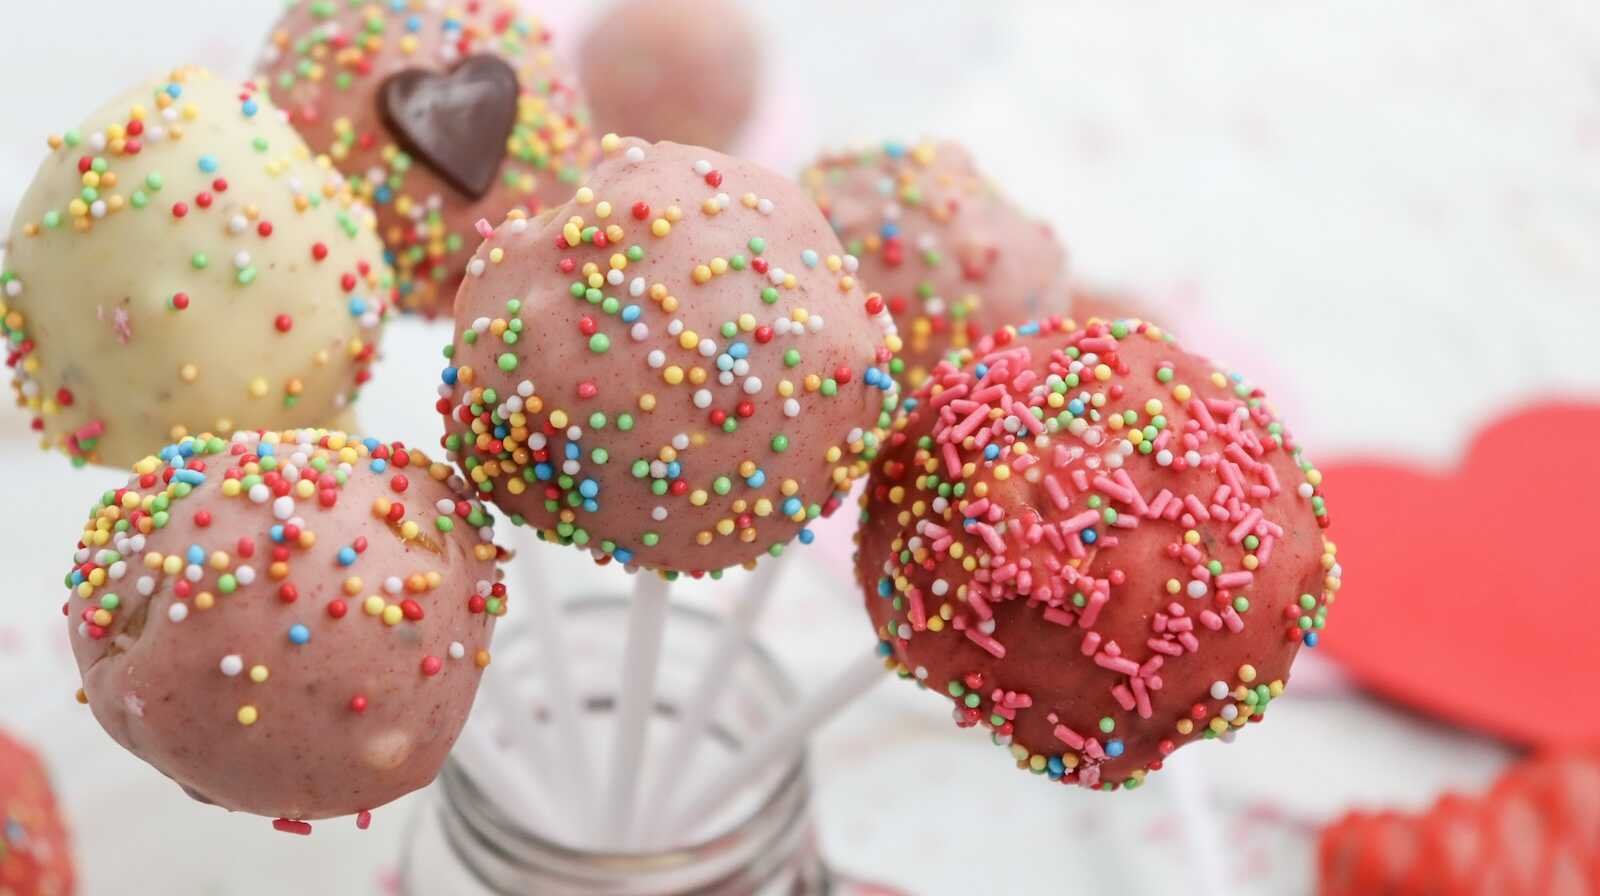
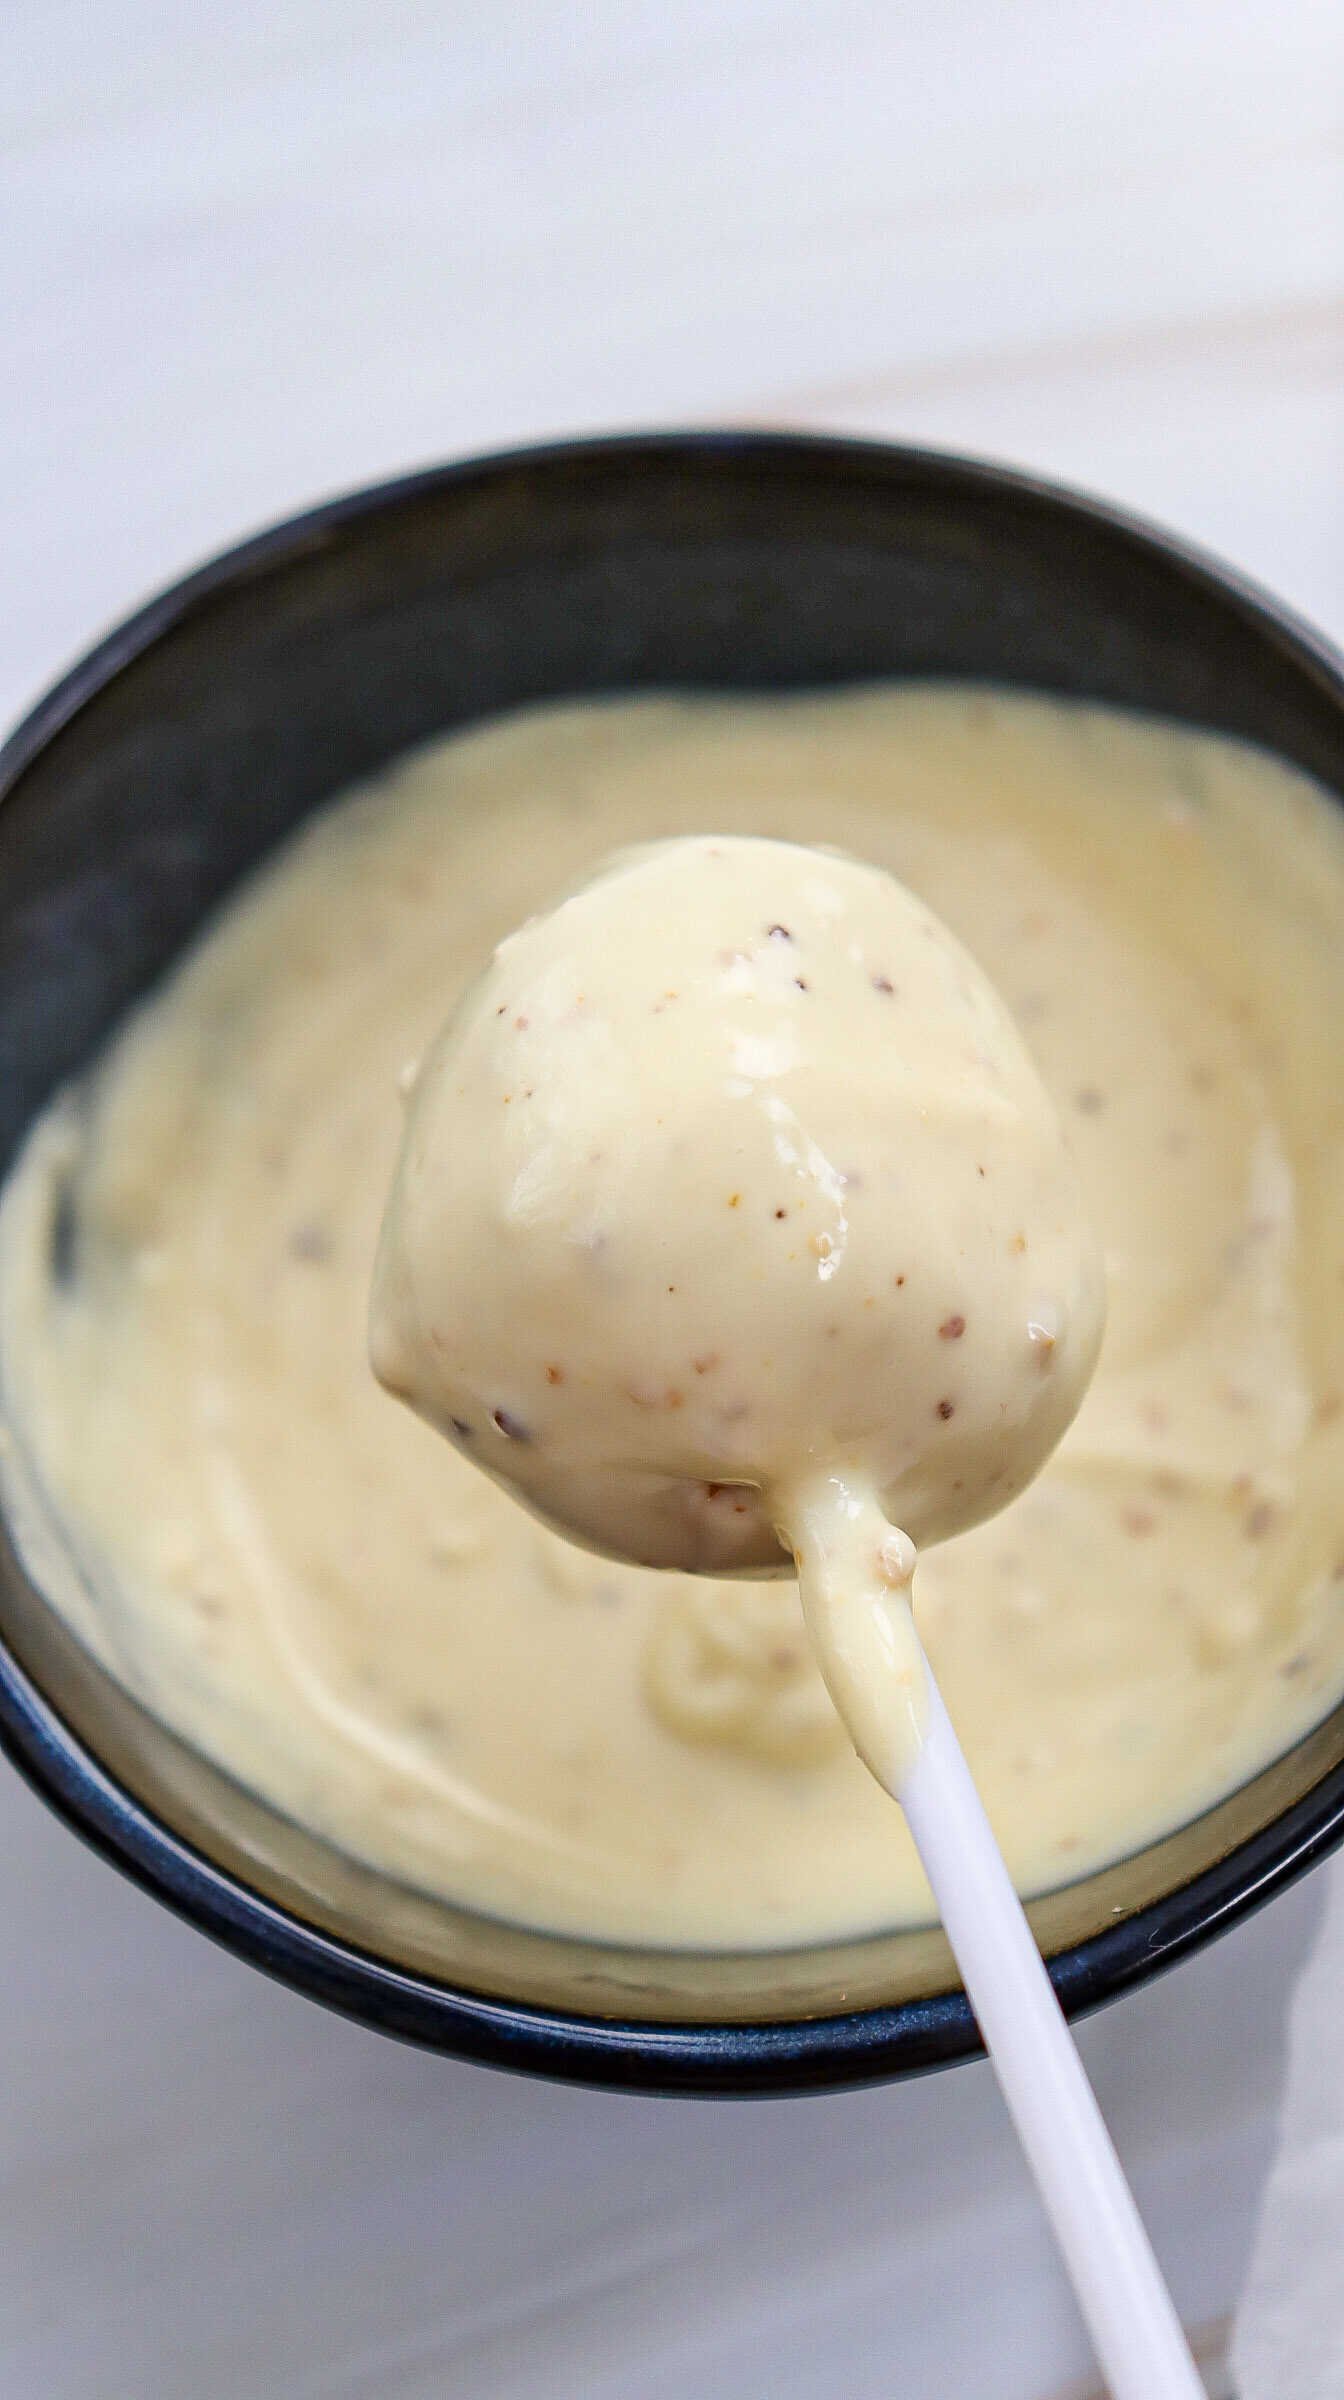
8. Dip the Cake Pops
Dip each cake pop into the melted chocolate, making sure it’s fully coated. Gently tap off any excess coating by lightly tapping the stick on the edge of the bowl.
Alternate between white and pink chocolate for a pretty mix of colors.
9. Let Them Set
Place the dipped cake pops back onto your parchment-lined baking sheet or into a cake pop stand. Let them set at room temperature or refrigerate for 15–30 minutes until the coating hardens completely.
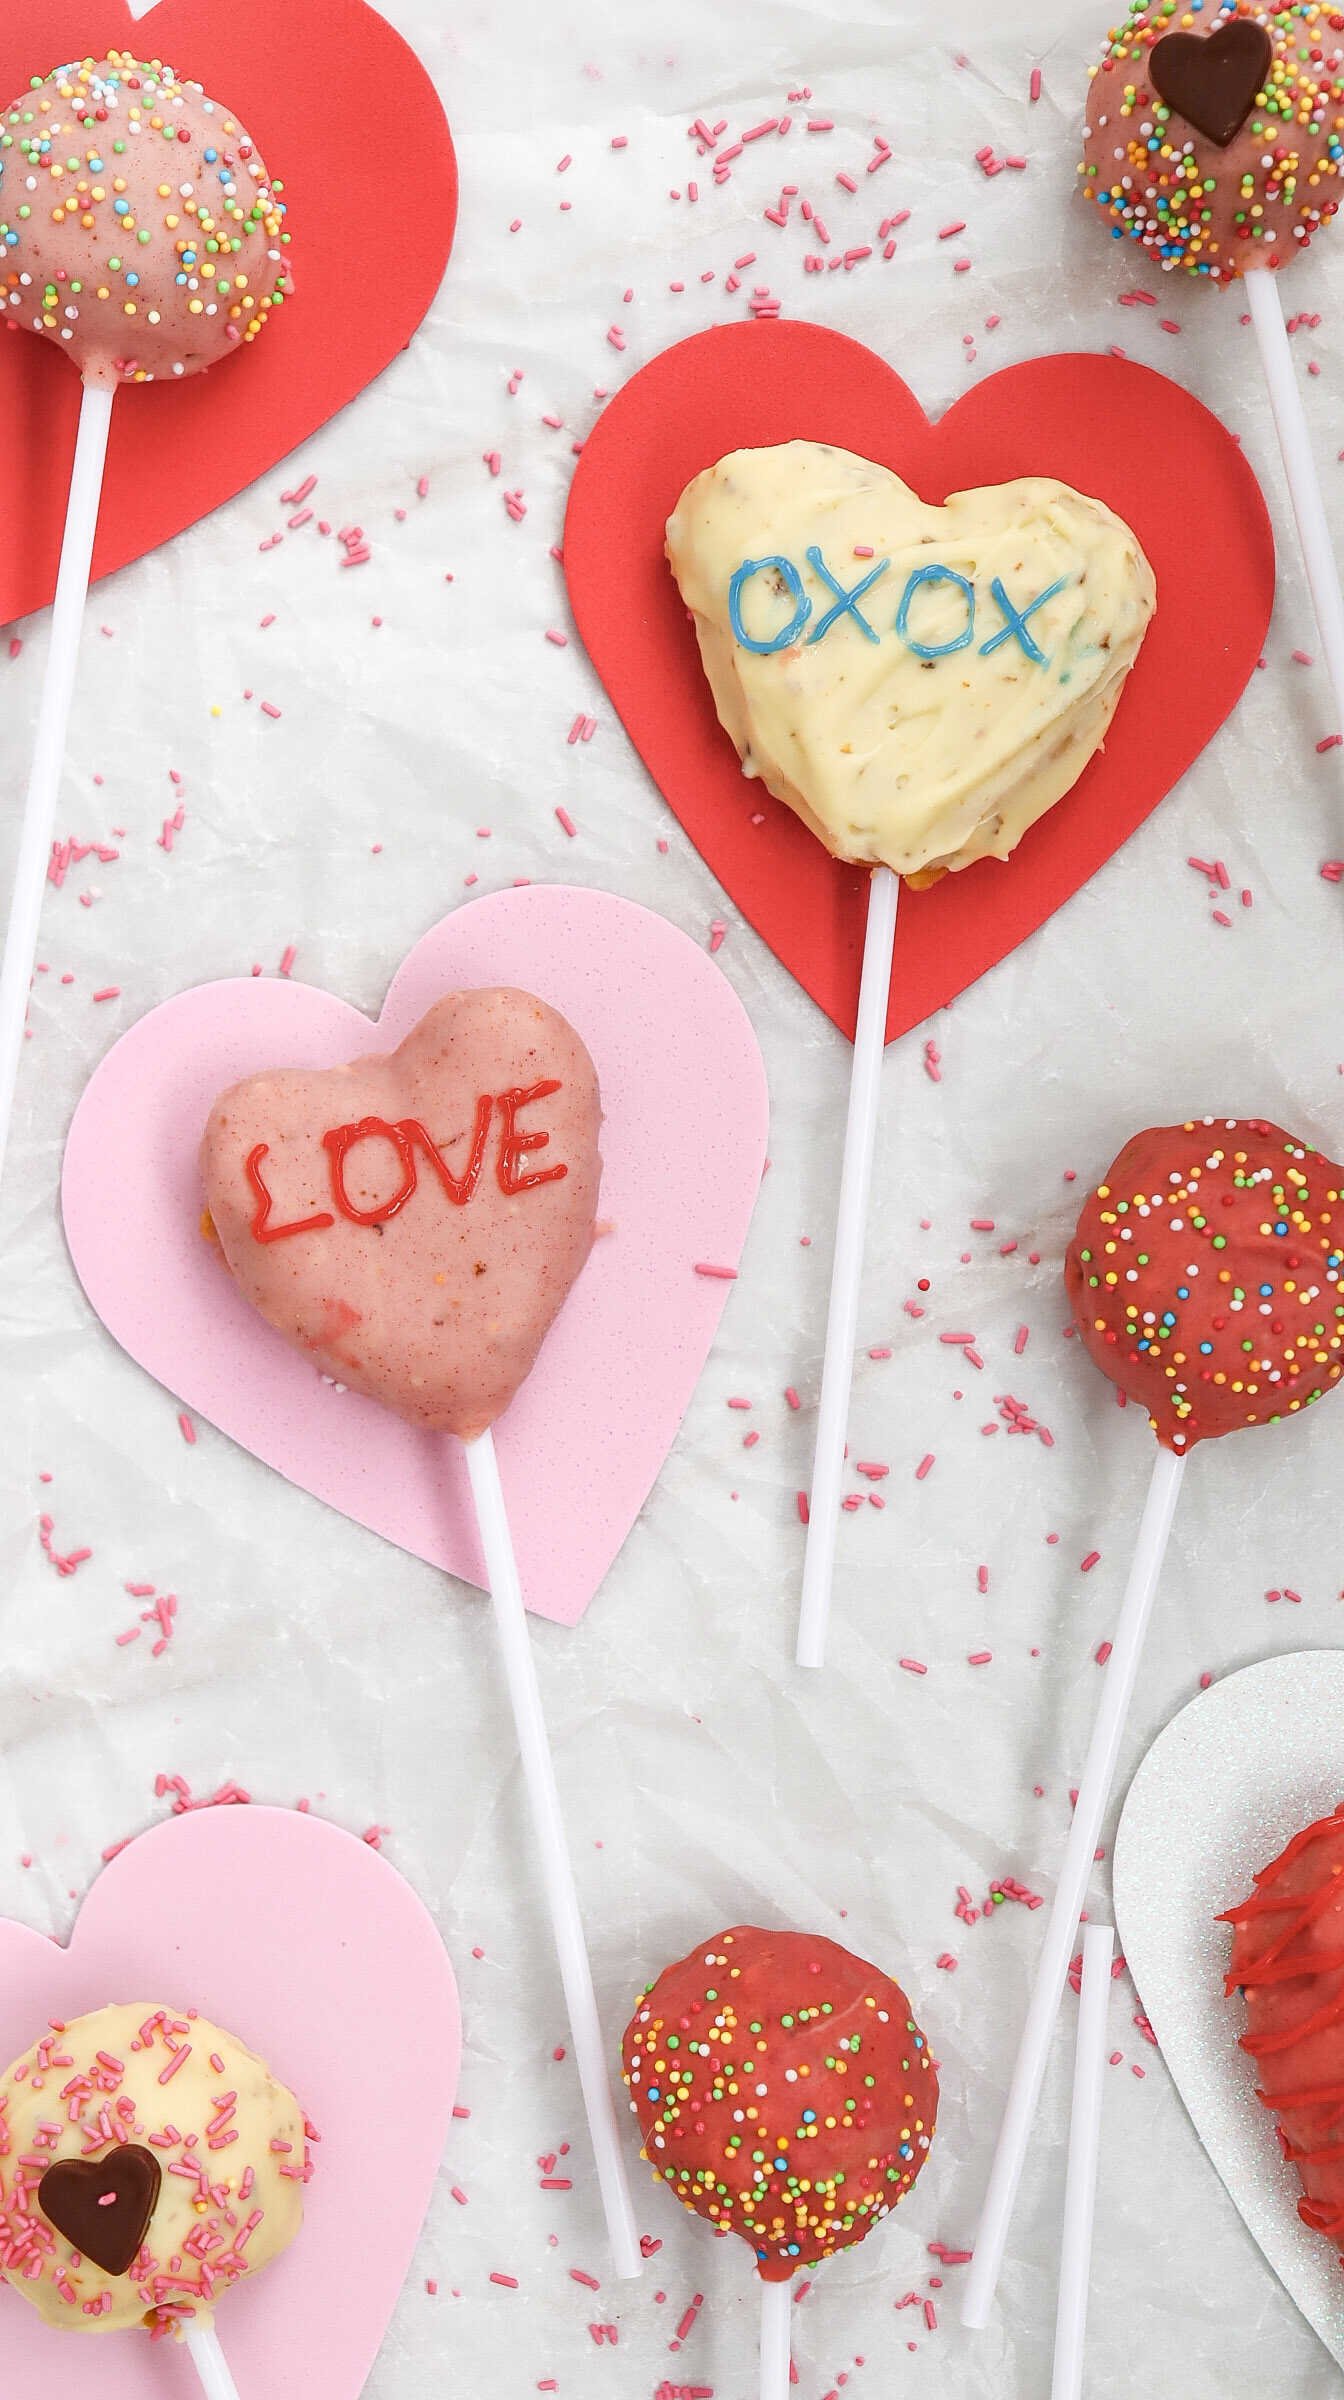
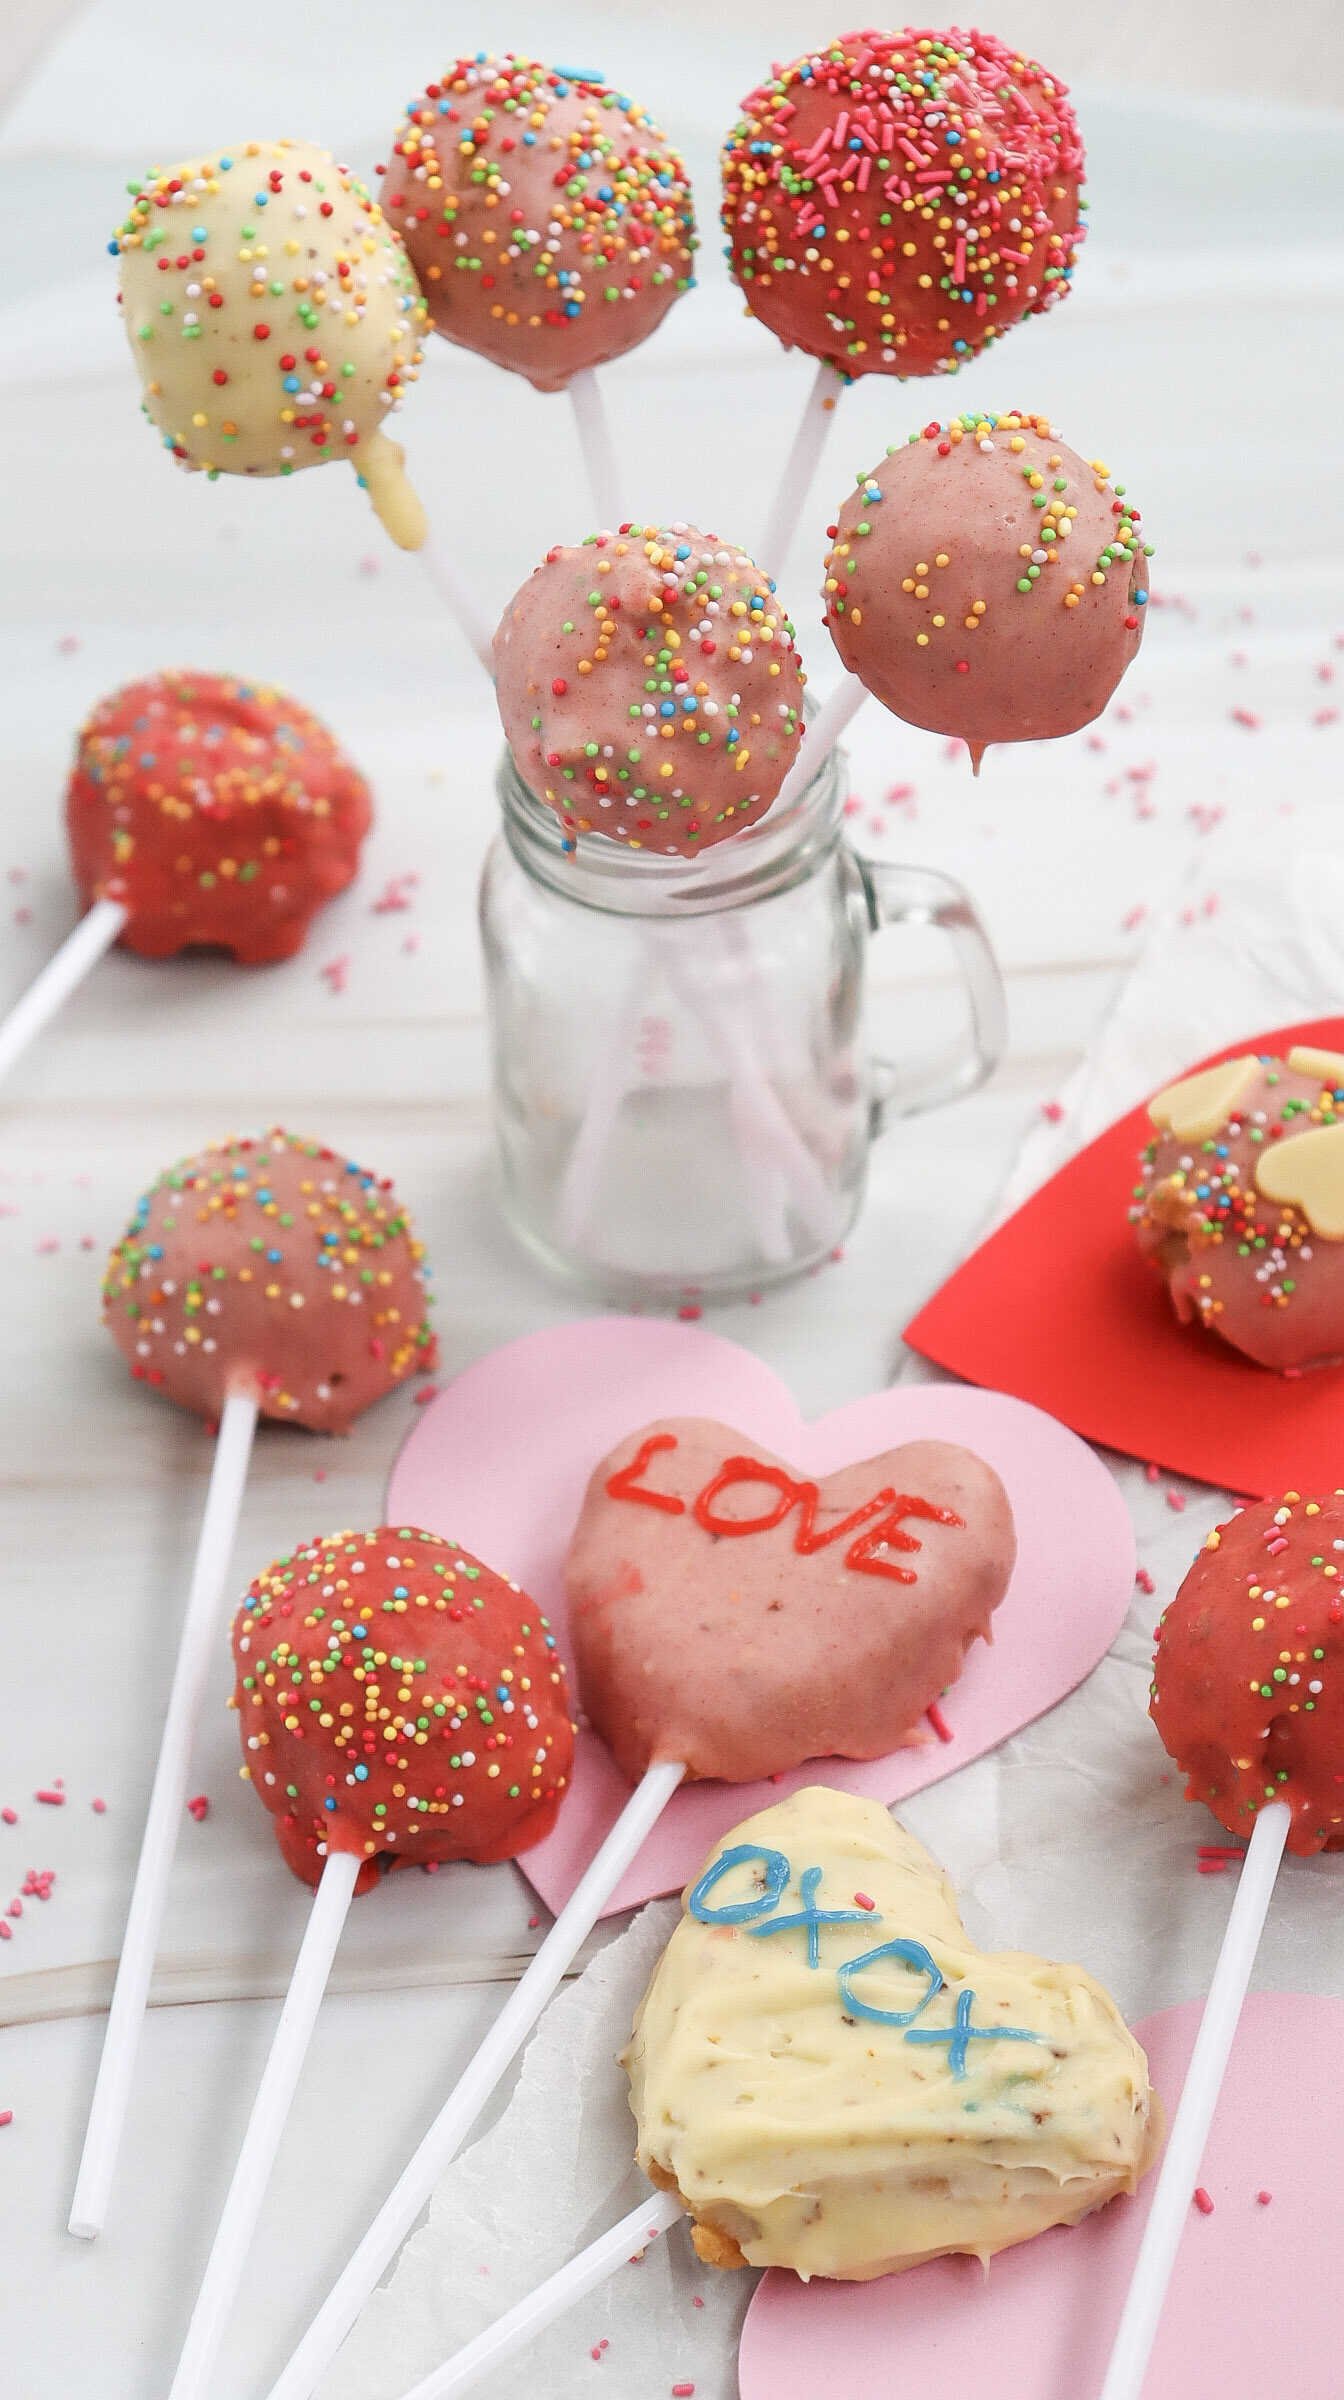
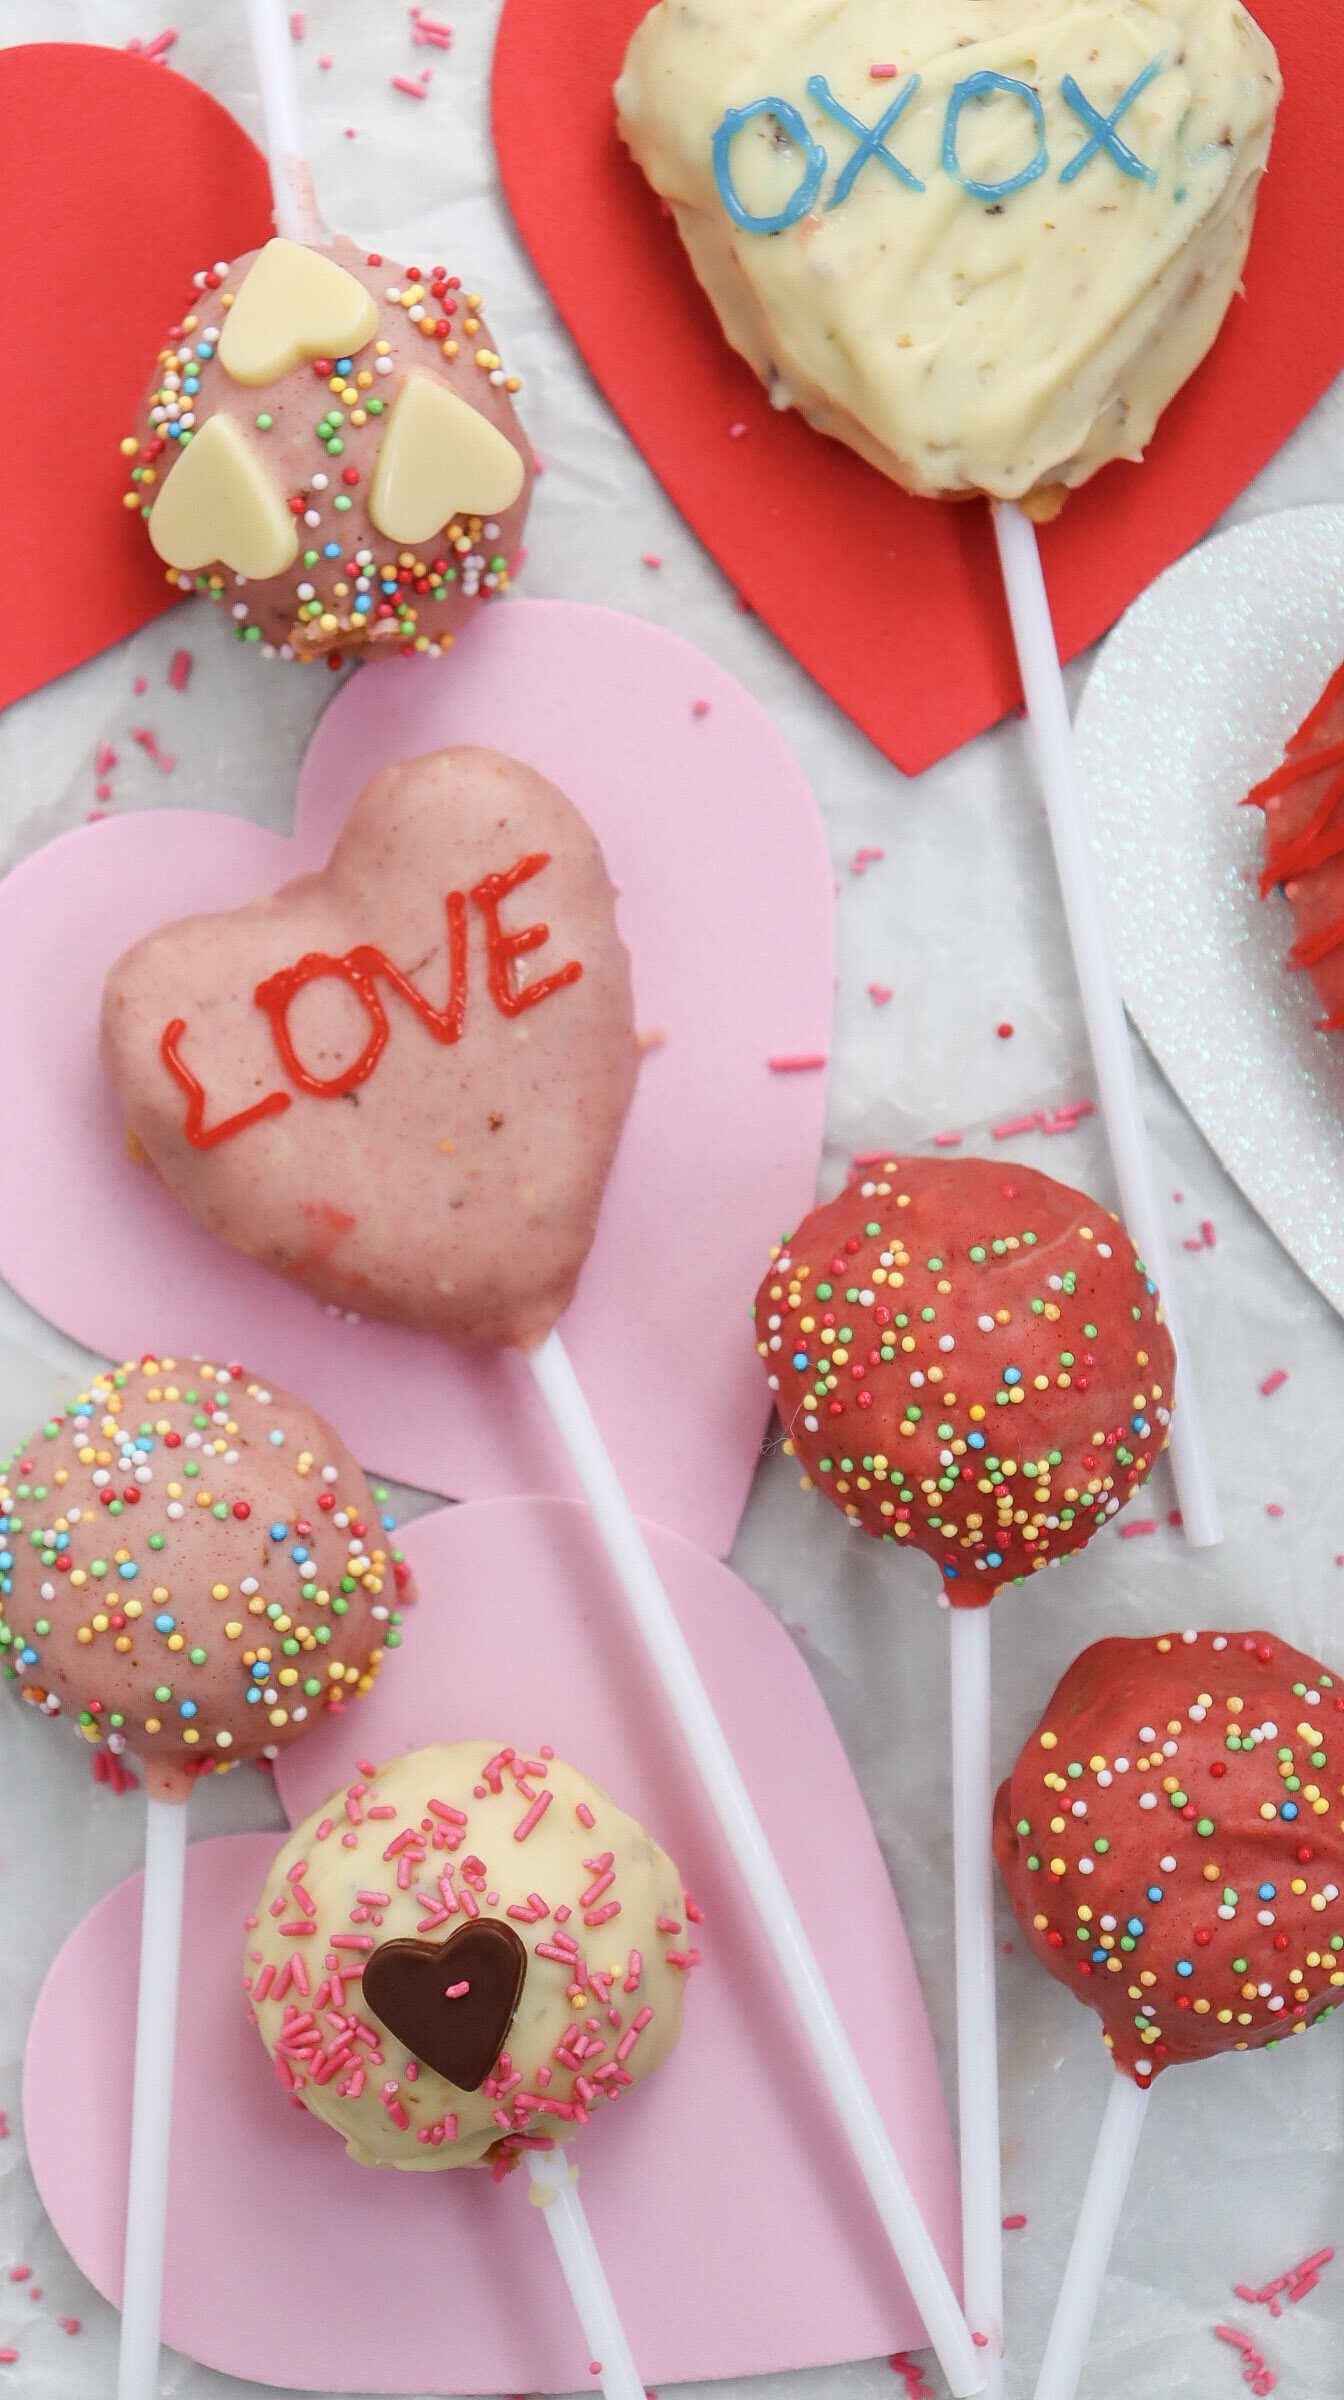
10. Decorate
Once the coating is set, it’s time to get creative.
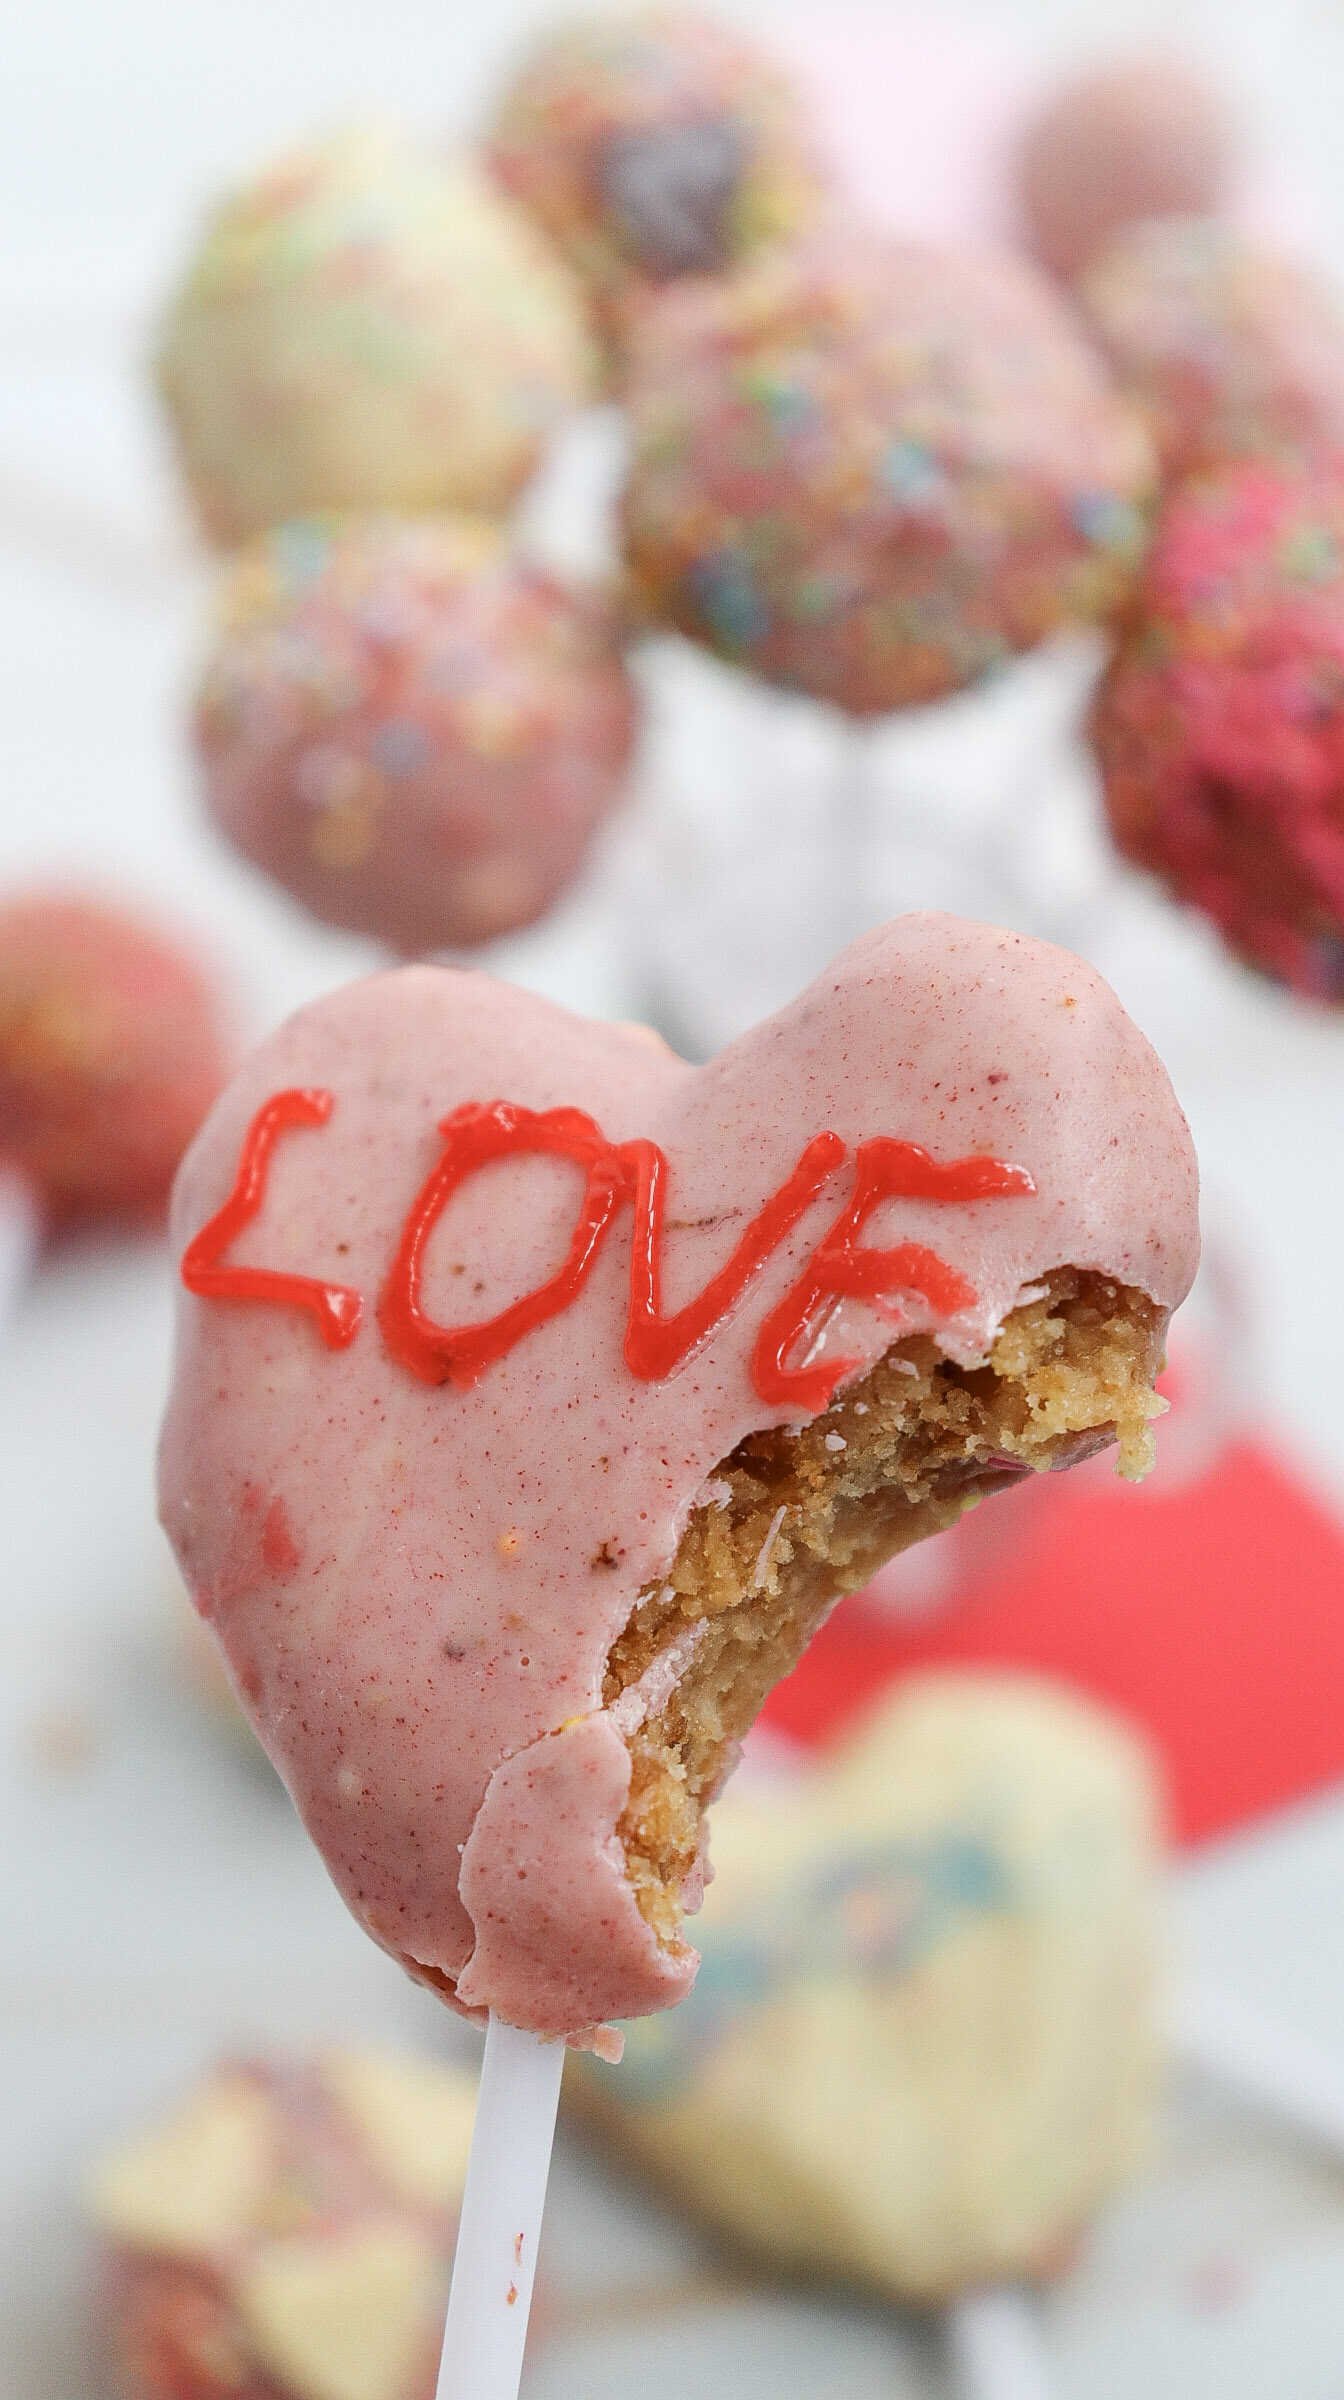
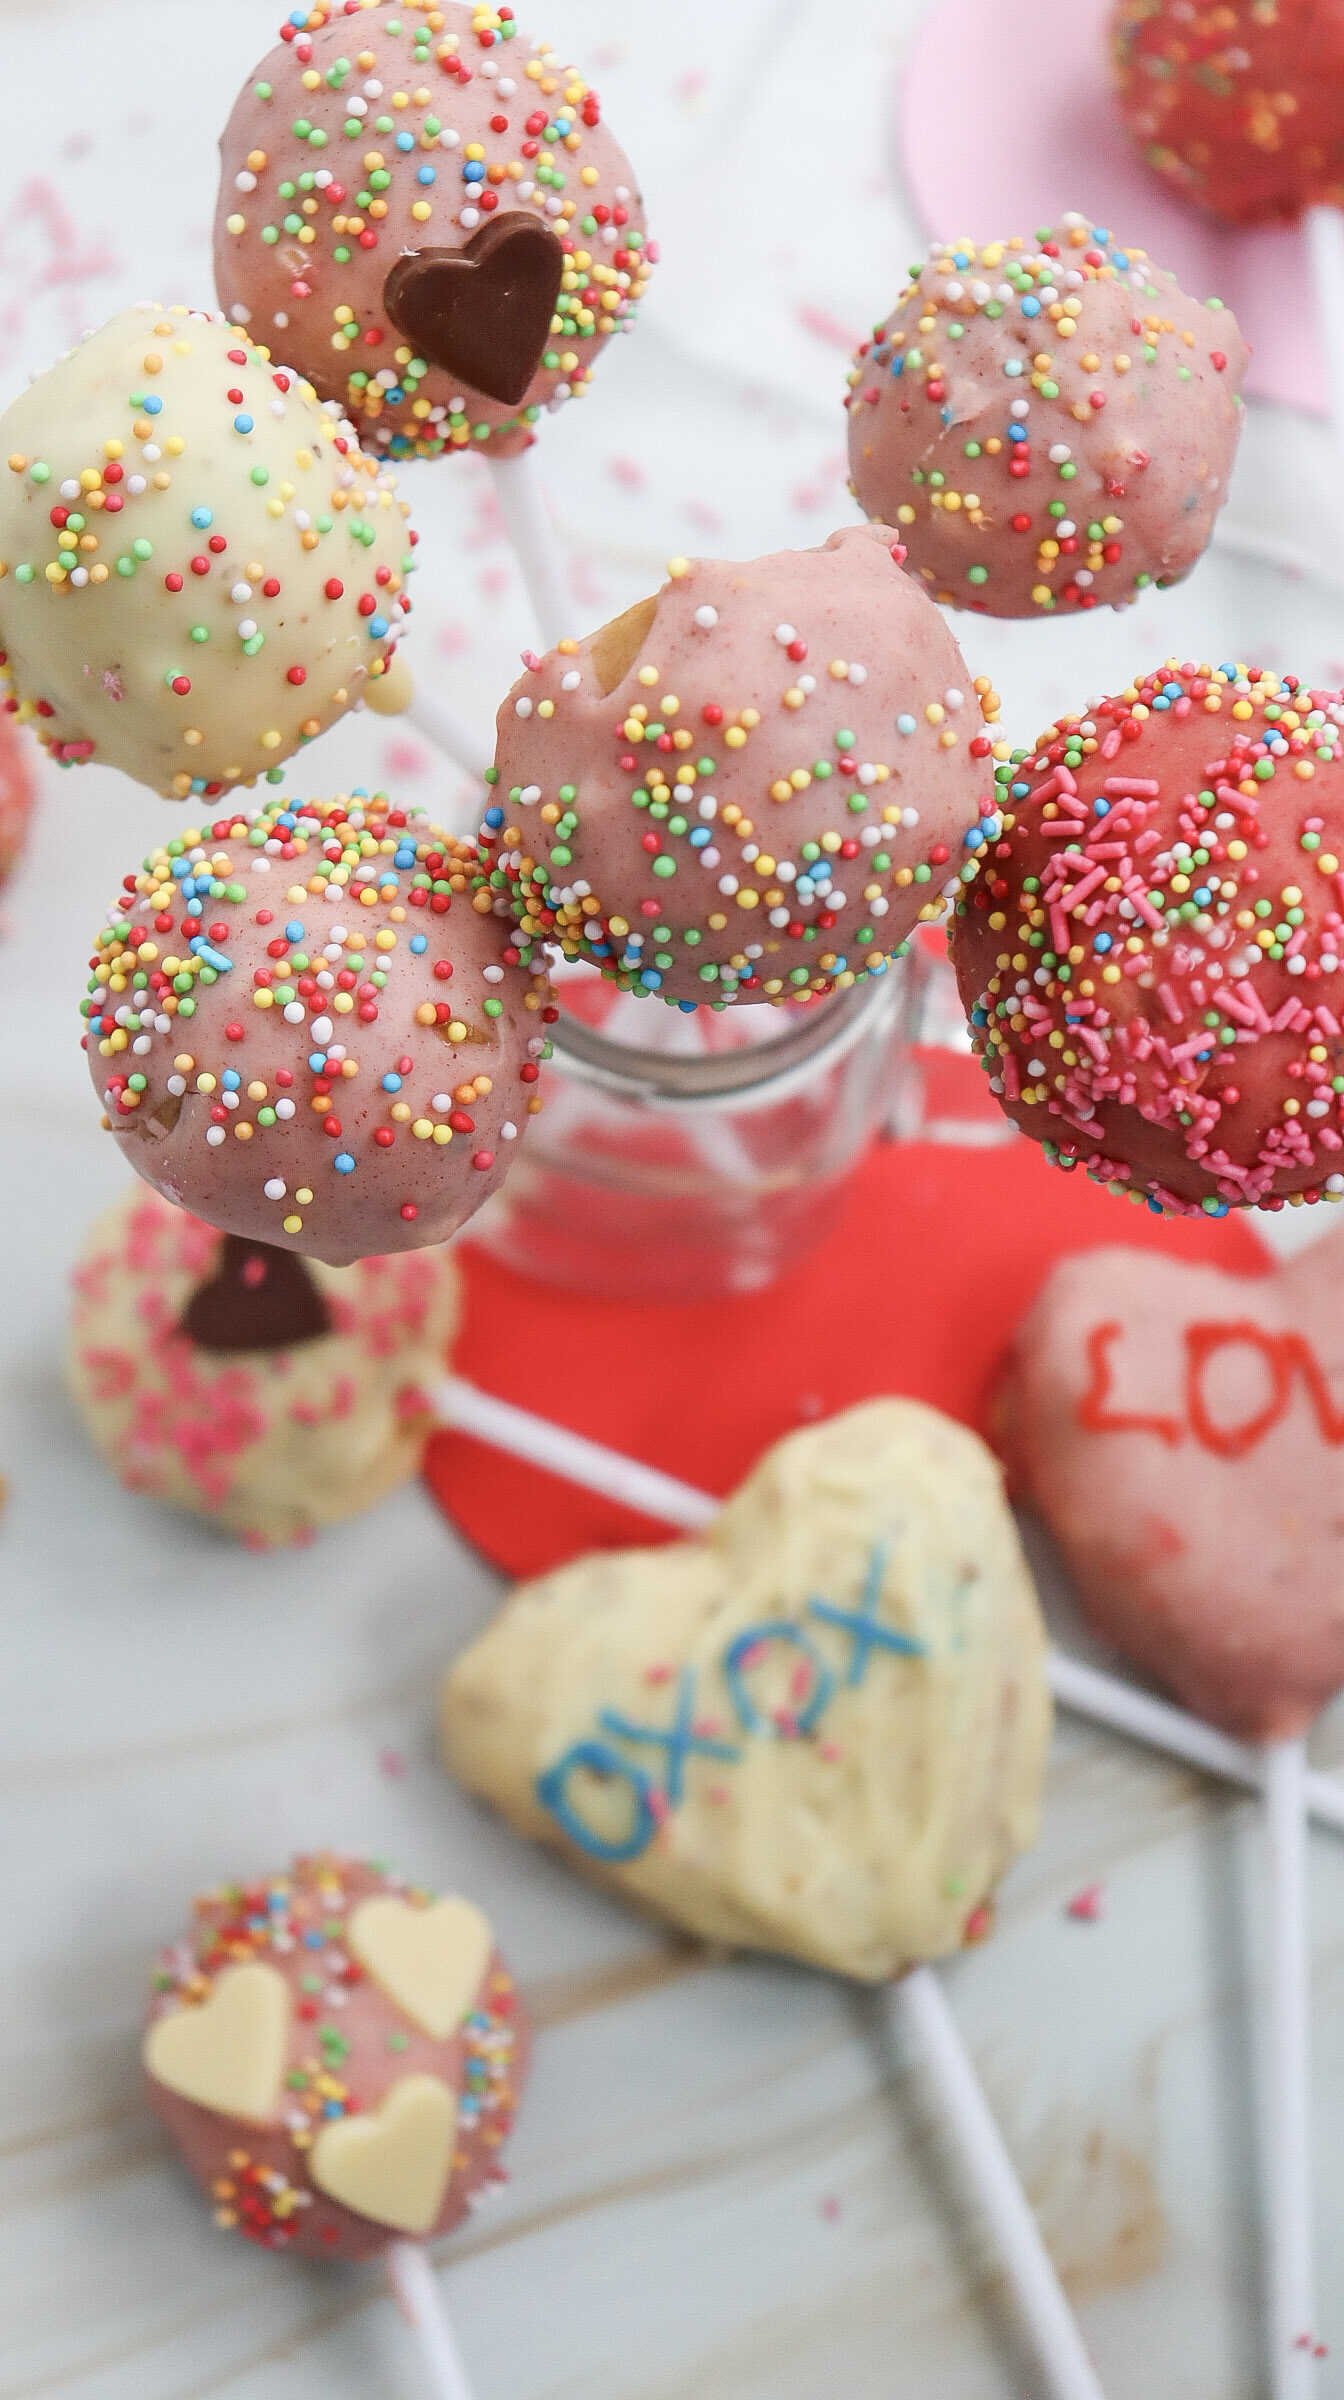
Add sprinkles, press on heart-shaped chocolates, or drizzle with contrasting chocolate. Use writing icing to add sweet messages like “LOVE,” “XOXO,” or initials for a personalized touch.
This is the step where you can really make each cake pop unique.
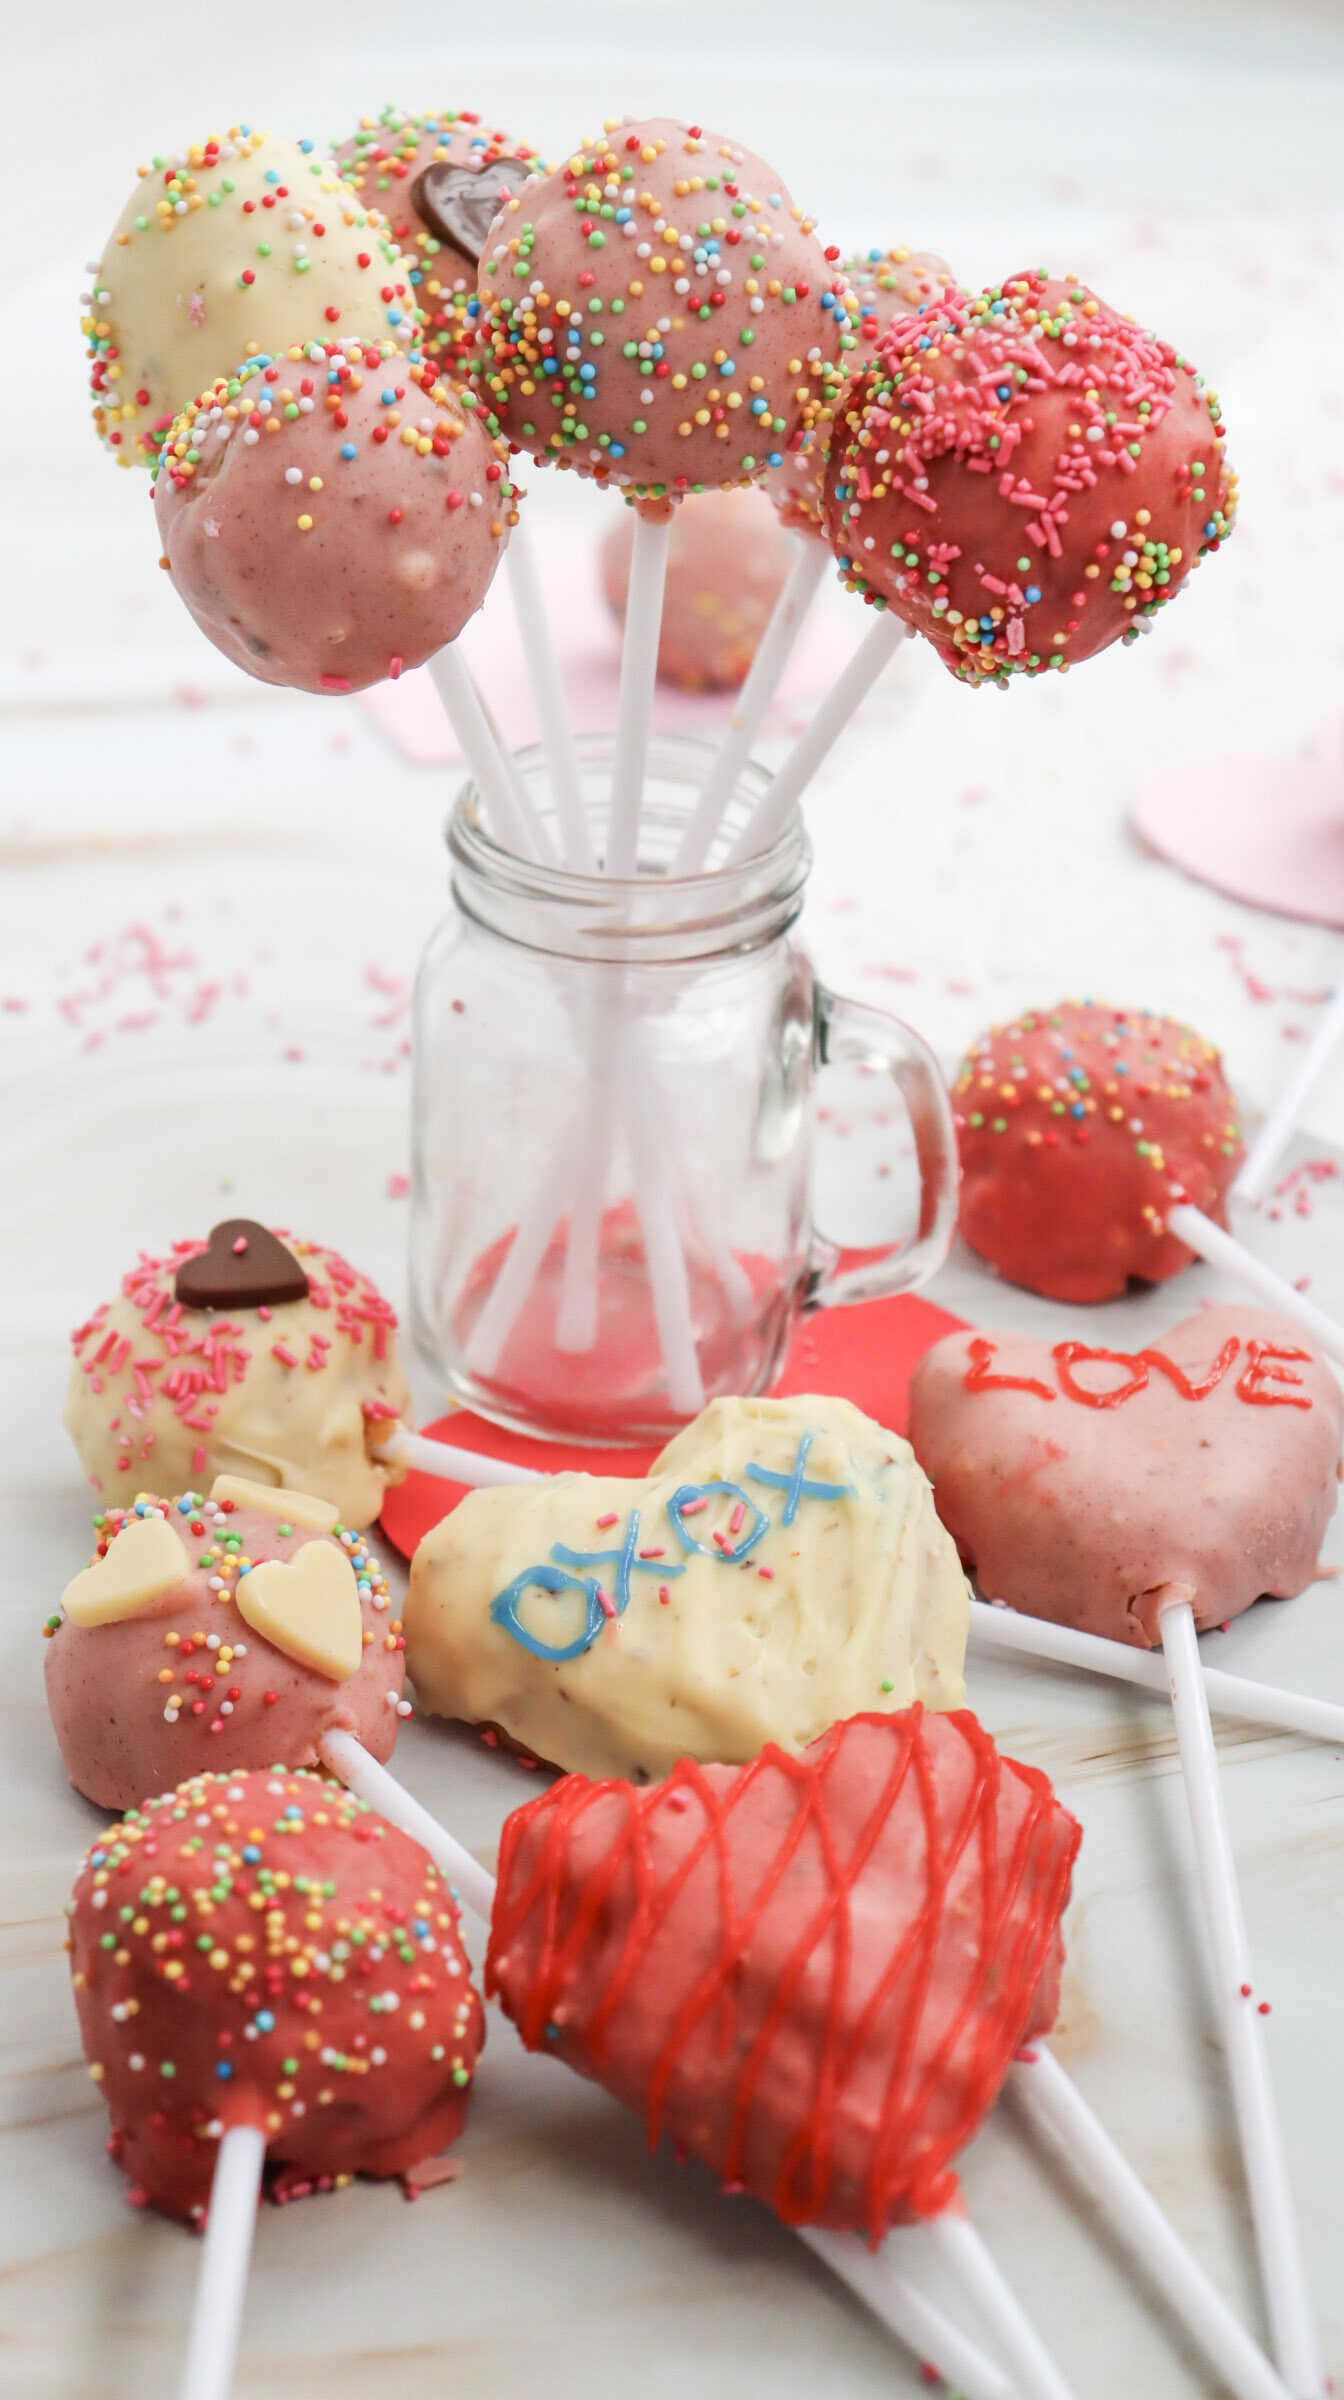
11. Serve & Enjoy
Your Valentine’s Cake Pops are ready to enjoy! Serve them on a platter, wrap them in clear treat bags for gifts, or display them in a decorative stand for parties.
They’re guaranteed to be a hit with kids and adults alike.

Tips for Perfect Cake Pops
- Don’t skip chilling: Firm cake balls are much easier to dip and won’t fall apart.
- Use the right consistency chocolate: If your chocolate is too thick, add a tiny bit of oil or shortening to thin it out.
- Avoid cracks: Let cake pops sit at room temperature briefly before dipping if they’re very cold.
- Work in batches: Keep some cake balls chilled while you dip others to maintain their shape.
Flavor Variations
One of the best things about cake pops is how customizable they are. Here are a few fun ideas:
- Chocolate + strawberry frosting for a chocolate-covered strawberry vibe
- Red velvet + cream cheese frosting for a classic Valentine flavor
- Vanilla + funfetti frosting for a colorful, playful twist
- Lemon cake + vanilla frosting for a fresh, tangy option

How to Store Cake Pops
Store finished cake pops in an airtight container at room temperature for up to 3 days or in the refrigerator for up to a week.
If refrigerated, let them come to room temperature before serving for the best texture.
You can also freeze undecorated cake balls for up to 2 months—just thaw, dip, and decorate when ready.

Perfect for Gifting
Valentine’s Cake Pops make thoughtful, homemade gifts. Wrap each one in a clear bag, tie with a ribbon, and add a handwritten tag for a personal touch.
They’re great for:
- Classroom Valentine exchanges
- Party favors
- Romantic surprises
- Galentine’s Day gatherings

Final Thoughts
Valentine’s Cake Pops are the kind of treat that instantly brings joy. They’re cute, delicious, and endlessly customizable, making them perfect for celebrating love in all its forms.
Whether you’re baking with your kids, surprising a friend, or creating something sweet for yourself, these cake pops are guaranteed to brighten the day.
Once you make them, don’t be surprised if they become a new Valentine’s tradition in your home.