Heart Q-Tip Art: Easy & Fun Kids Craft
If you’re looking for an easy, budget-friendly craft that doubles as a sweet keepsake, Heart Q-Tip Art is one of those magical projects that checks every box. It’s simple enough for toddlers, creative enough for older kids, and honestly… even adults will love the relaxing, almost therapeutic process of dot painting.
This craft is especially perfect for Valentine’s Day, Mother’s Day, classroom art projects, or just a cozy afternoon at home. With just a few supplies and a little imagination, you’ll create a vibrant, heart-centered masterpiece that’s Pinterest-worthy and fridge-display ready.

Why Kids Love This Heart Q-Tip Art Craft
Before we dive into the how-to, here’s why this craft is such a favorite for families:
- Low prep, low mess – No complicated setup required
- Budget-friendly – Uses supplies you likely already have
- Great for all ages – Easily adaptable for toddlers to teens
- Encourages creativity – No two hearts turn out the same
- Builds fine motor skills – Perfect for little hands learning control
Plus, the finished result has that trendy dot art aesthetic that looks surprisingly high-end!

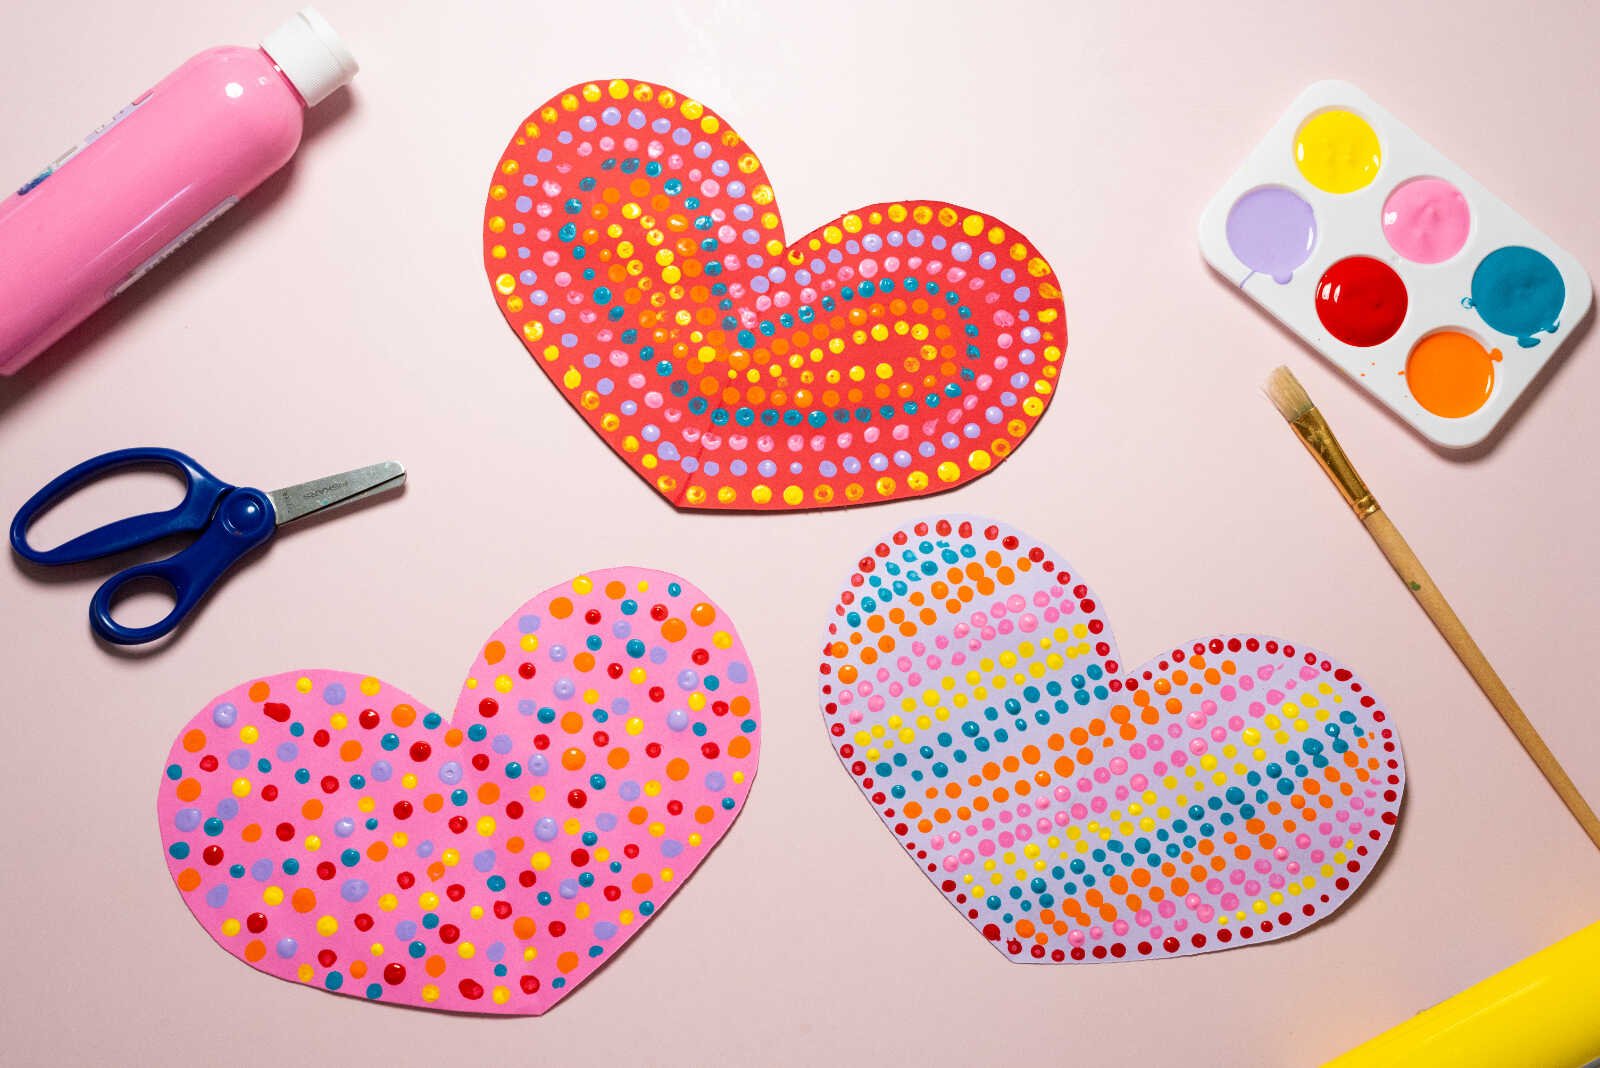
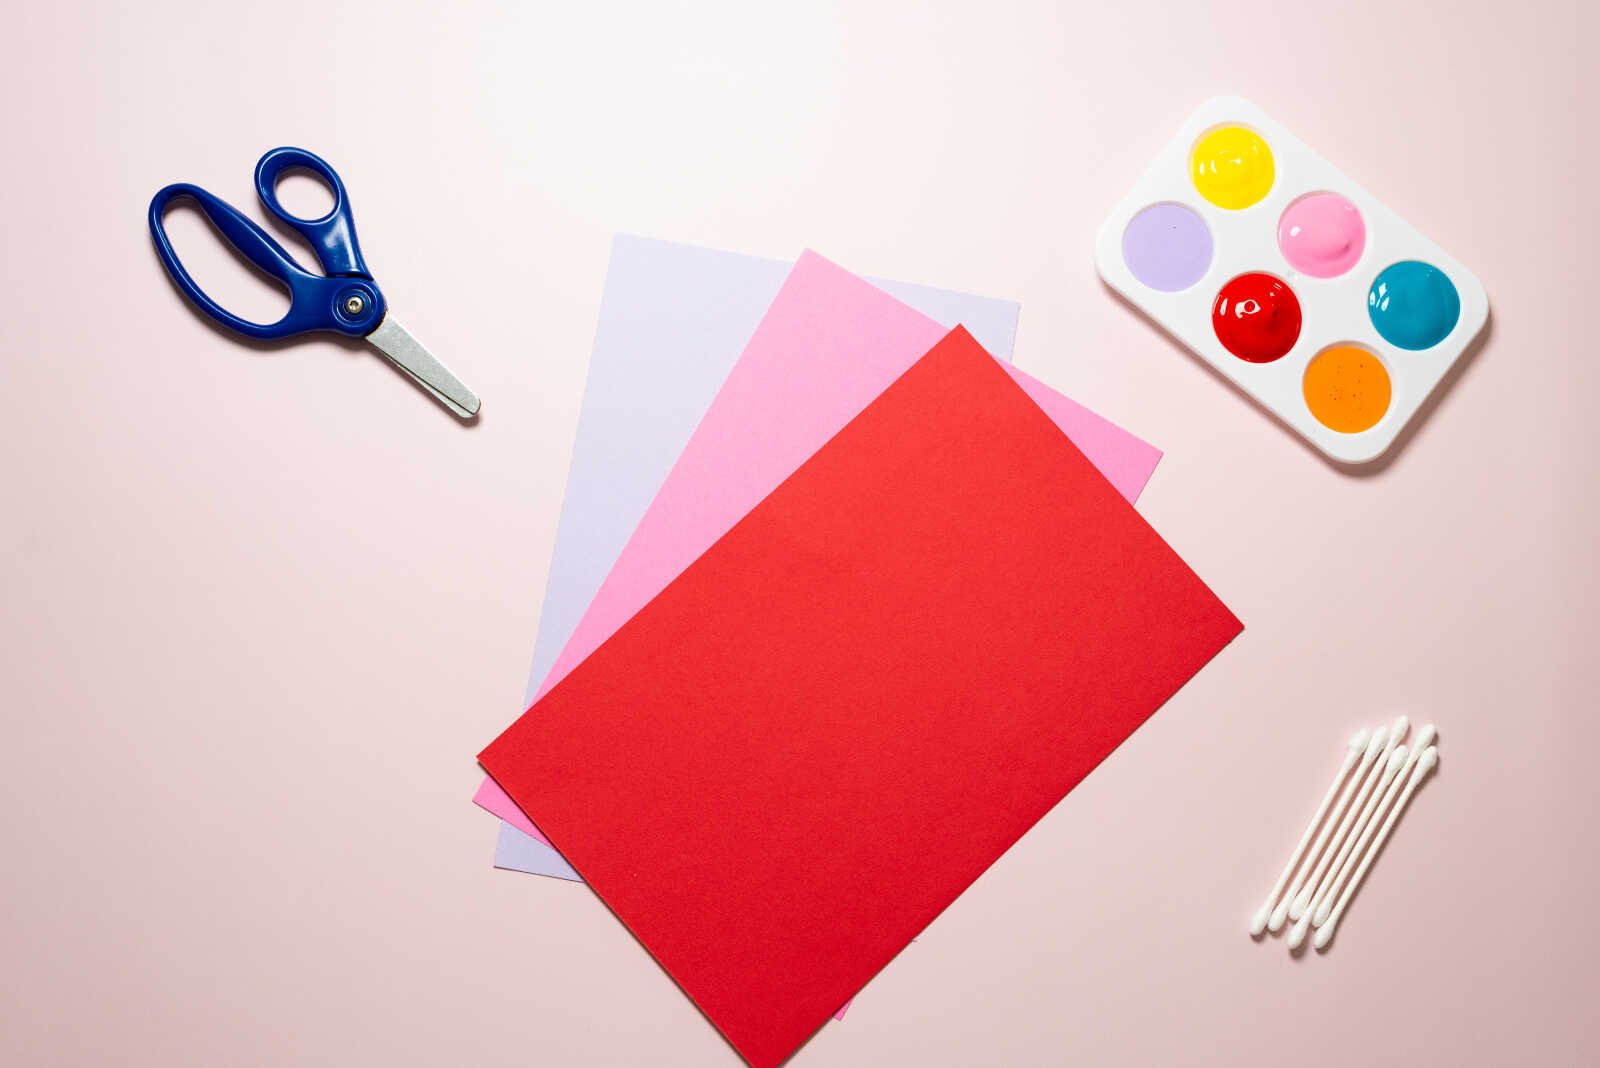
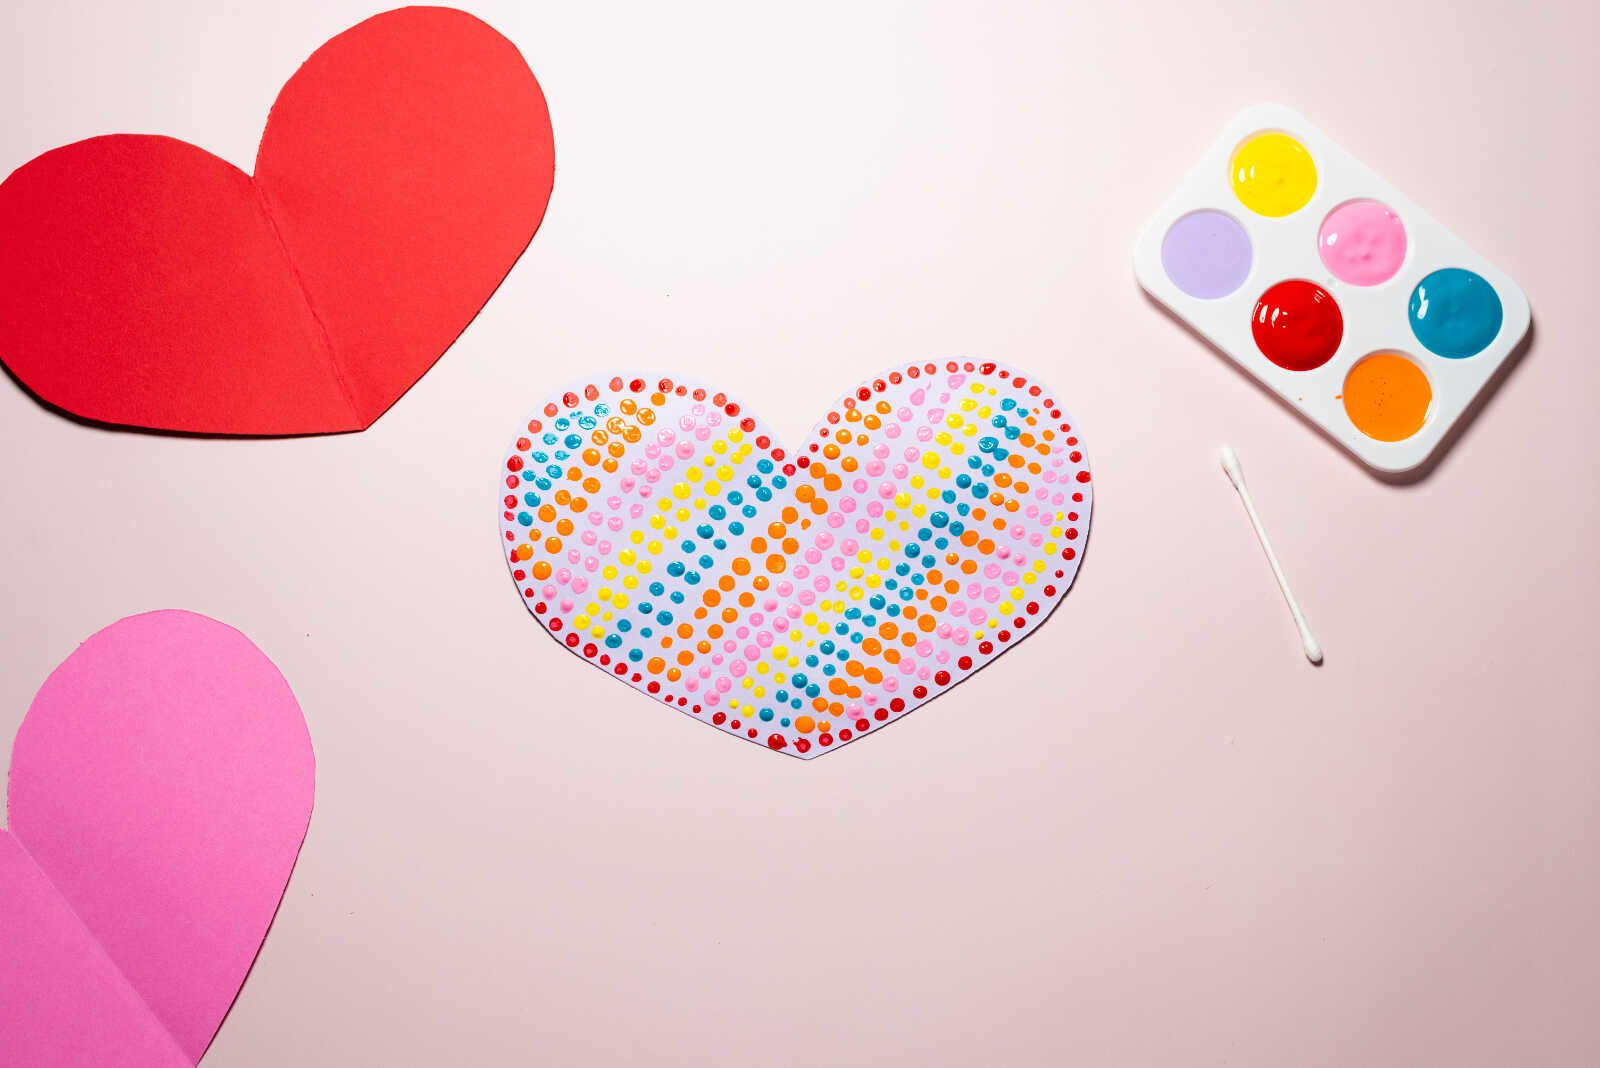
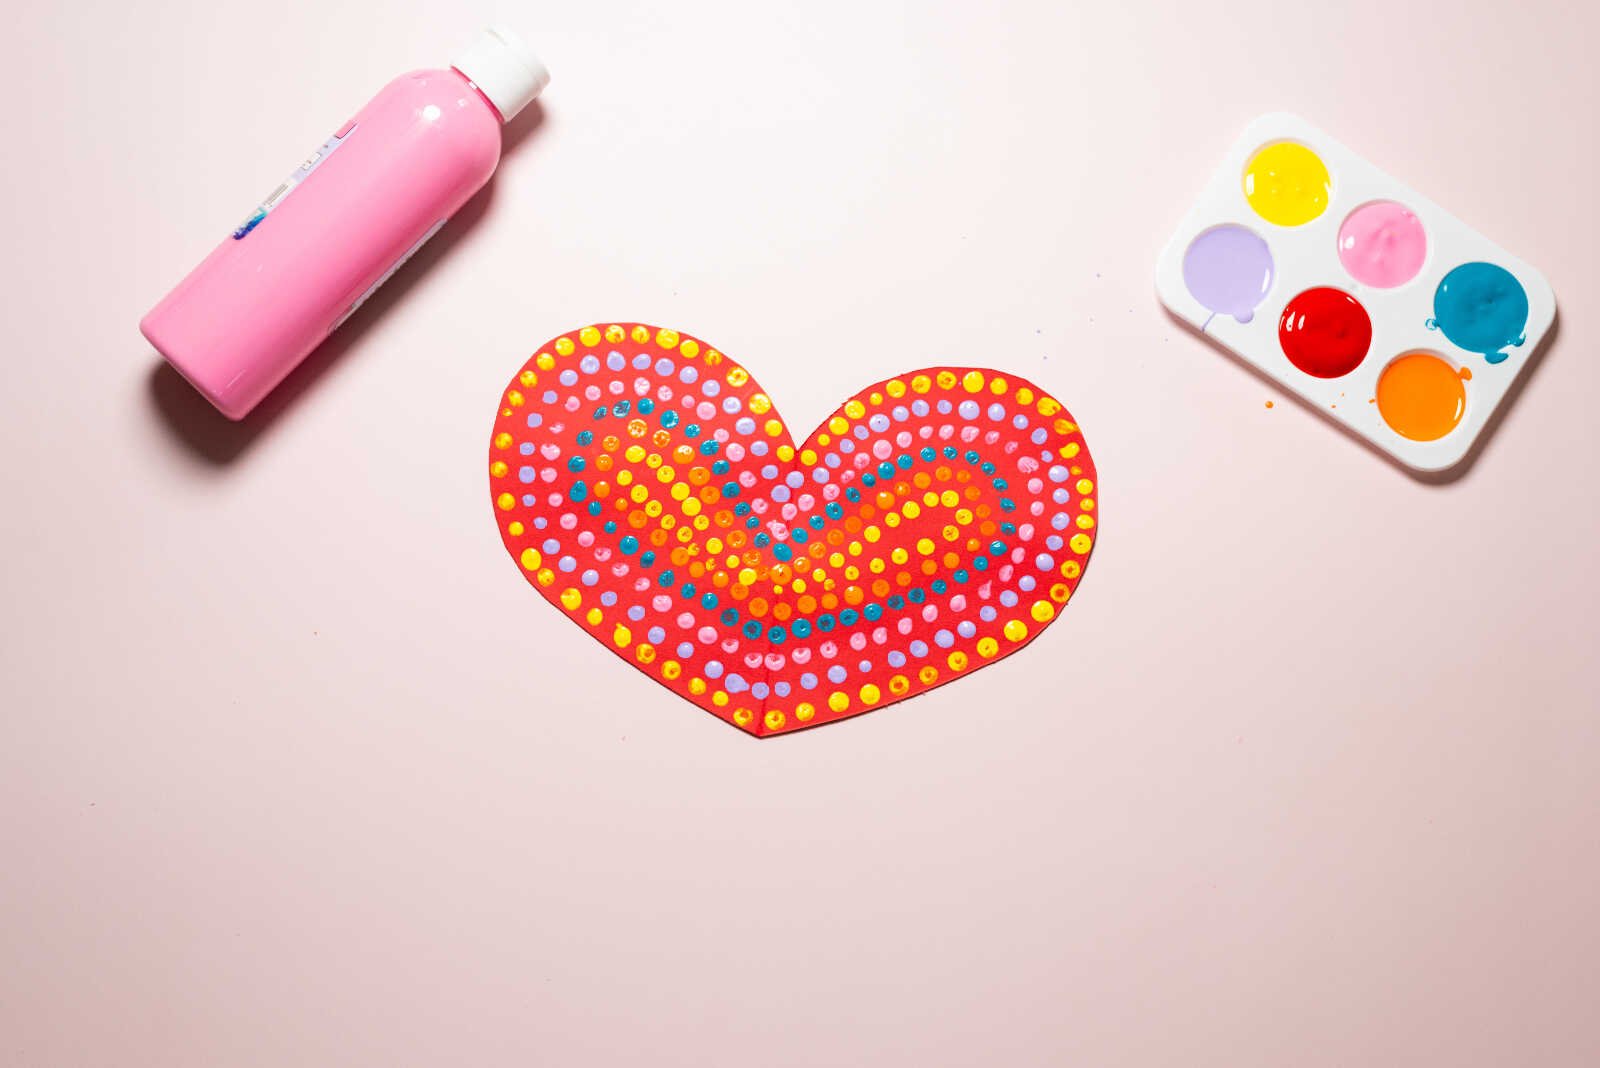
Supplies Needed
Gather your materials before you begin—this craft comes together quickly once you start.
- Q-Tips (cotton swabs)
- Paint (Suggested: Pink, Red, Purple, and White)
- Construction Paper (1 sheet in your color of choice: white, pink, purple, etc.)
- Scissors
- Paint tray or paper plate
Optional add-ons:
- Glitter paint for sparkle
- Metallic markers for outlining
- Cardstock for a sturdier final piece
Step-by-Step Instructions
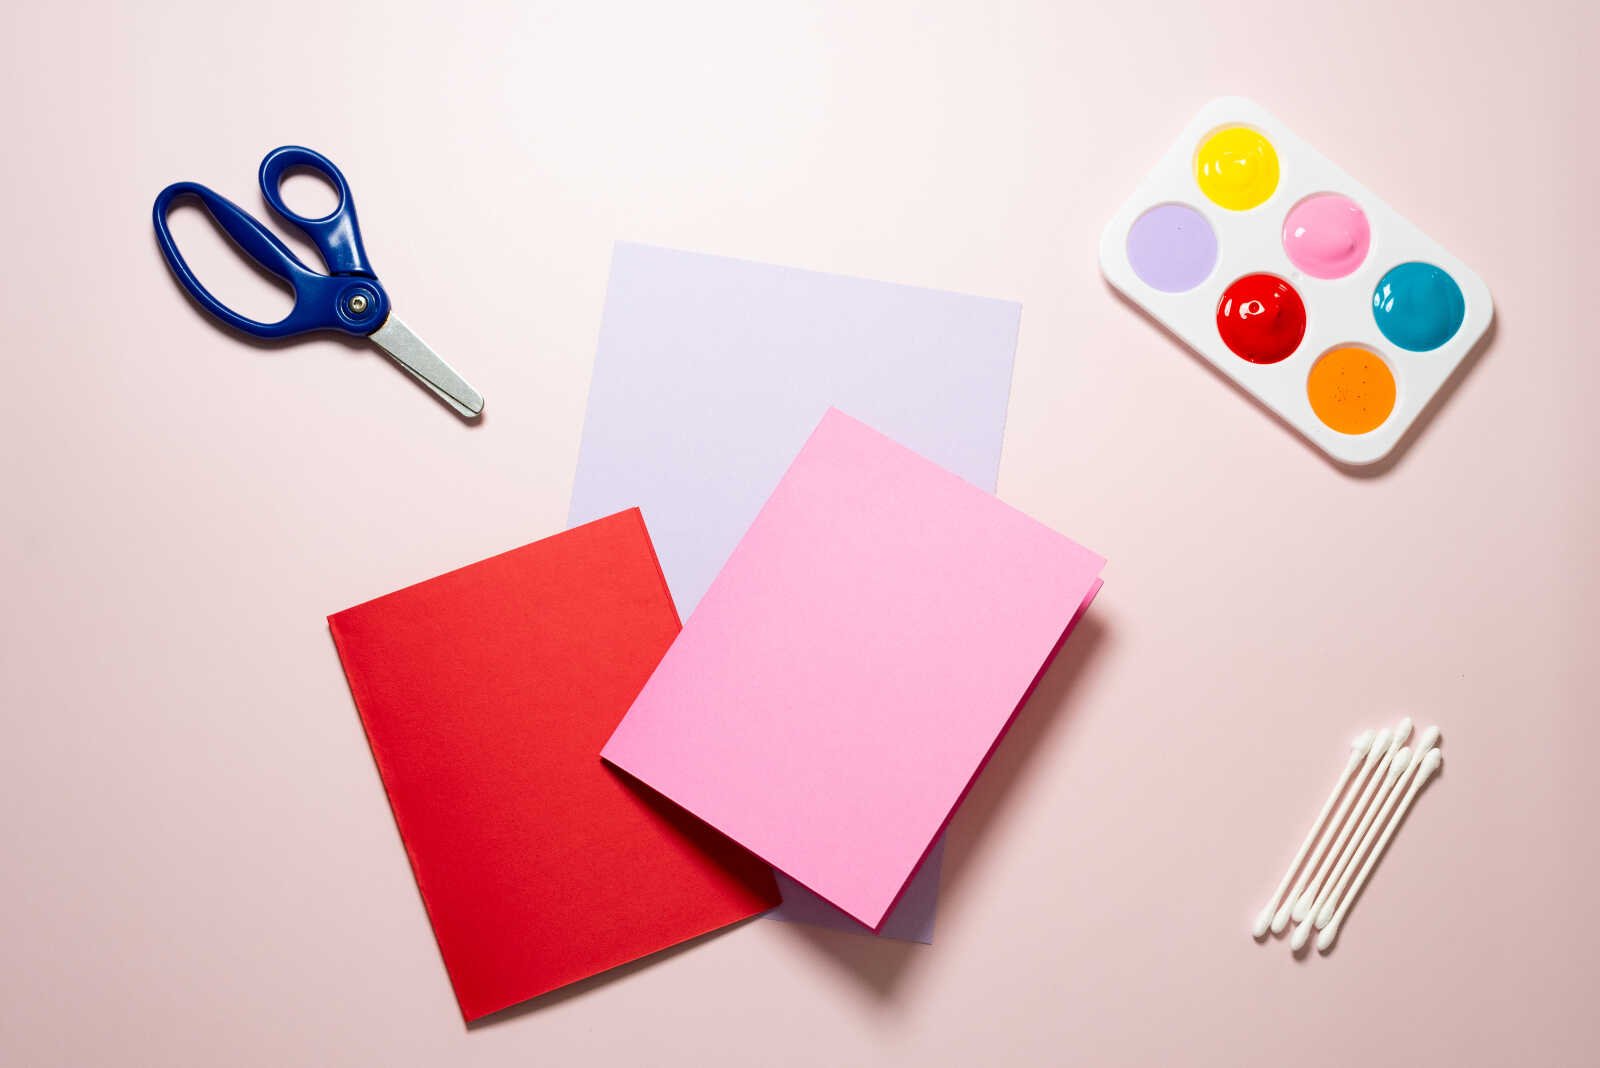
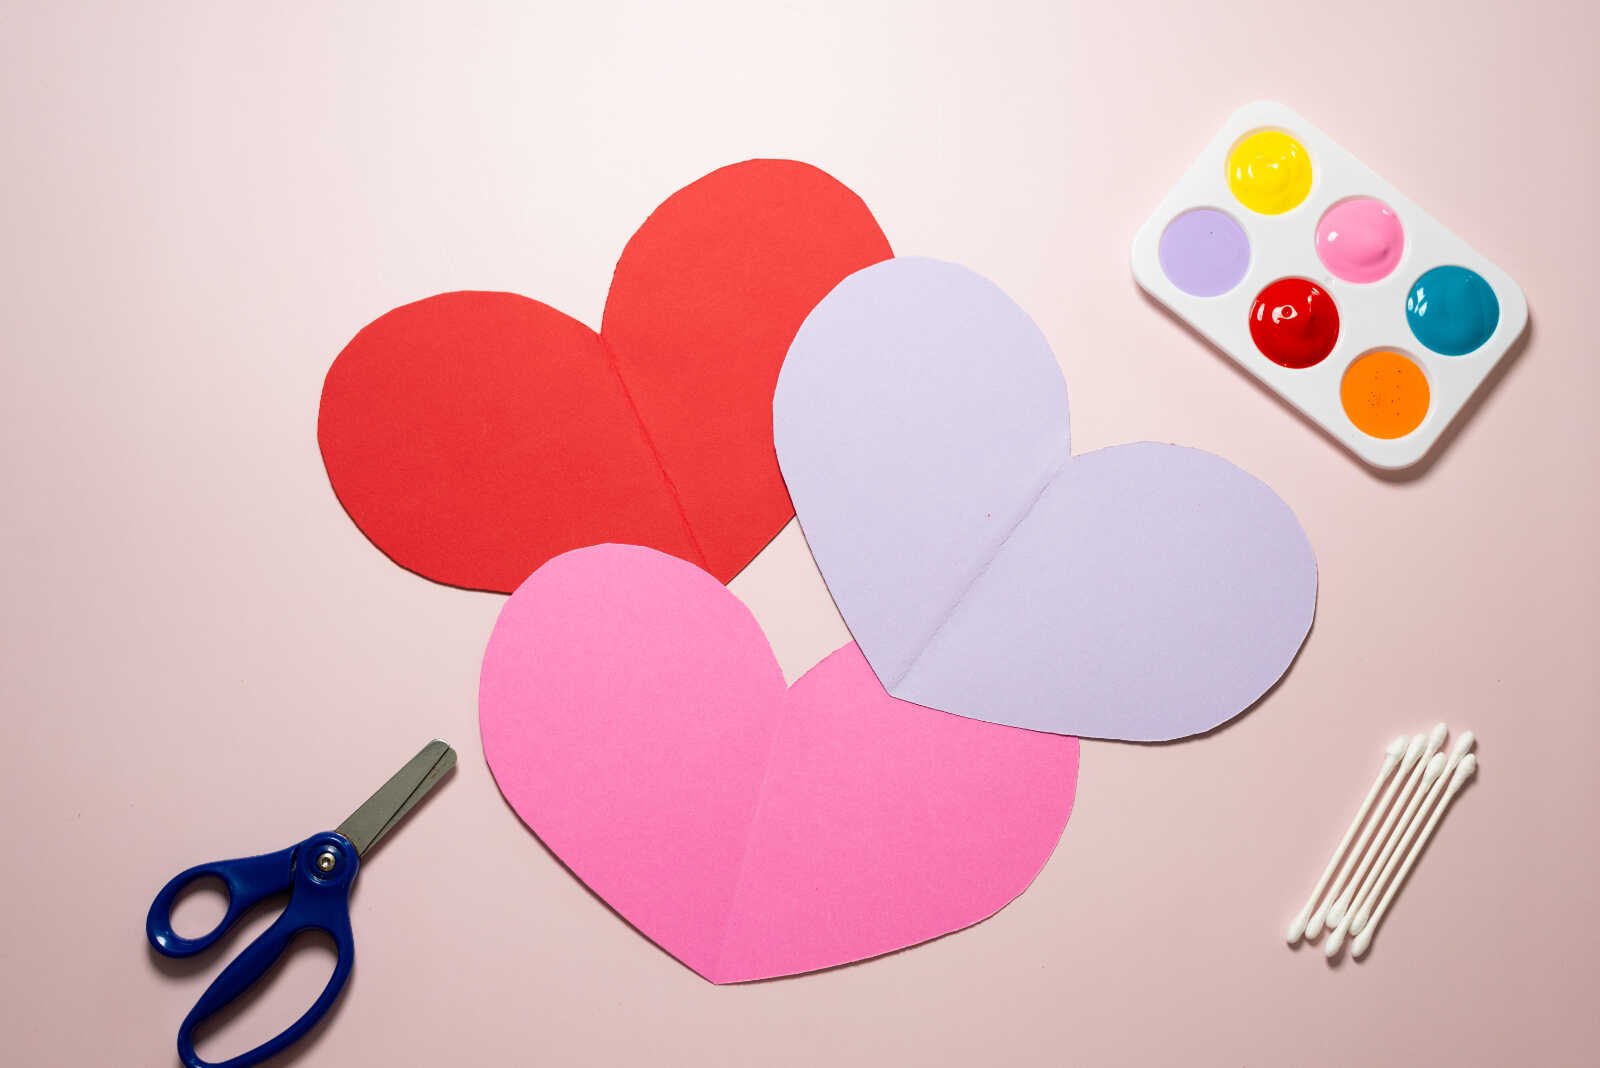
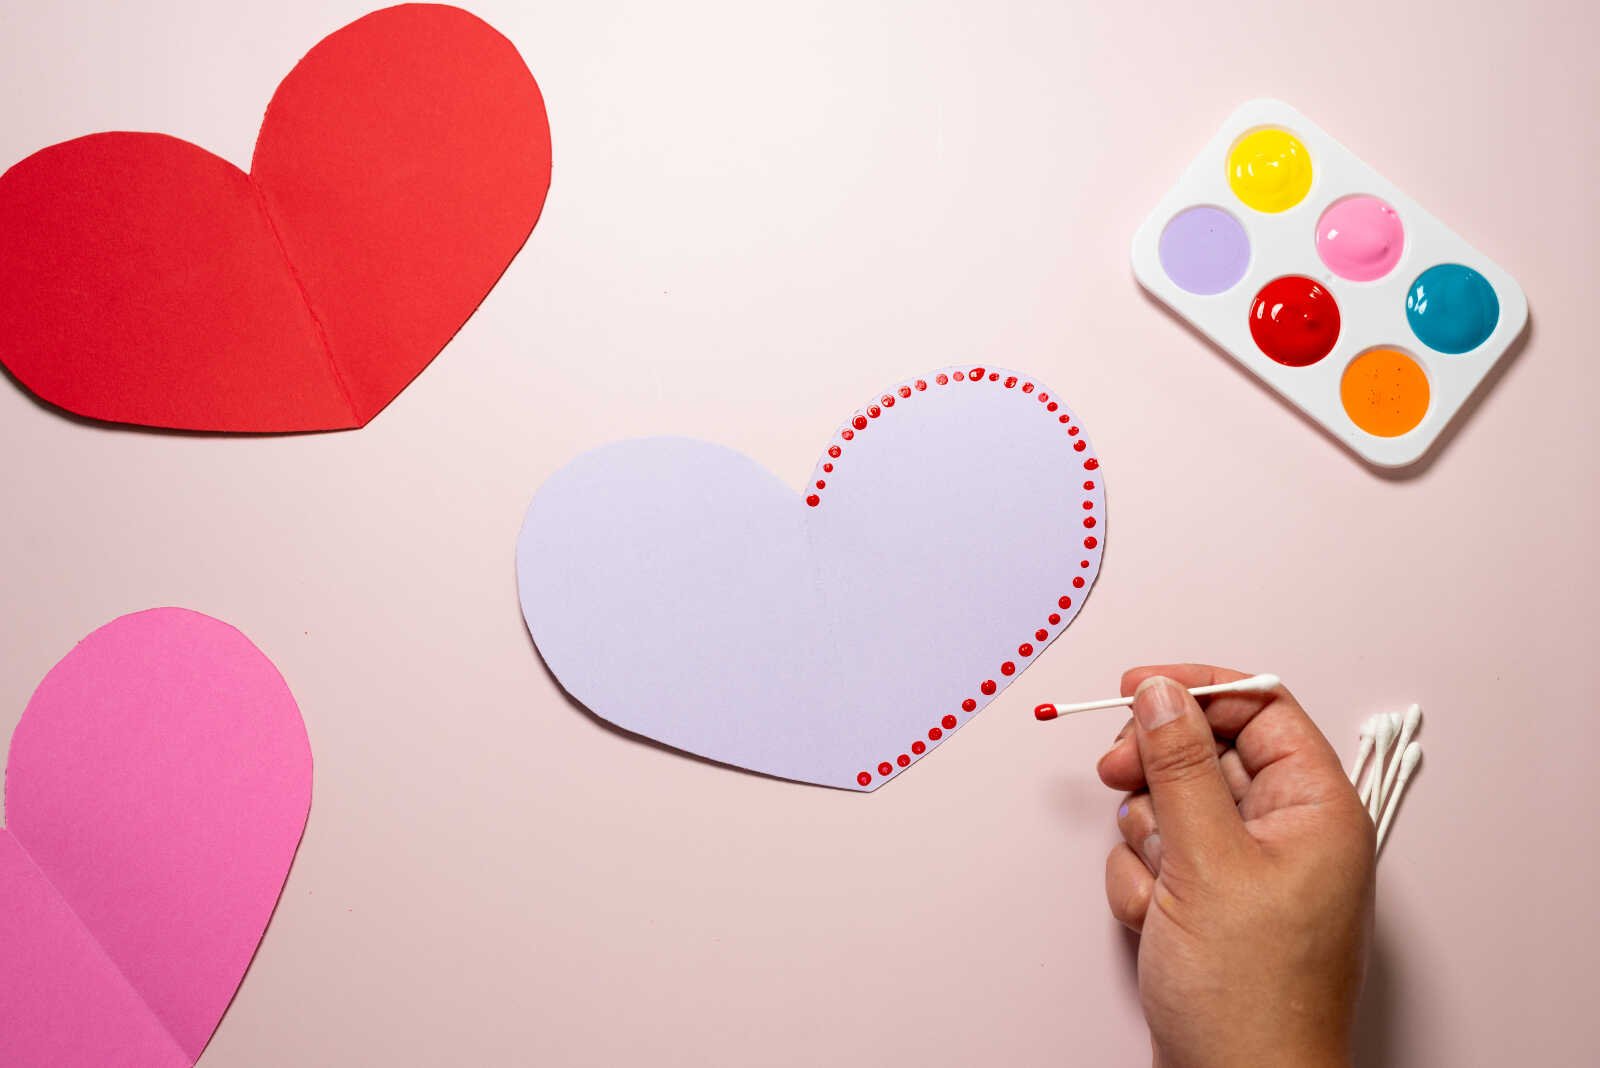
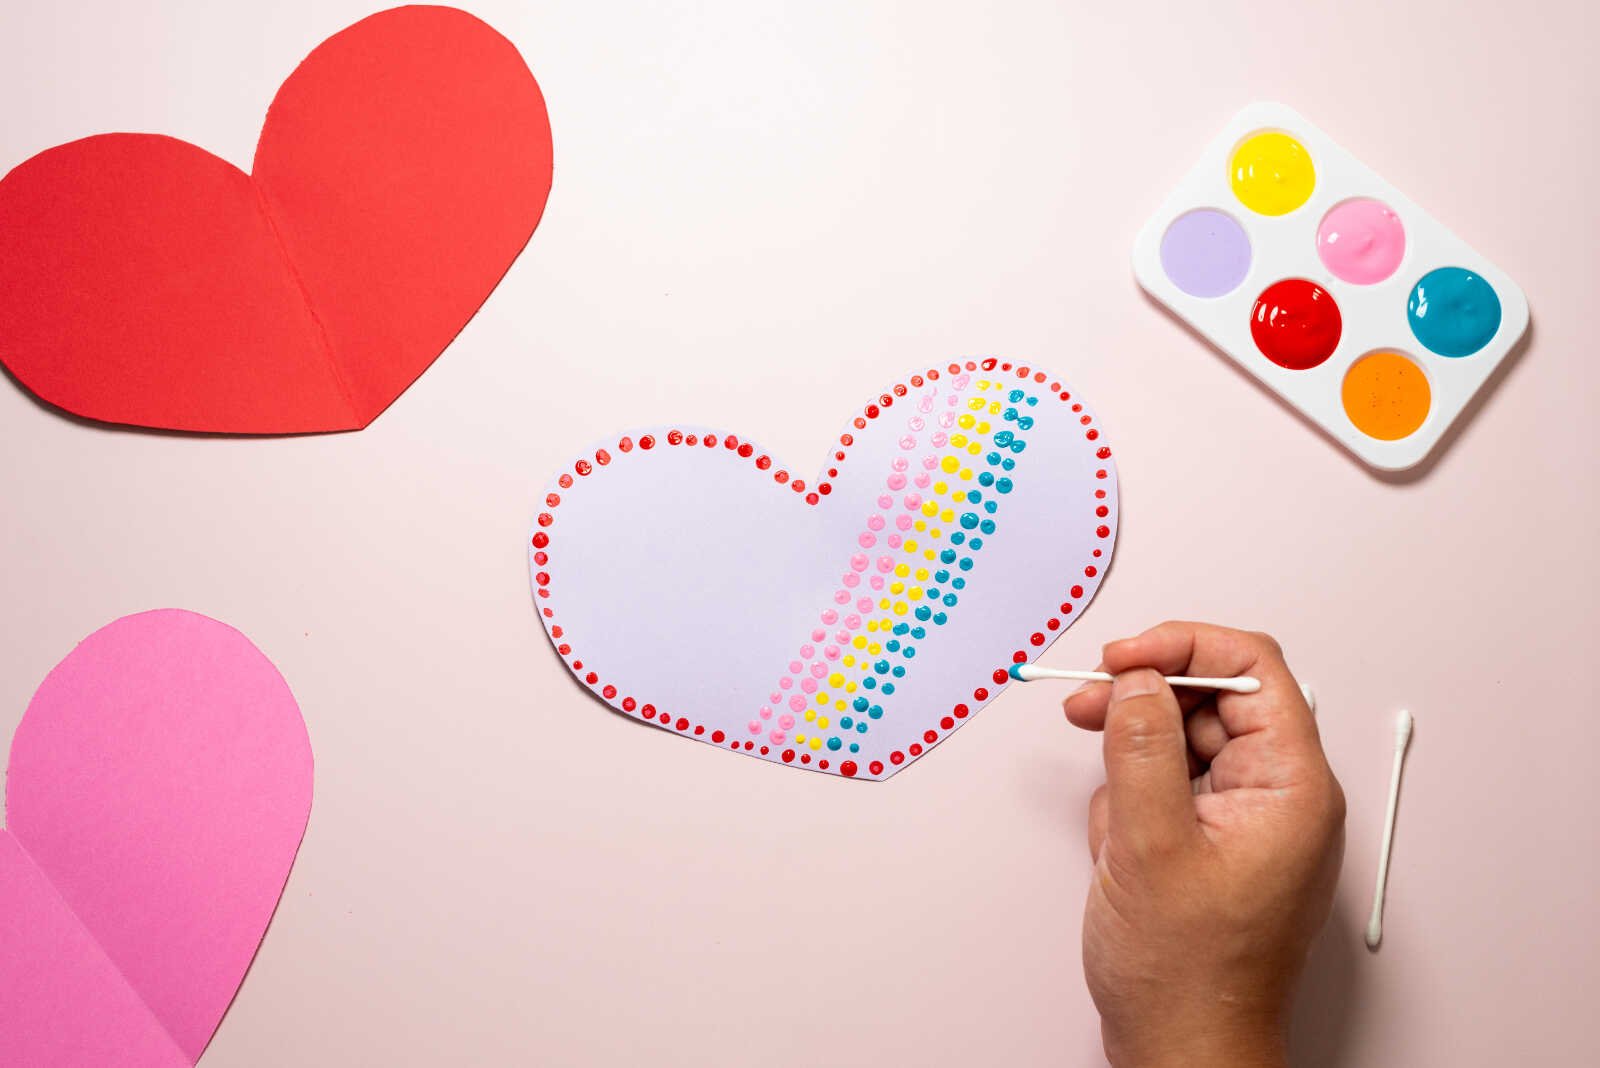
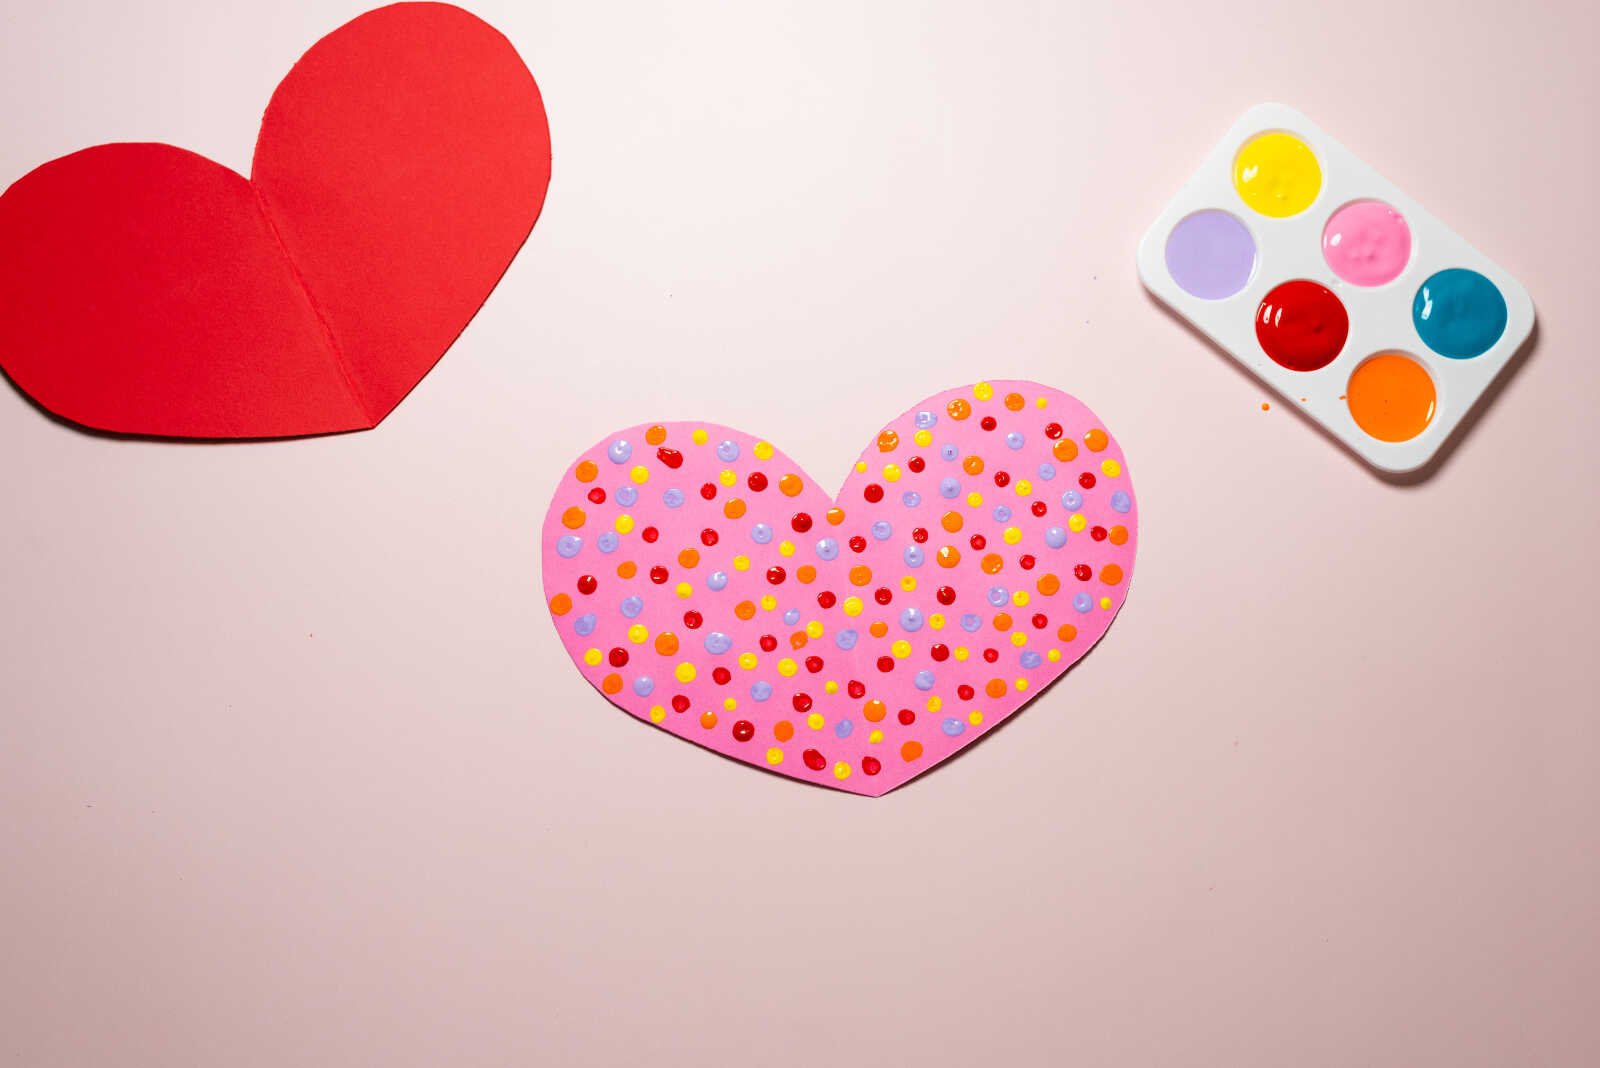
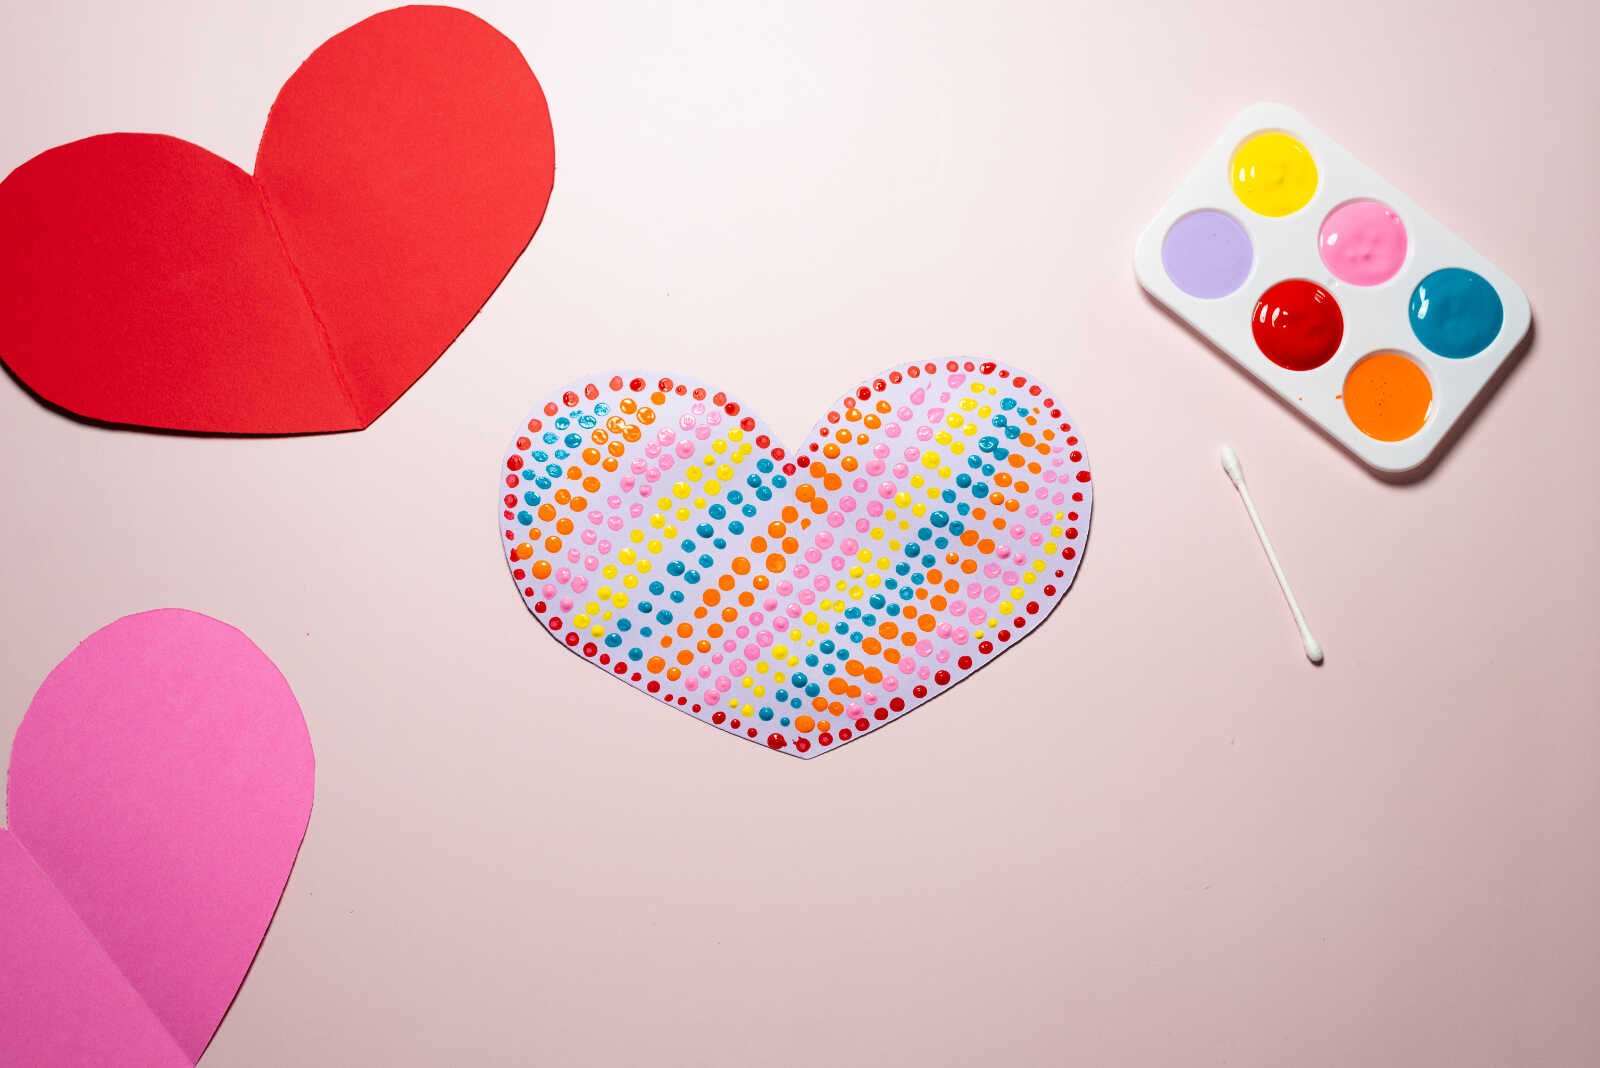
1. Cut Your Heart Stencil
Start by folding your construction paper in half. Along the folded edge, carefully cut out a half-heart shape. When you unfold it, you’ll have a perfectly symmetrical heart.
Now, place the heart cut-out directly back onto your main sheet of paper. This acts as your stencil and creates that clean, crisp heart shape in the final design.
Tip: If working with younger kids, pre-cut the heart stencil to make things easier.
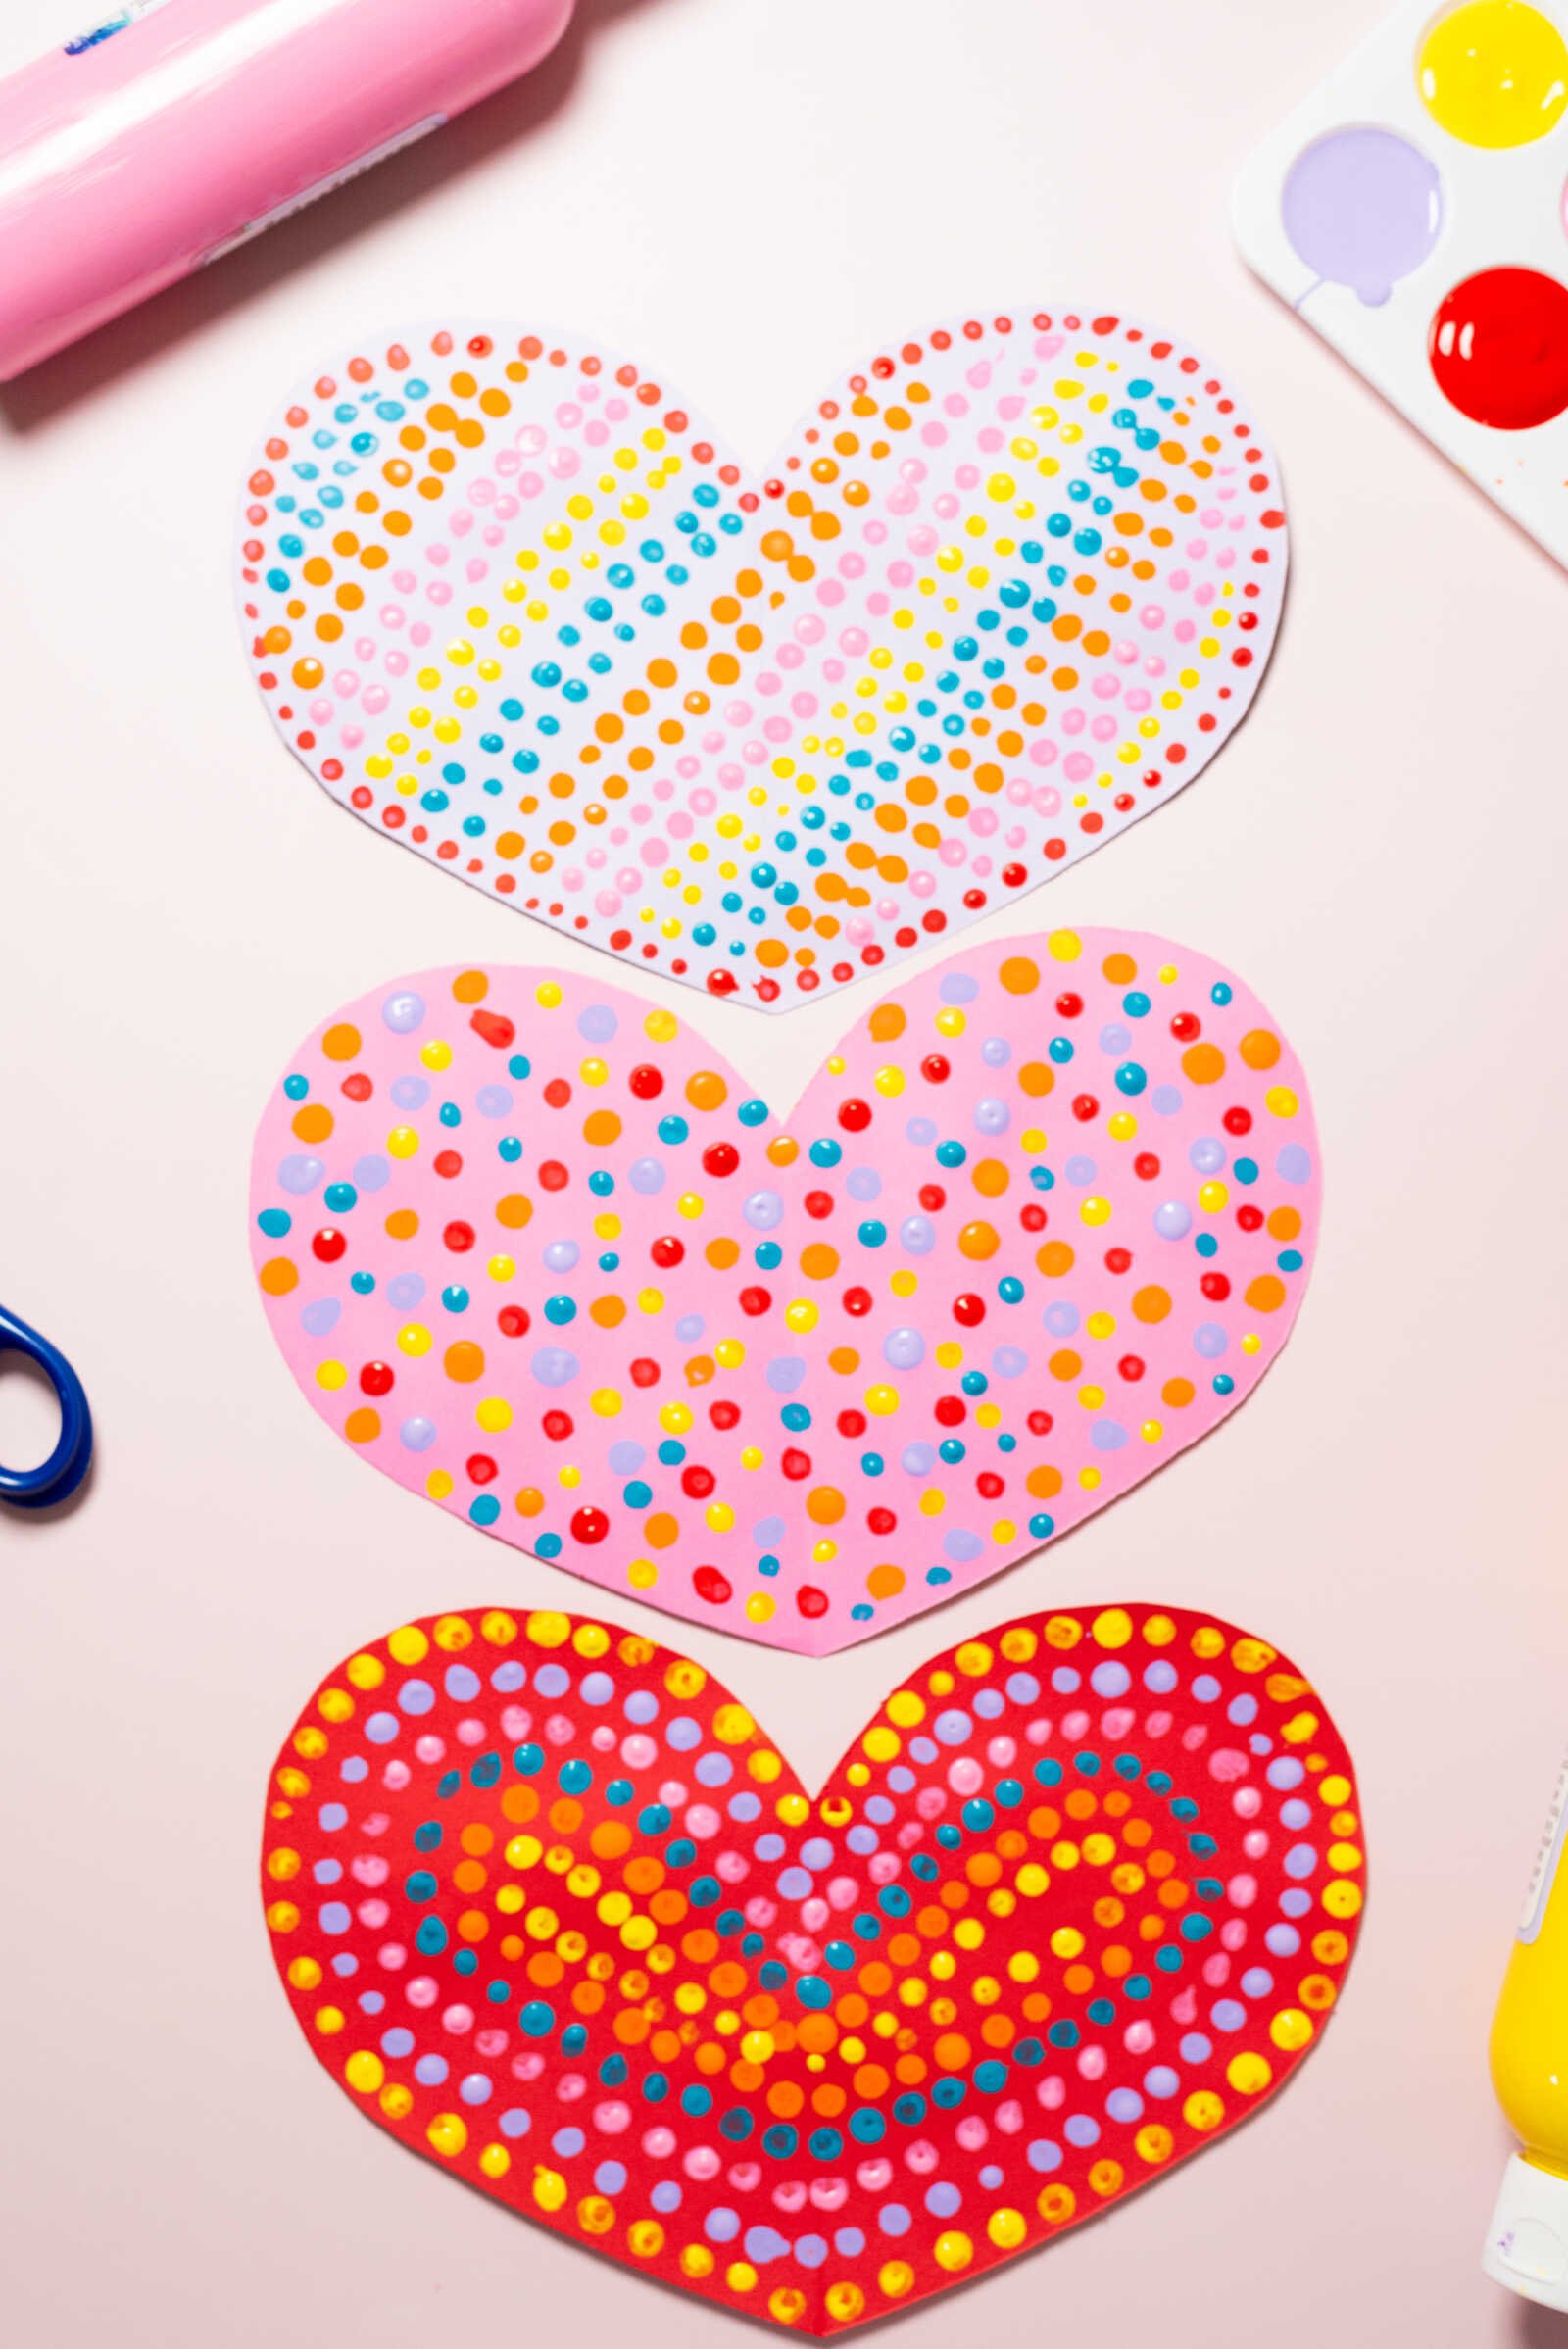
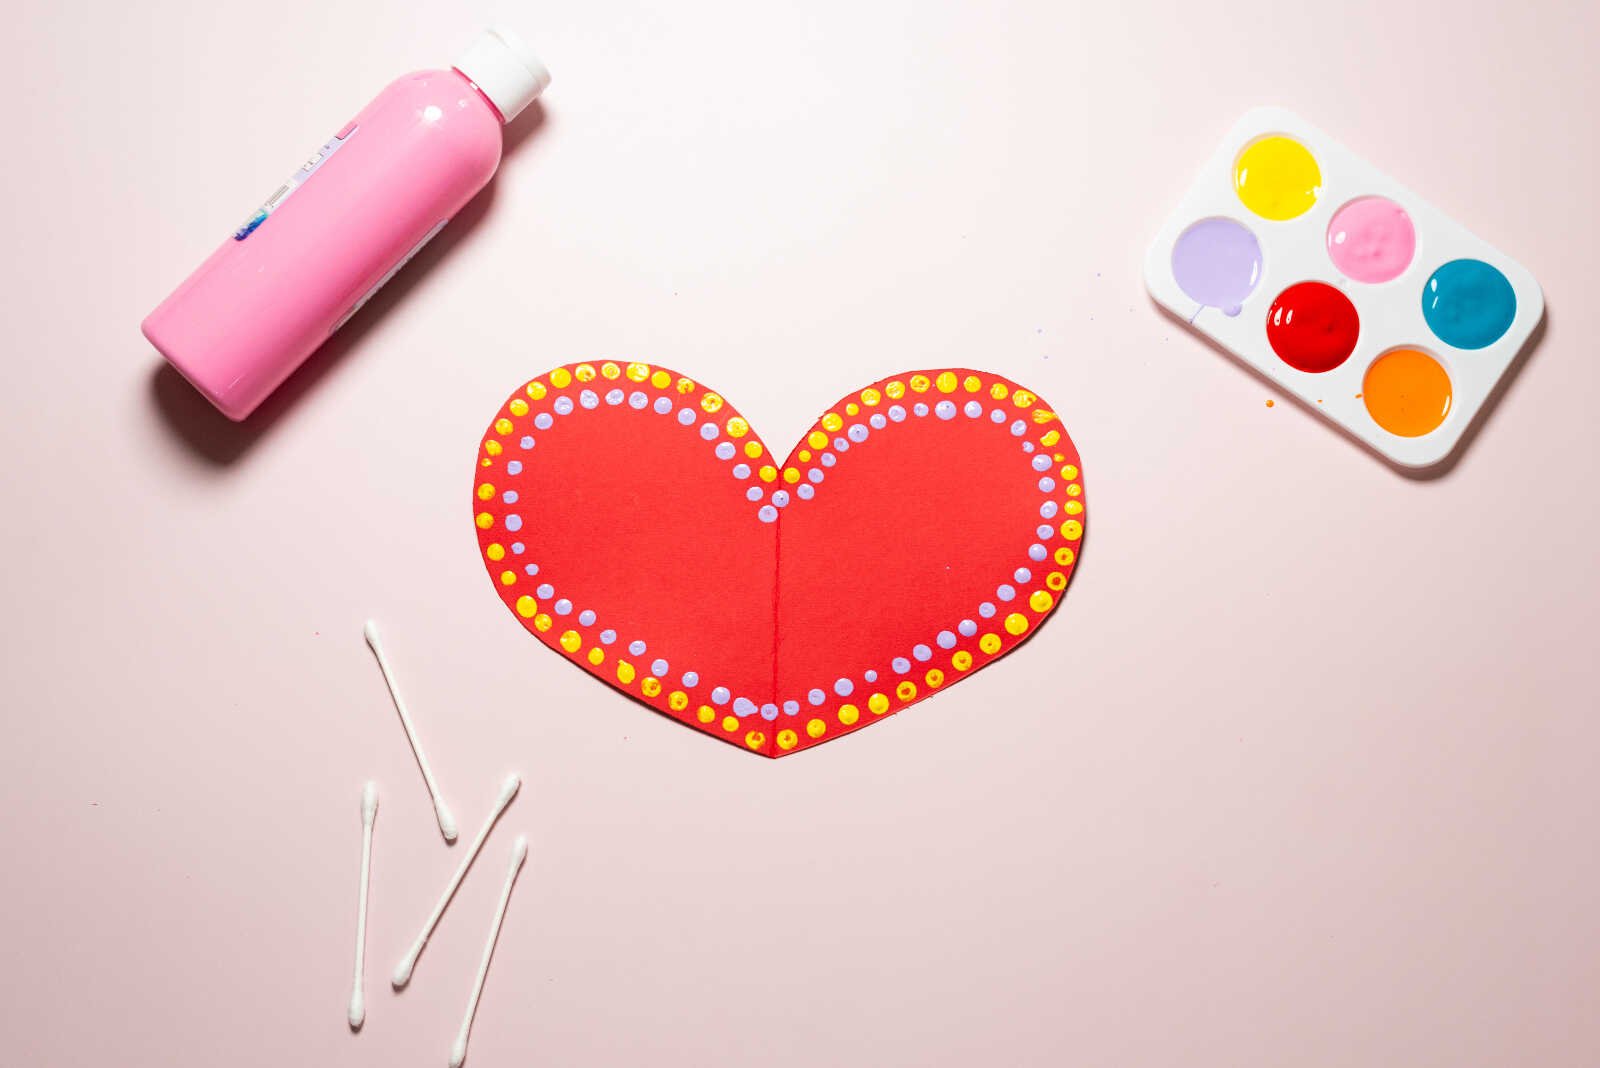
2. Choose Your Design Style
This is where the creativity really begins. Dip a Q-tip into your first paint color and start building your design. You can follow one of these fun styles—or mix and match!
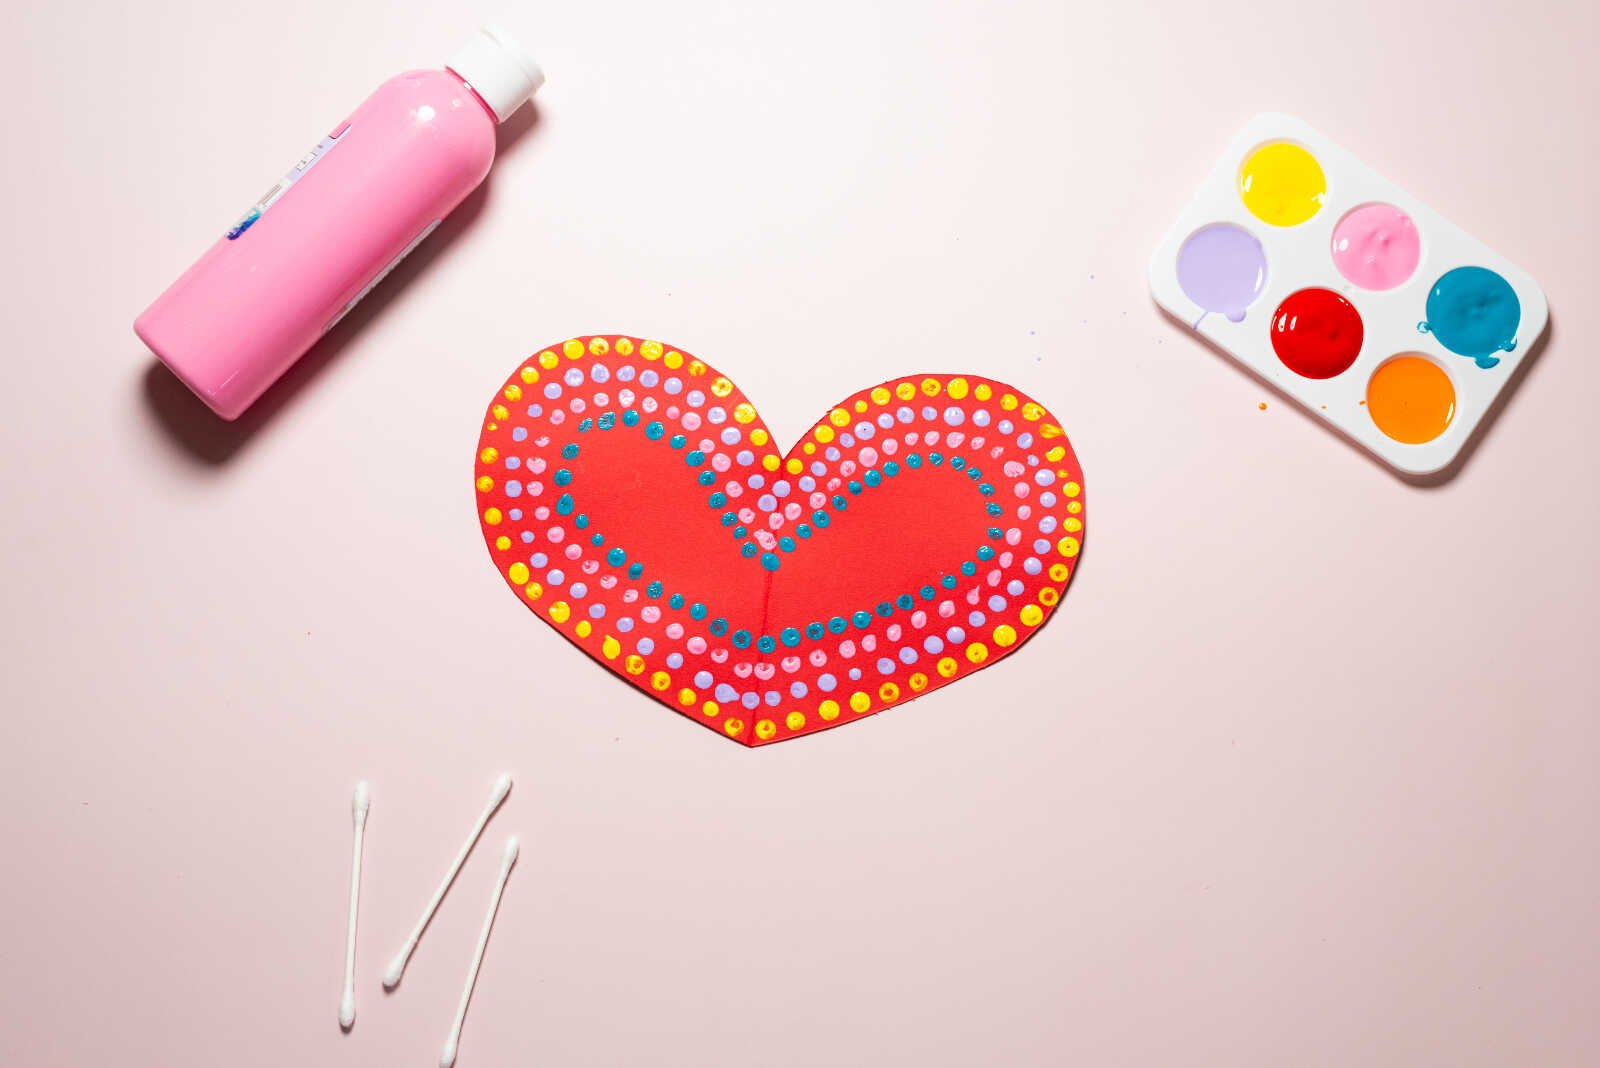
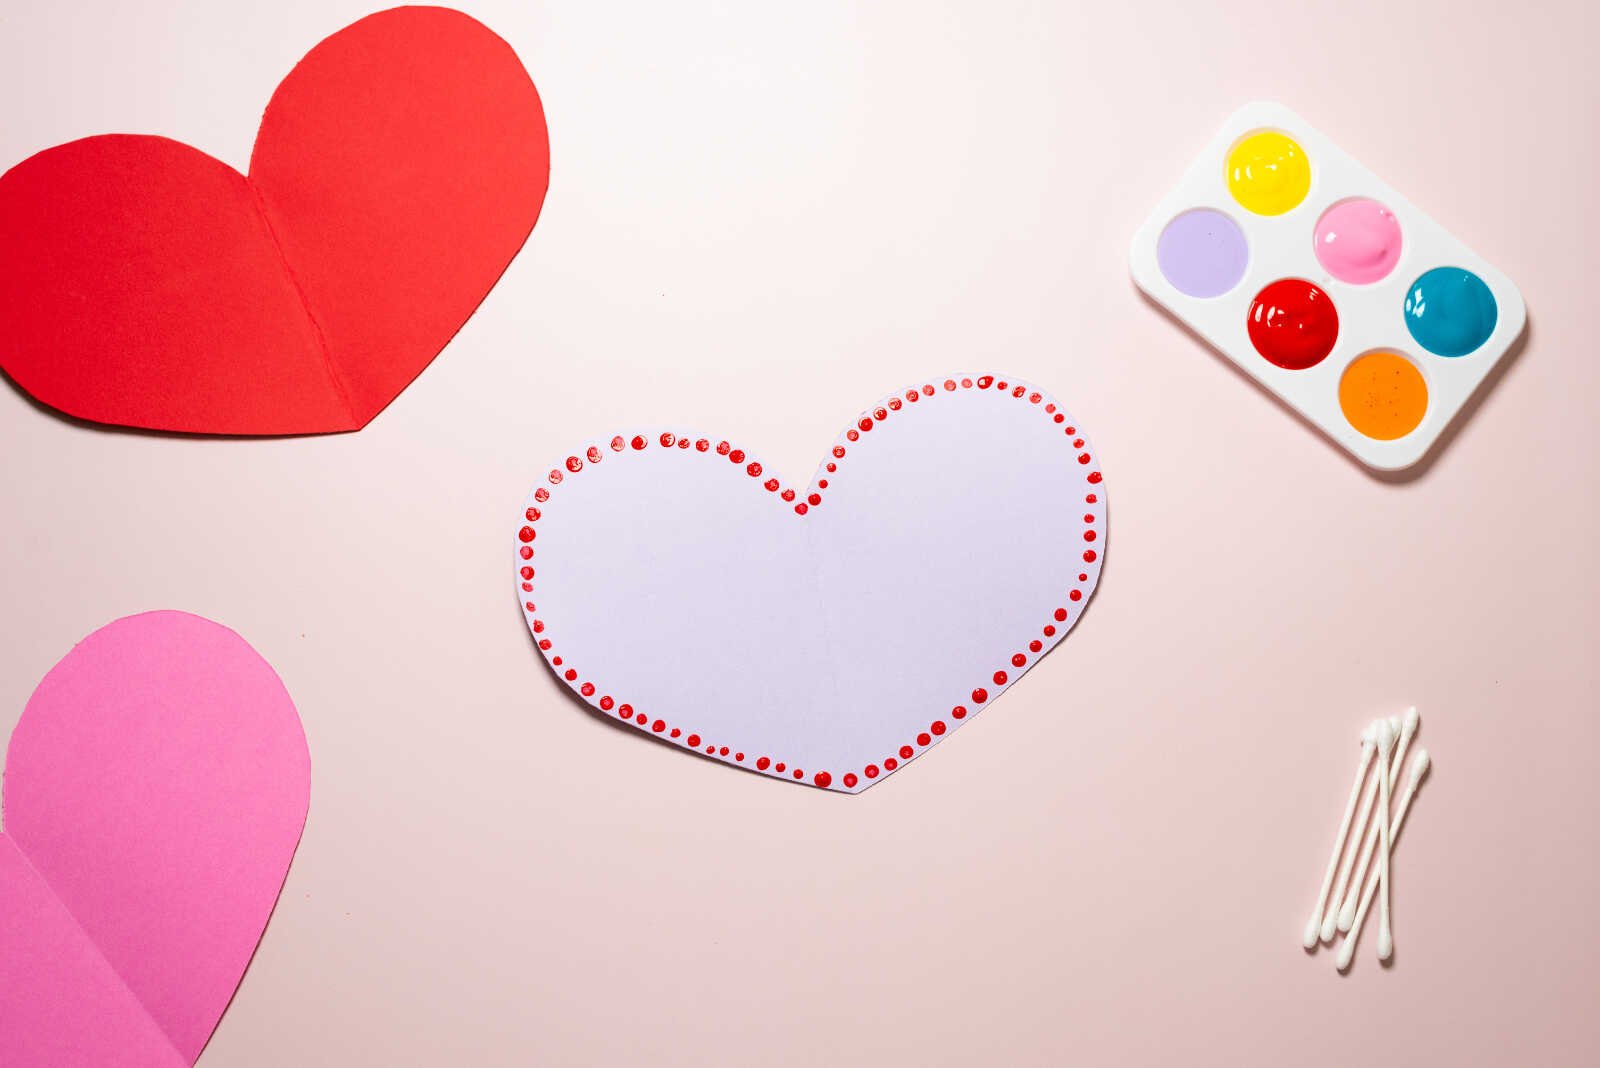
The Radiant Border
Create a bold outline by dabbing dots closely around the edge of the heart stencil. Then, continue adding rings of dots outward, forming a glowing, radiating effect.
This style looks especially beautiful when you alternate colors in each “ring.”
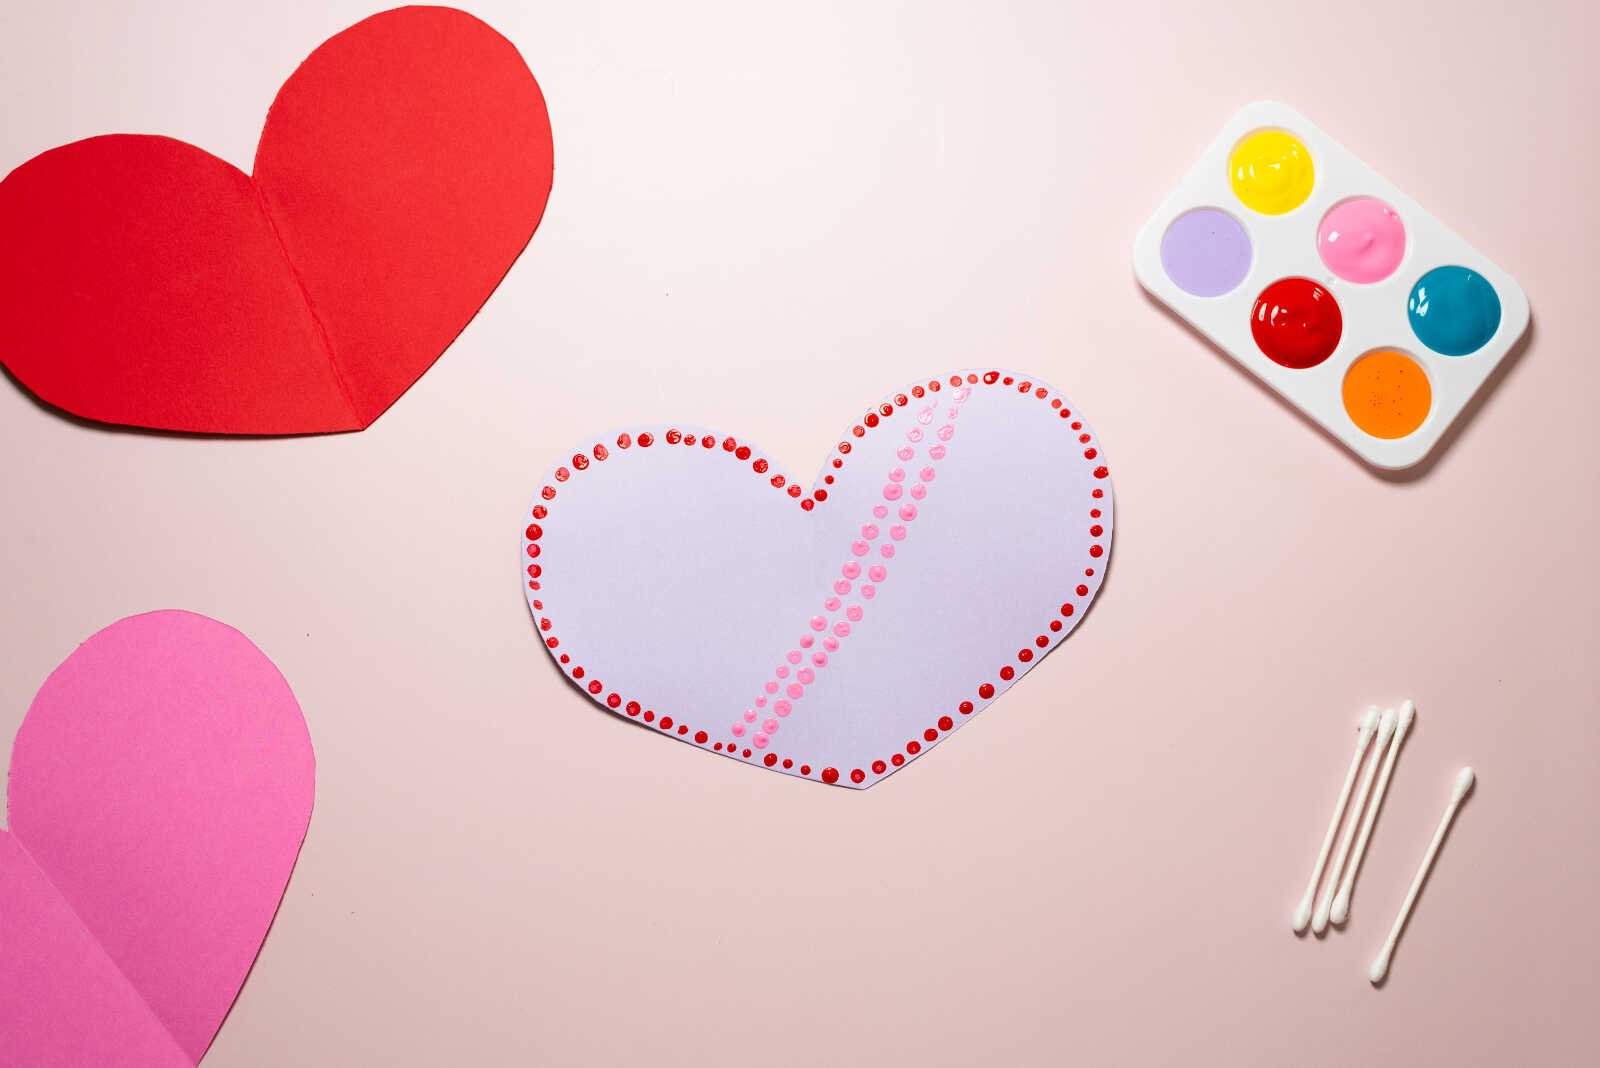
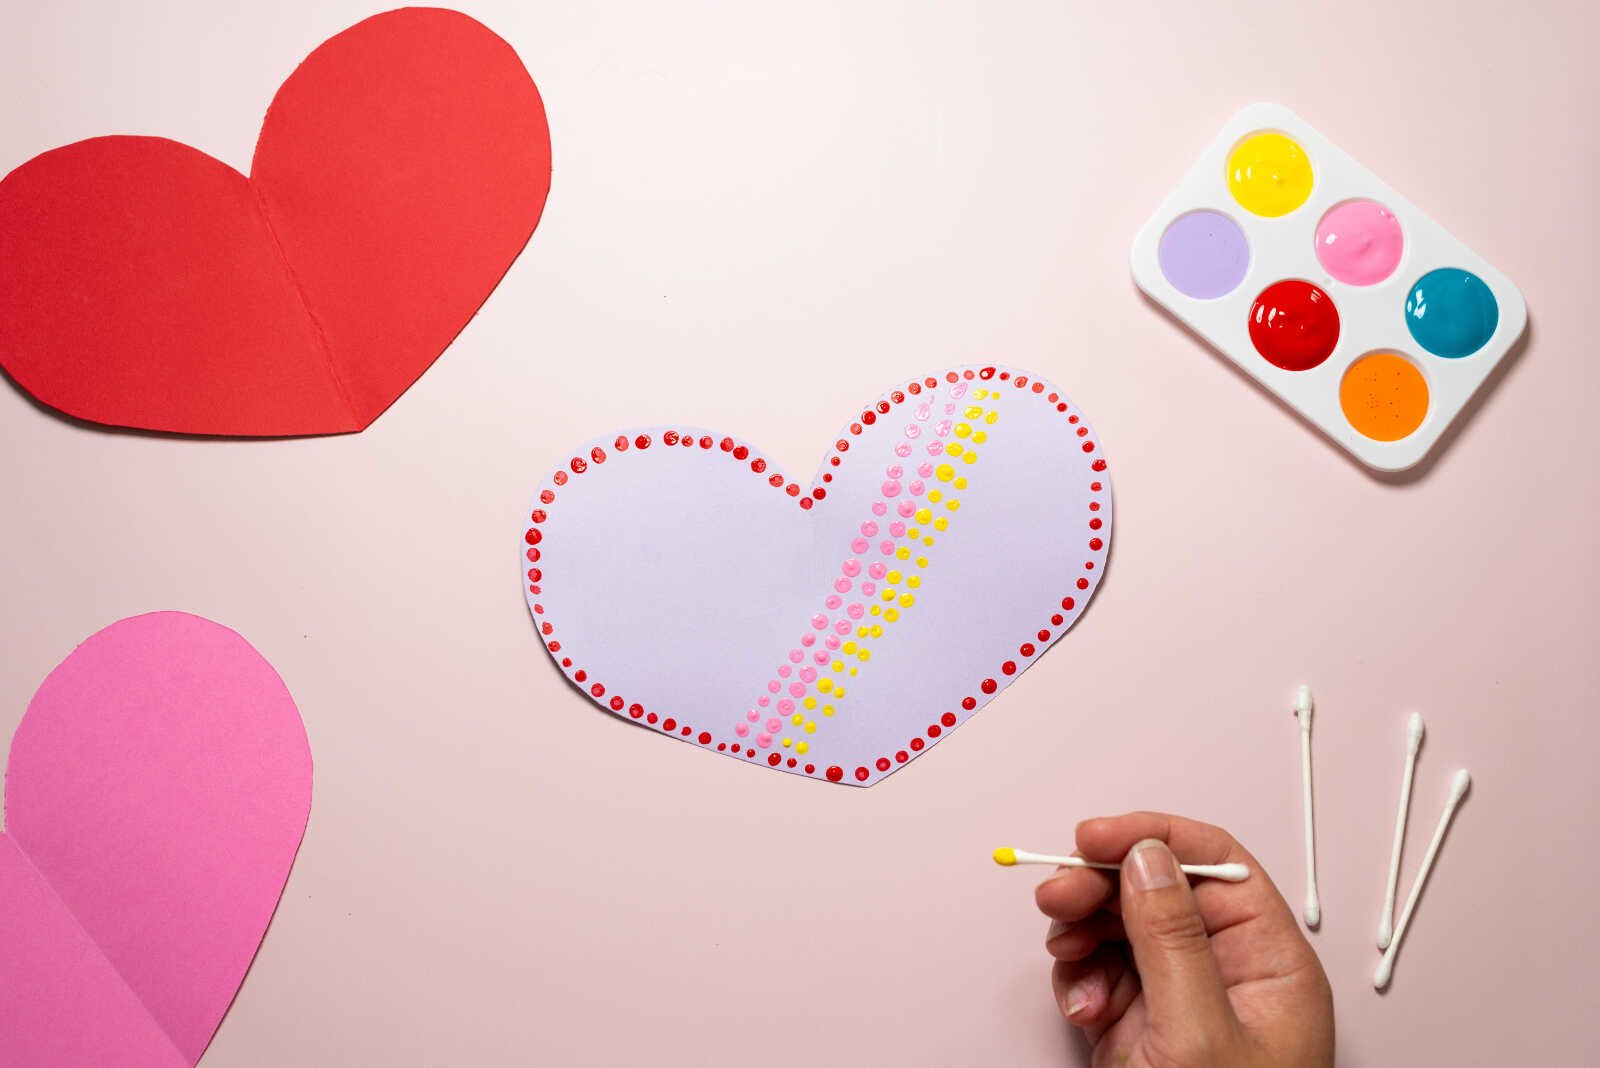
The Linear Path
Start with a dotted heart outline, then switch to creating straight lines of dots across the page—horizontal or vertical. Let the lines pass behind the heart shape for a modern, graphic look.
This one is great for older kids who like patterns and structure.

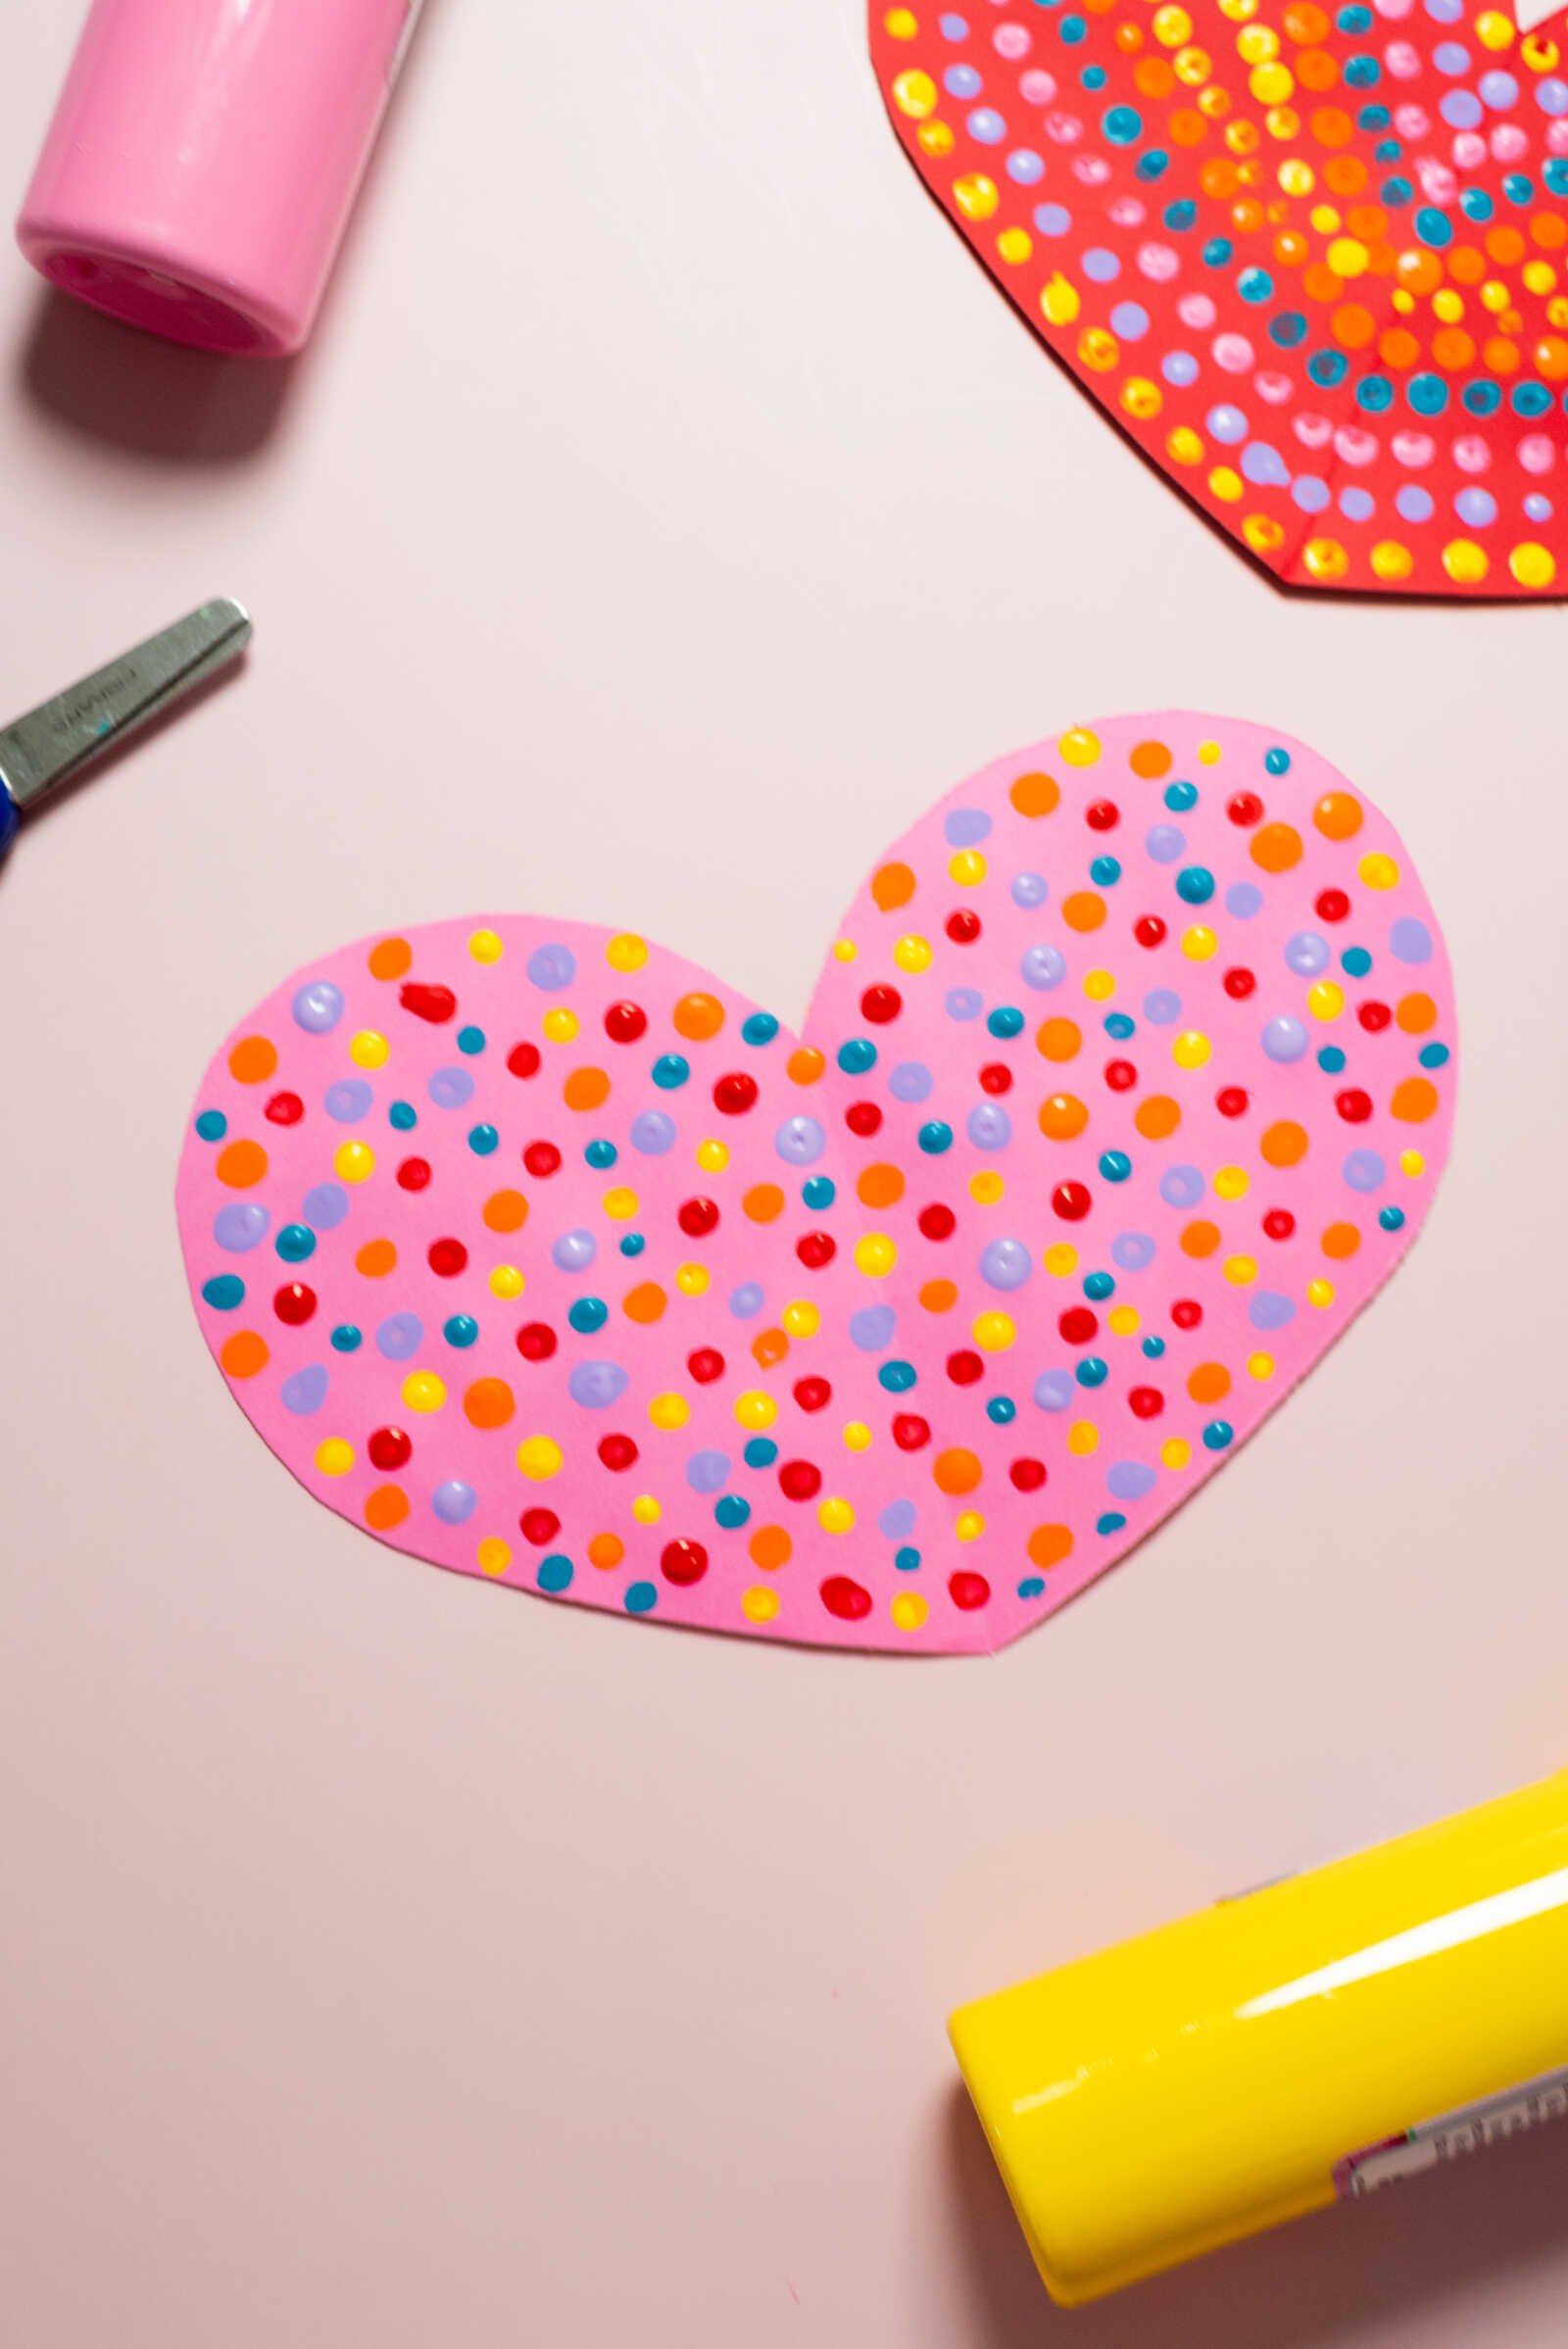
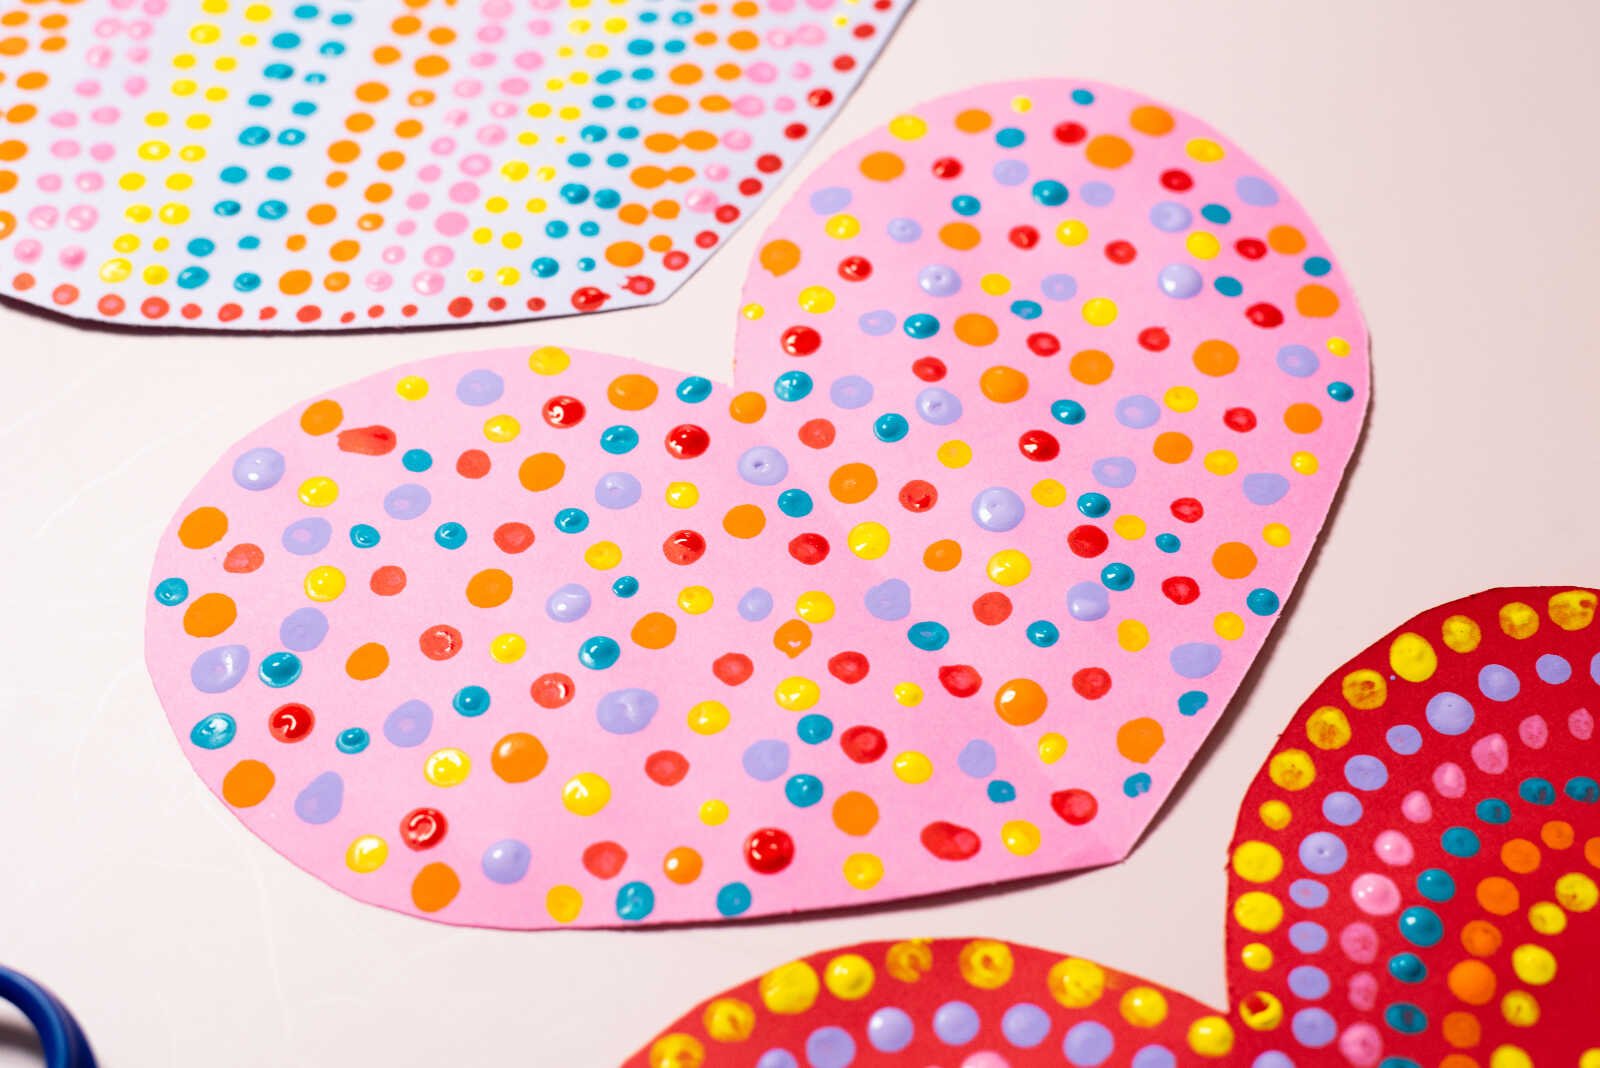
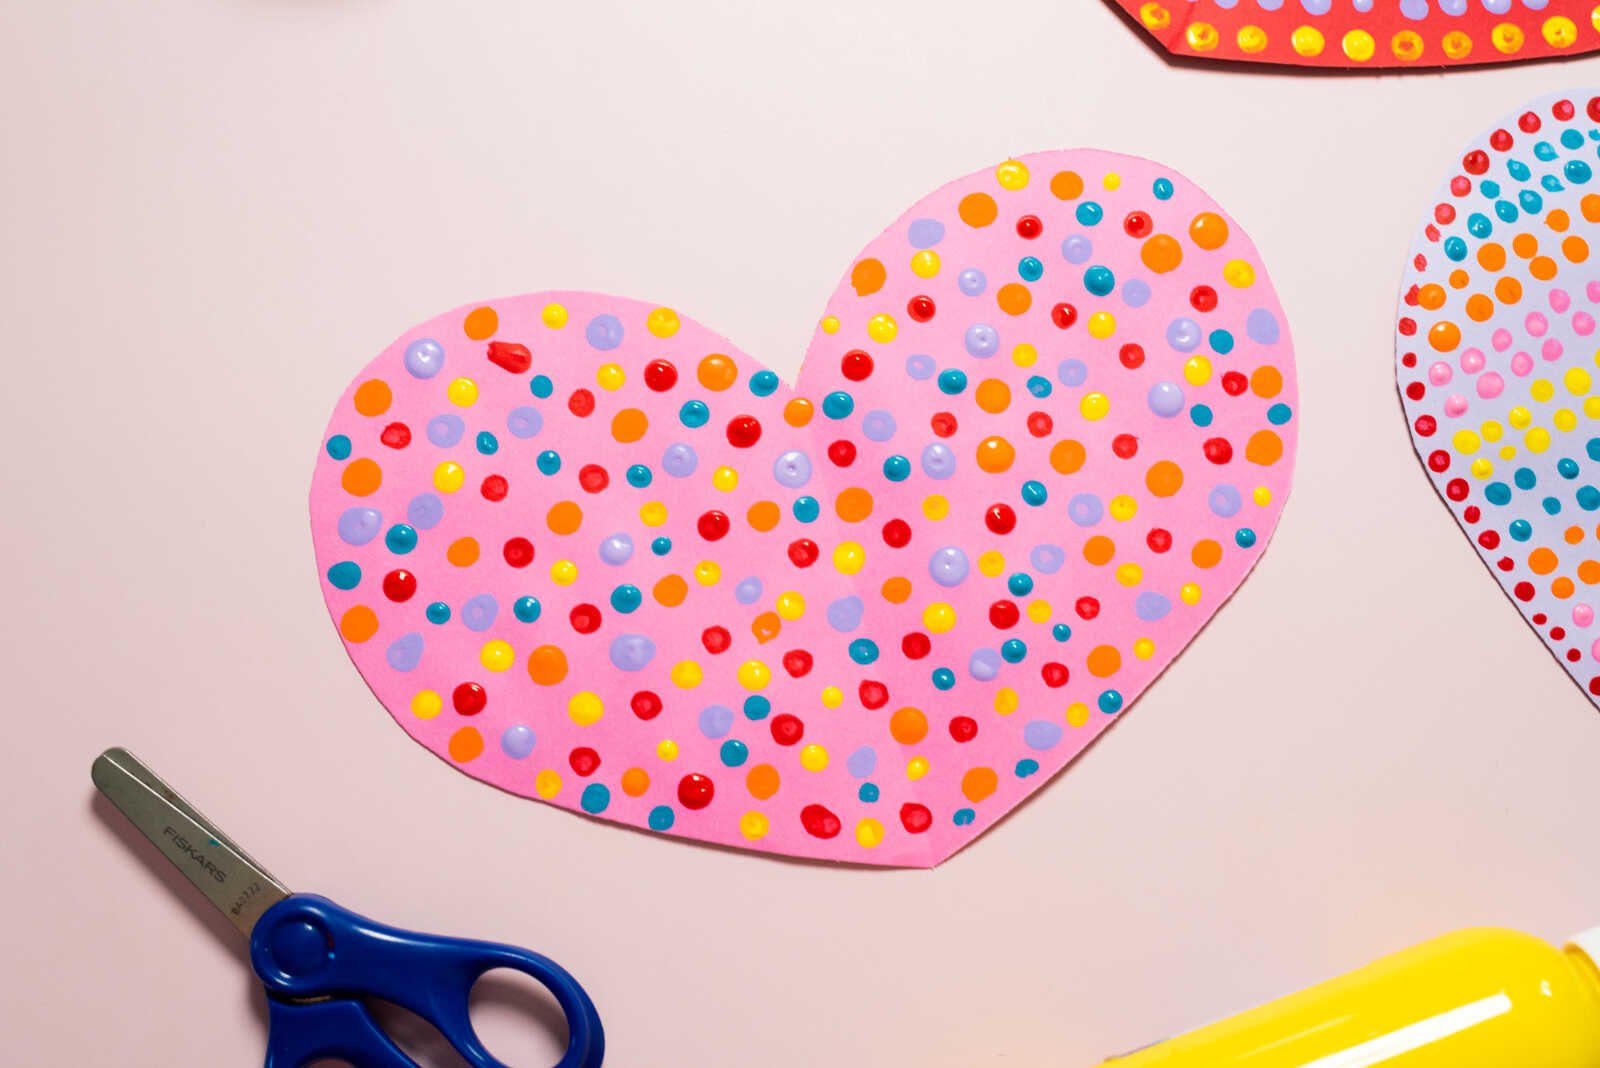
The Freestyle Cloud
Let go of structure and embrace creativity! Start near the heart and randomly dab dots all over the page using different colors.
Layer colors, overlap dots, and create a dreamy, cloud-like texture around your heart.
Perfect for younger kids who just want to explore and have fun.
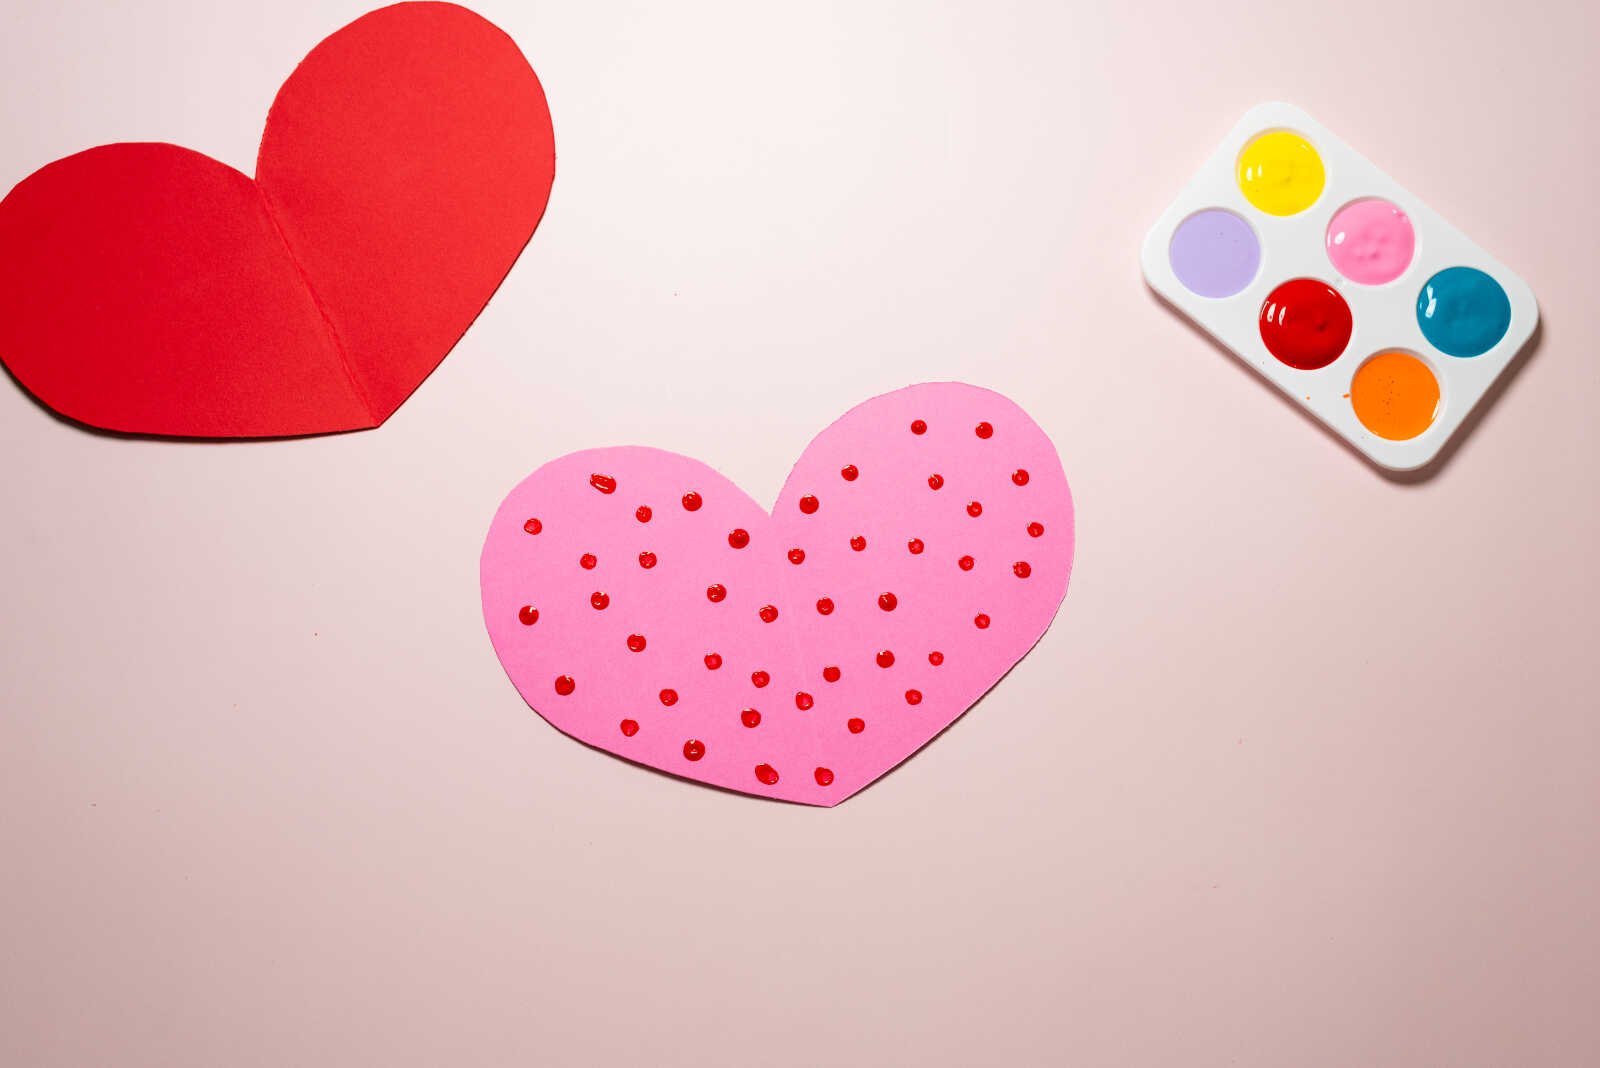
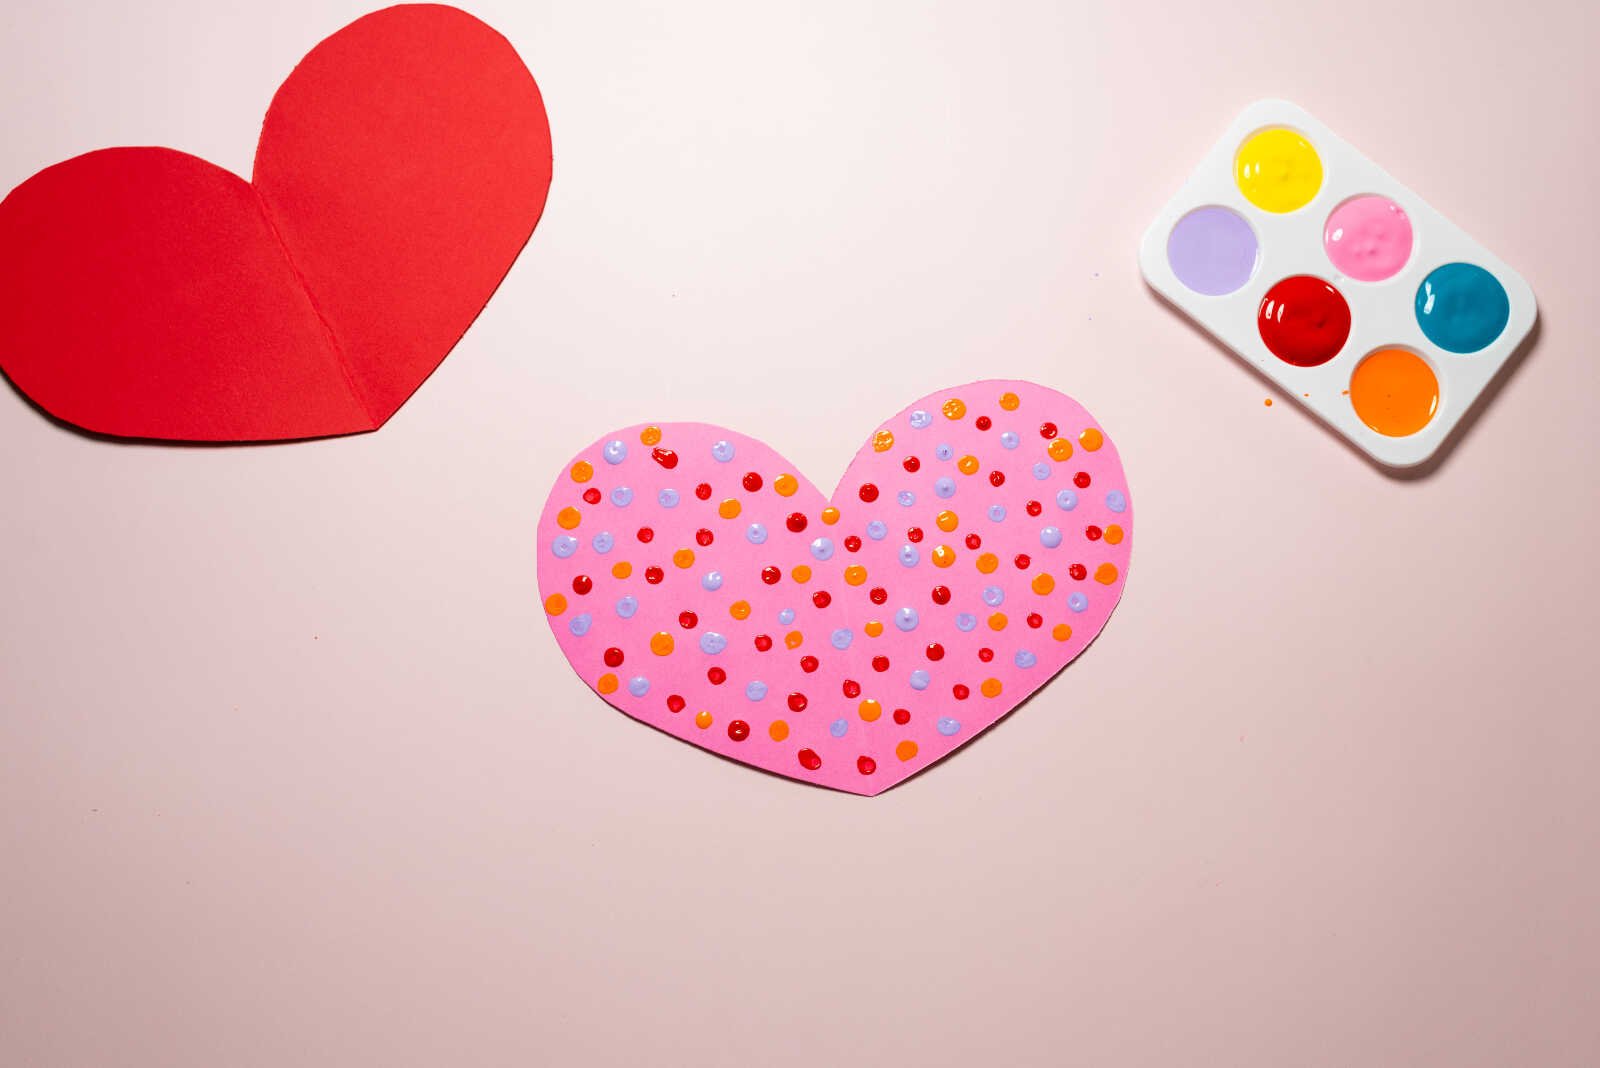
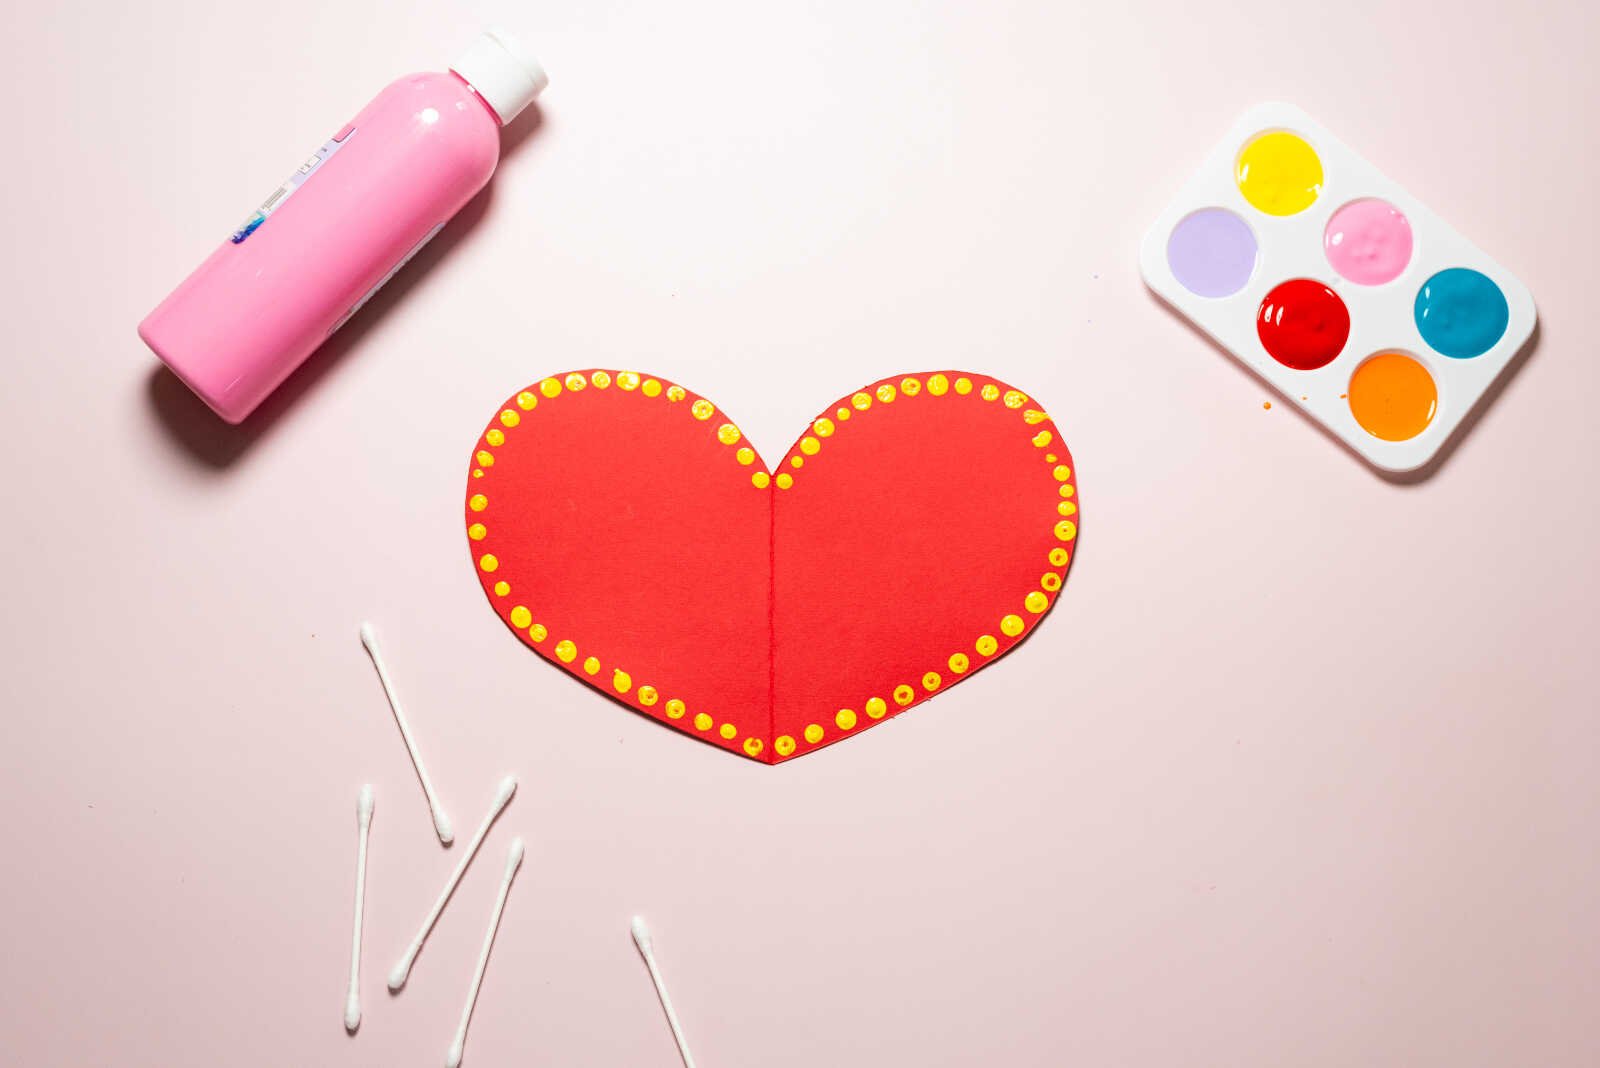
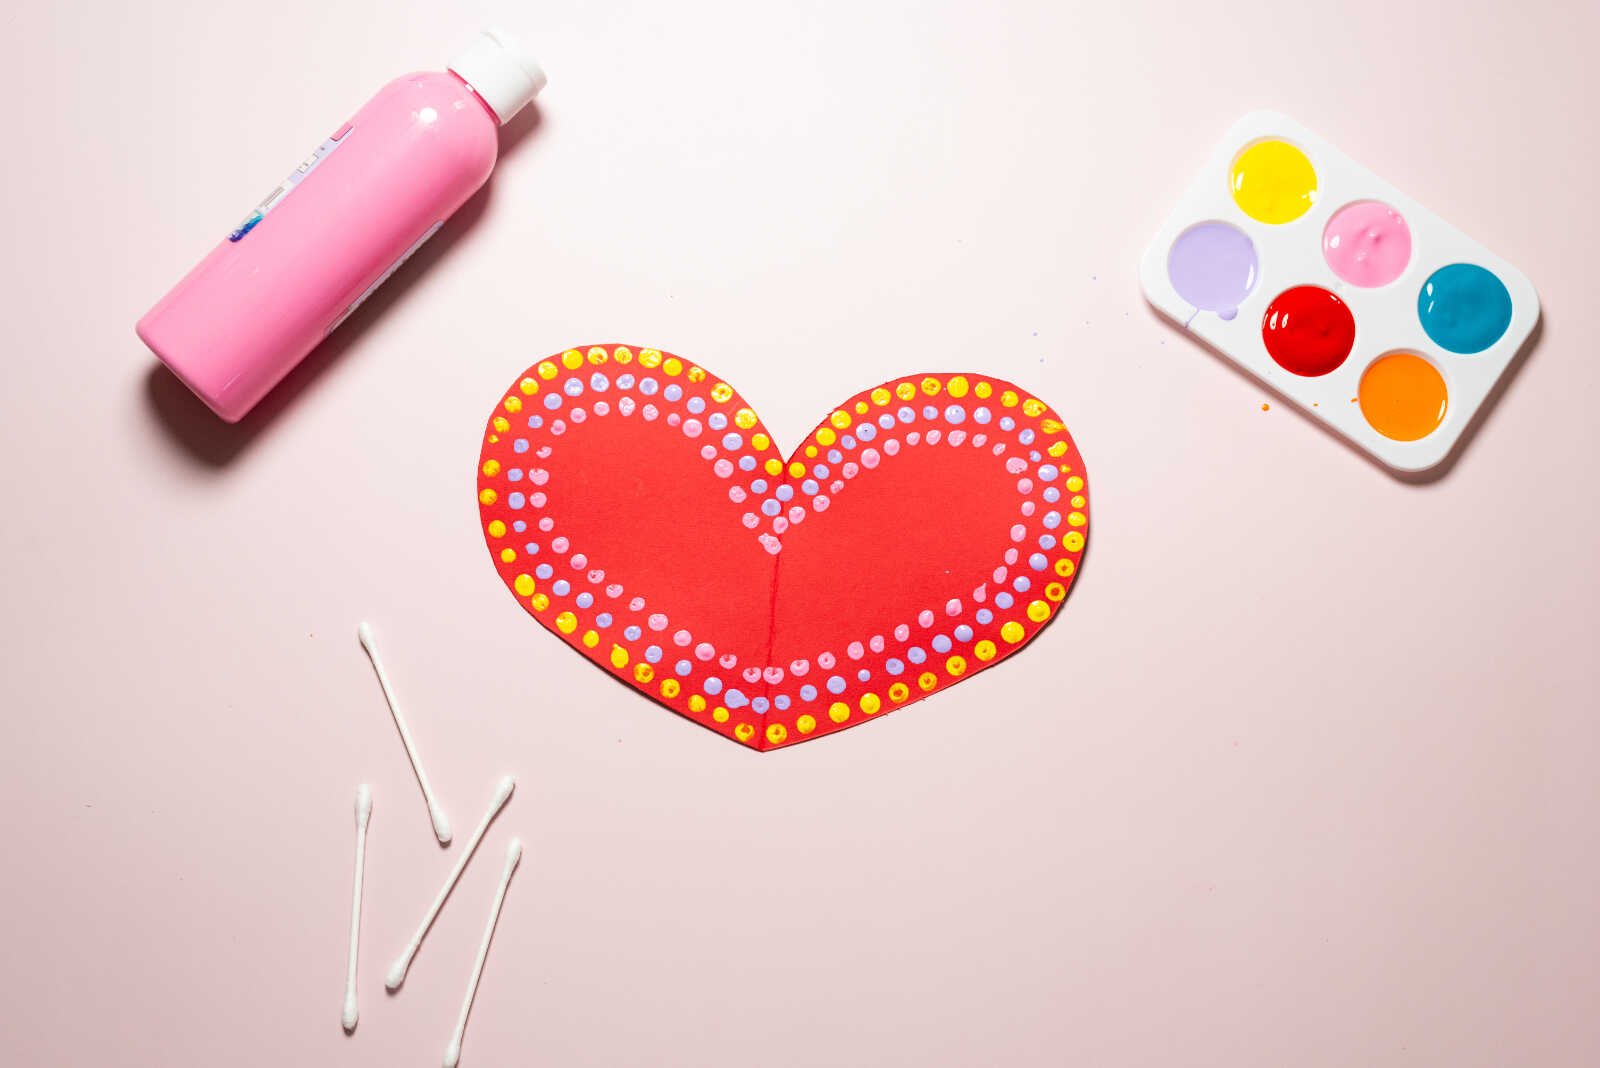
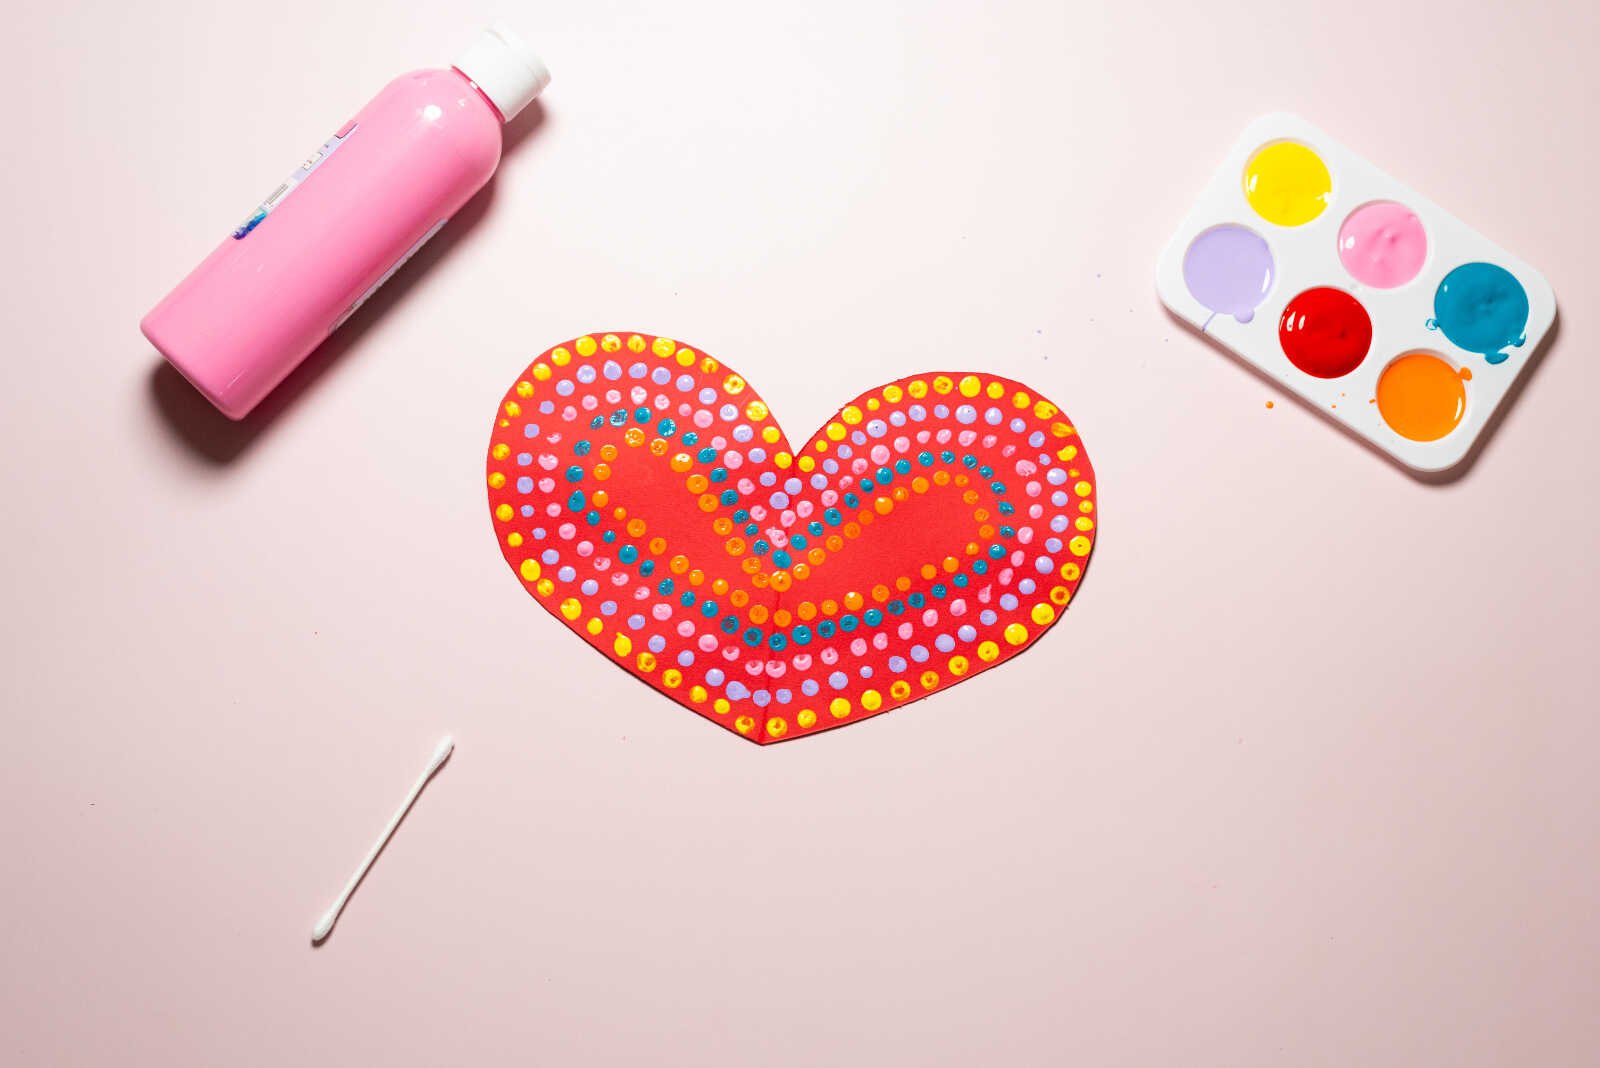
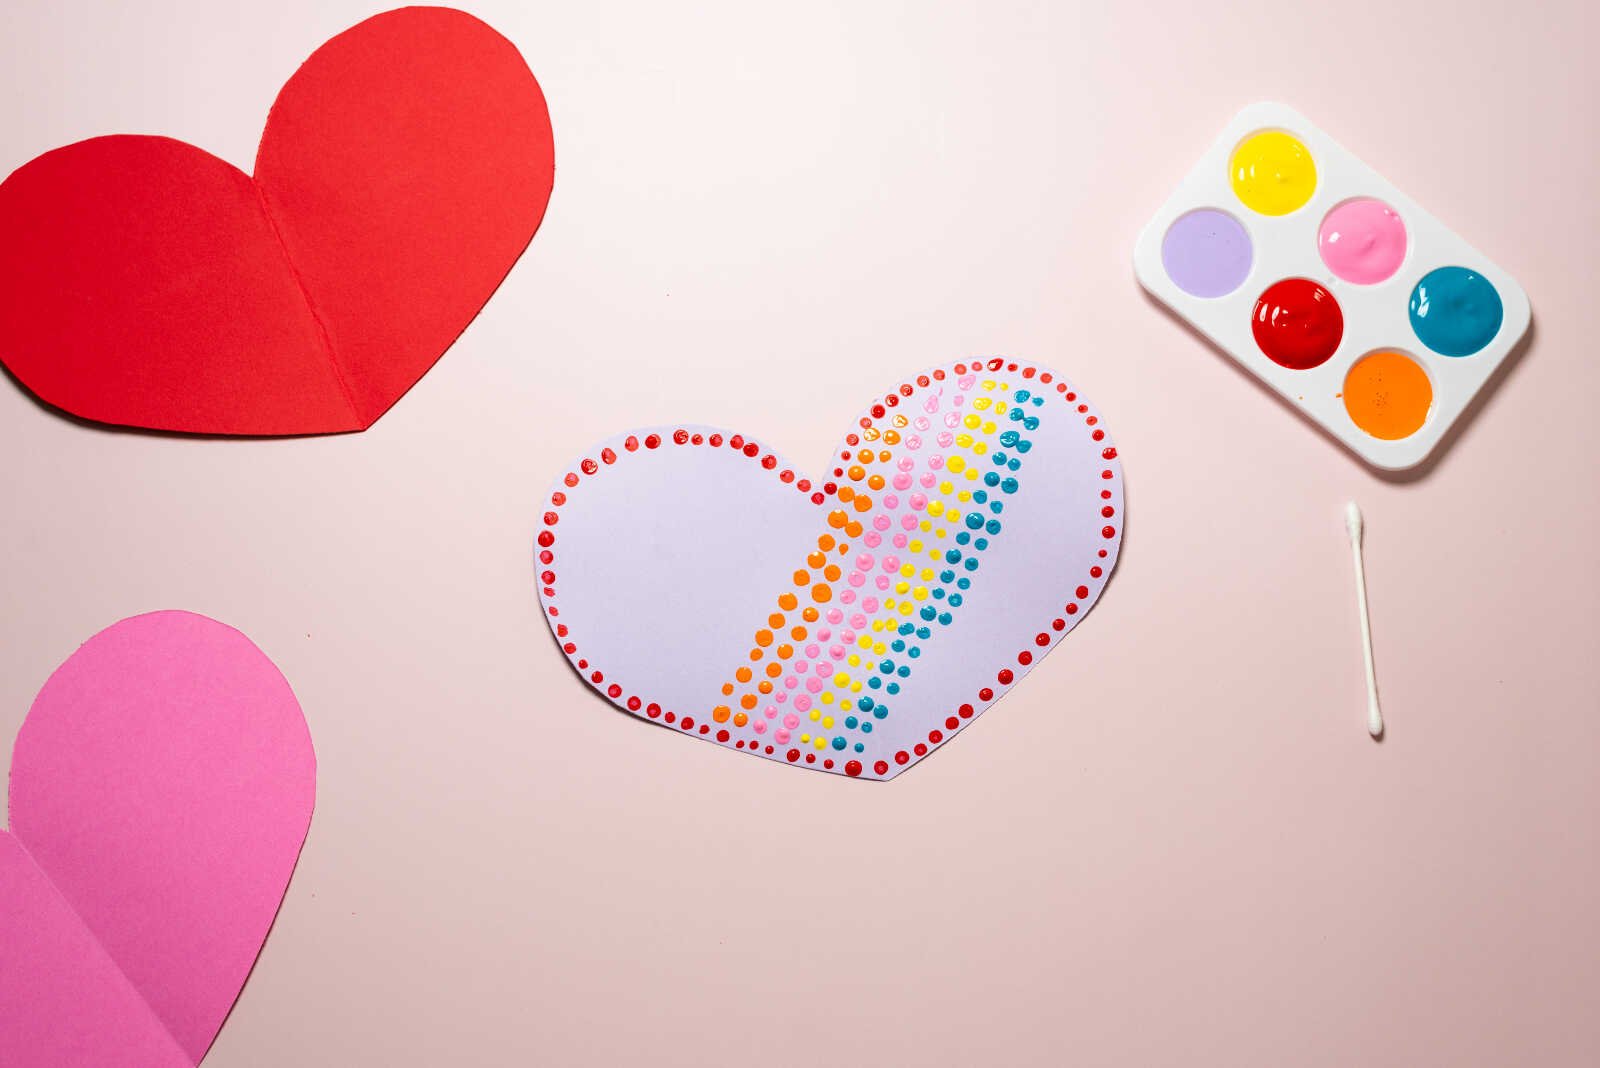
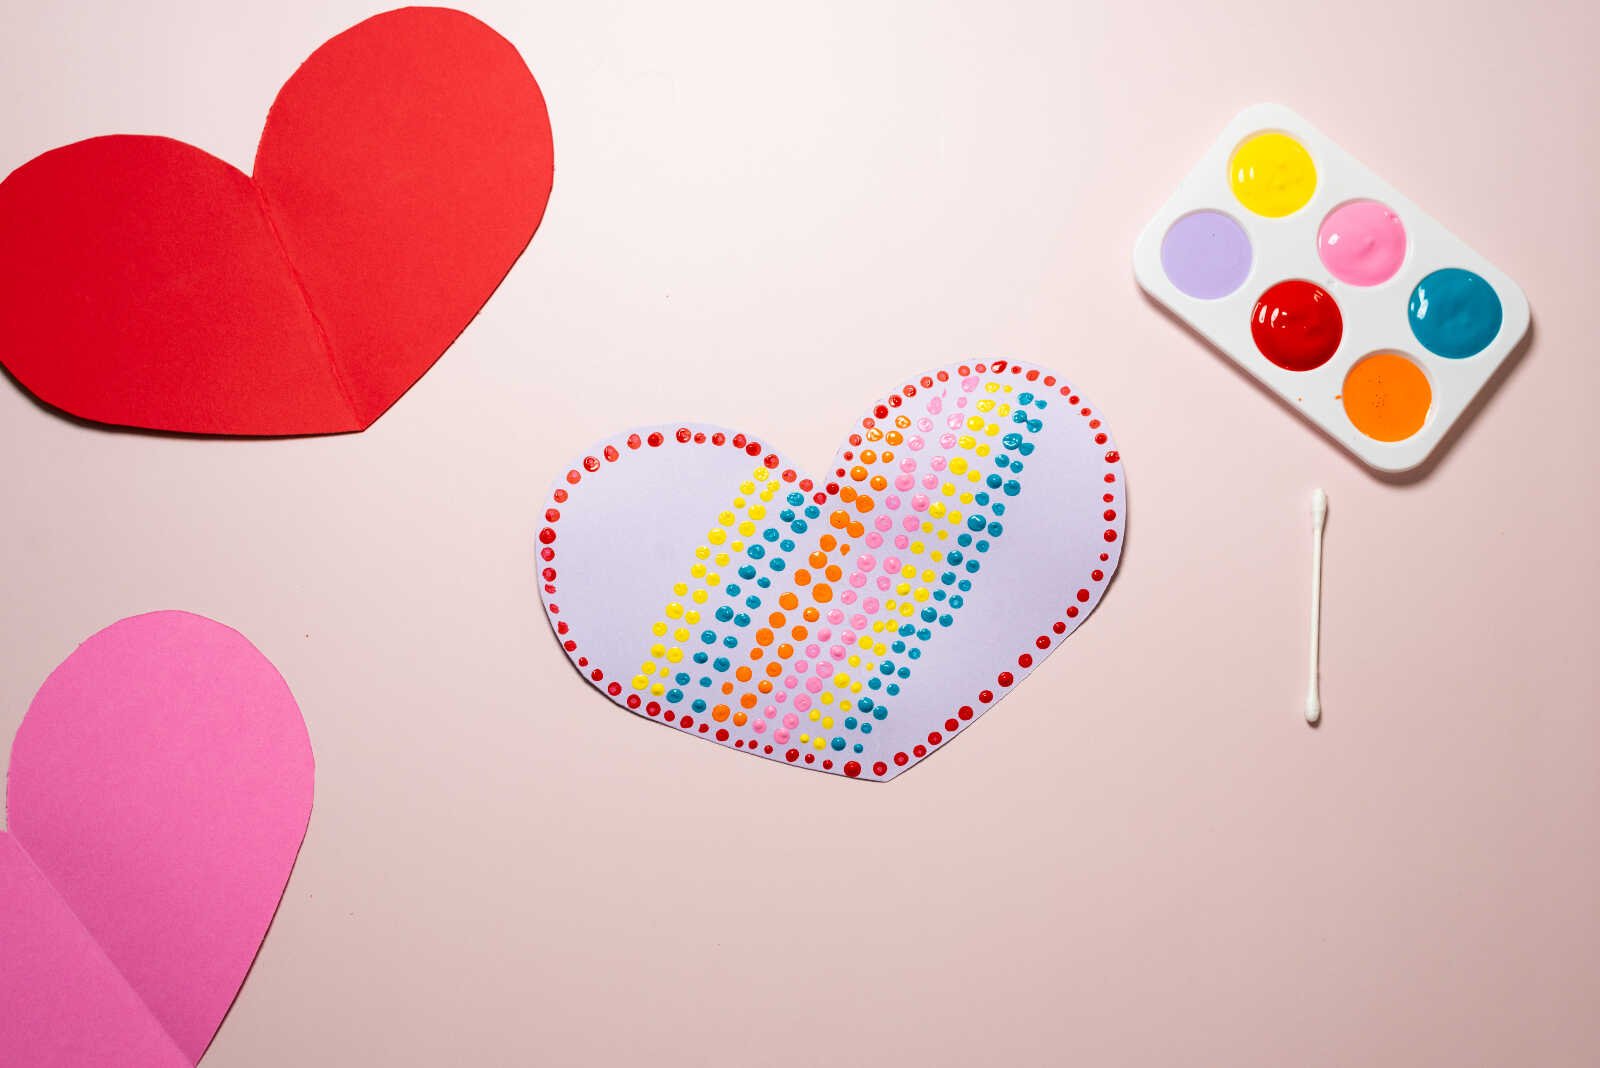
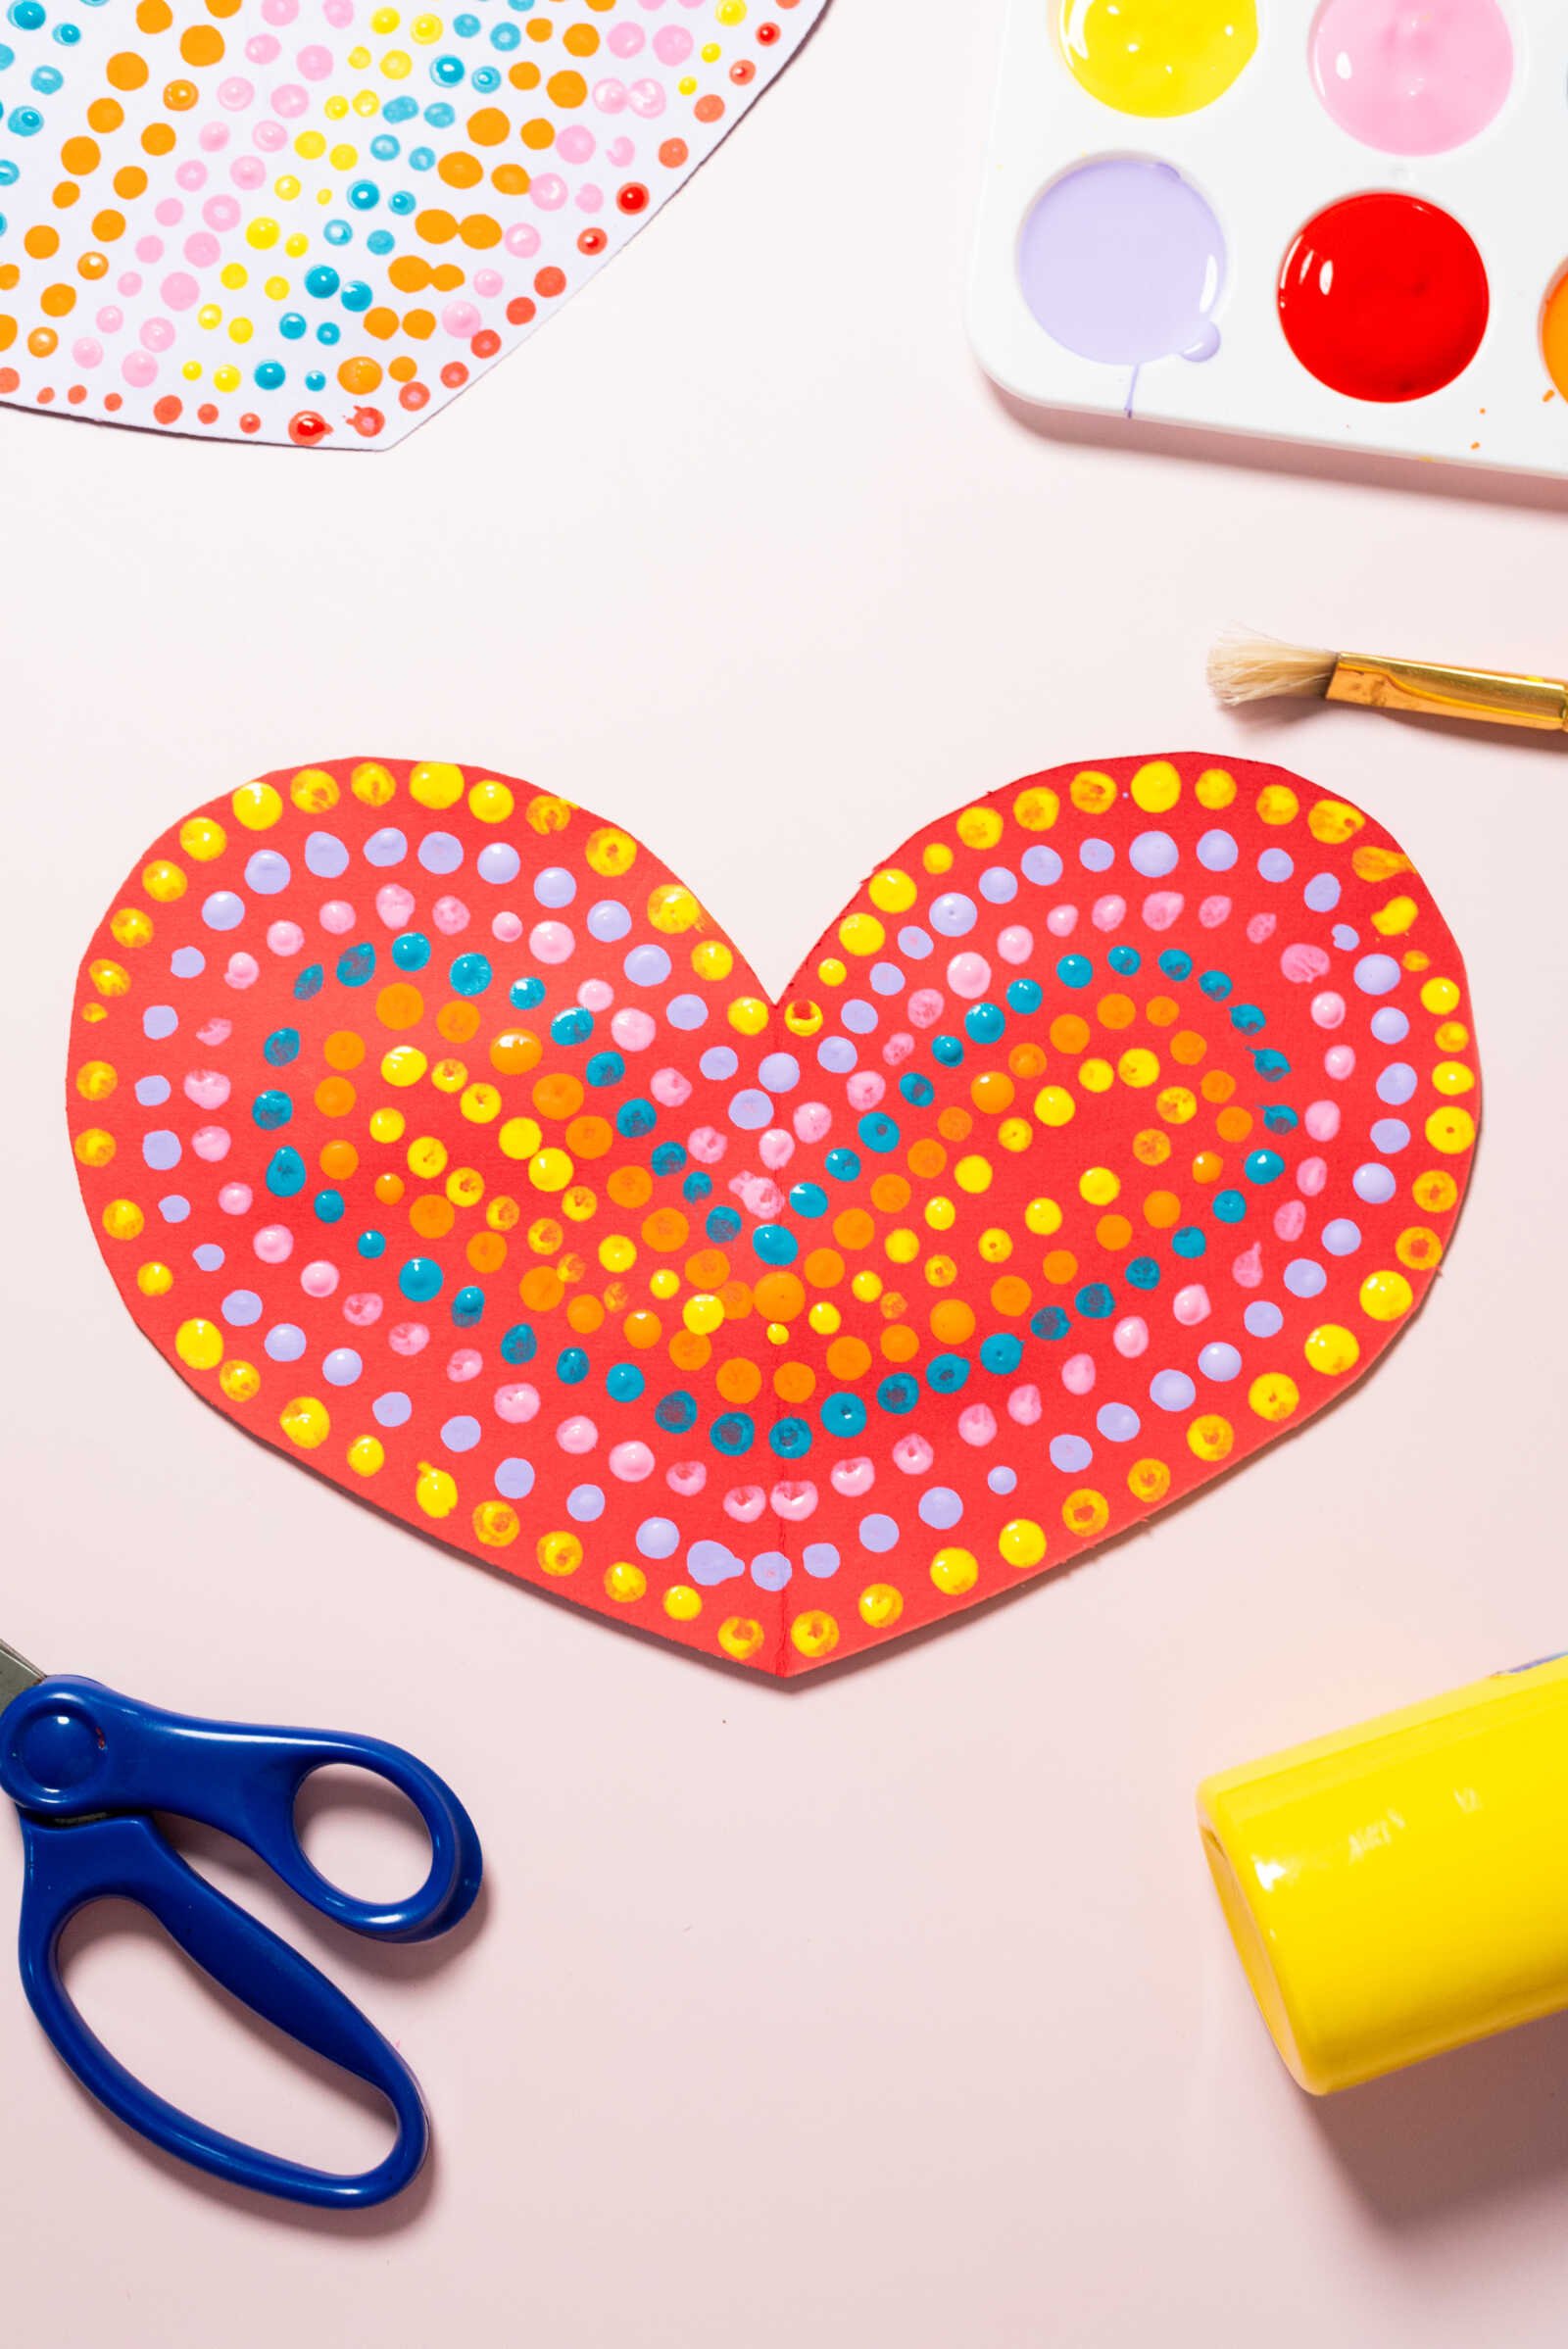
3. Layer and Highlight
Once your base design is complete, grab a fresh Q-tip and dip it into white paint.
Add small dots throughout your design to create highlights. This simple step adds dimension and helps the colors pop beautifully against your background.
Pro tip: Lightly overlap white dots onto other colors for a soft, blended look.
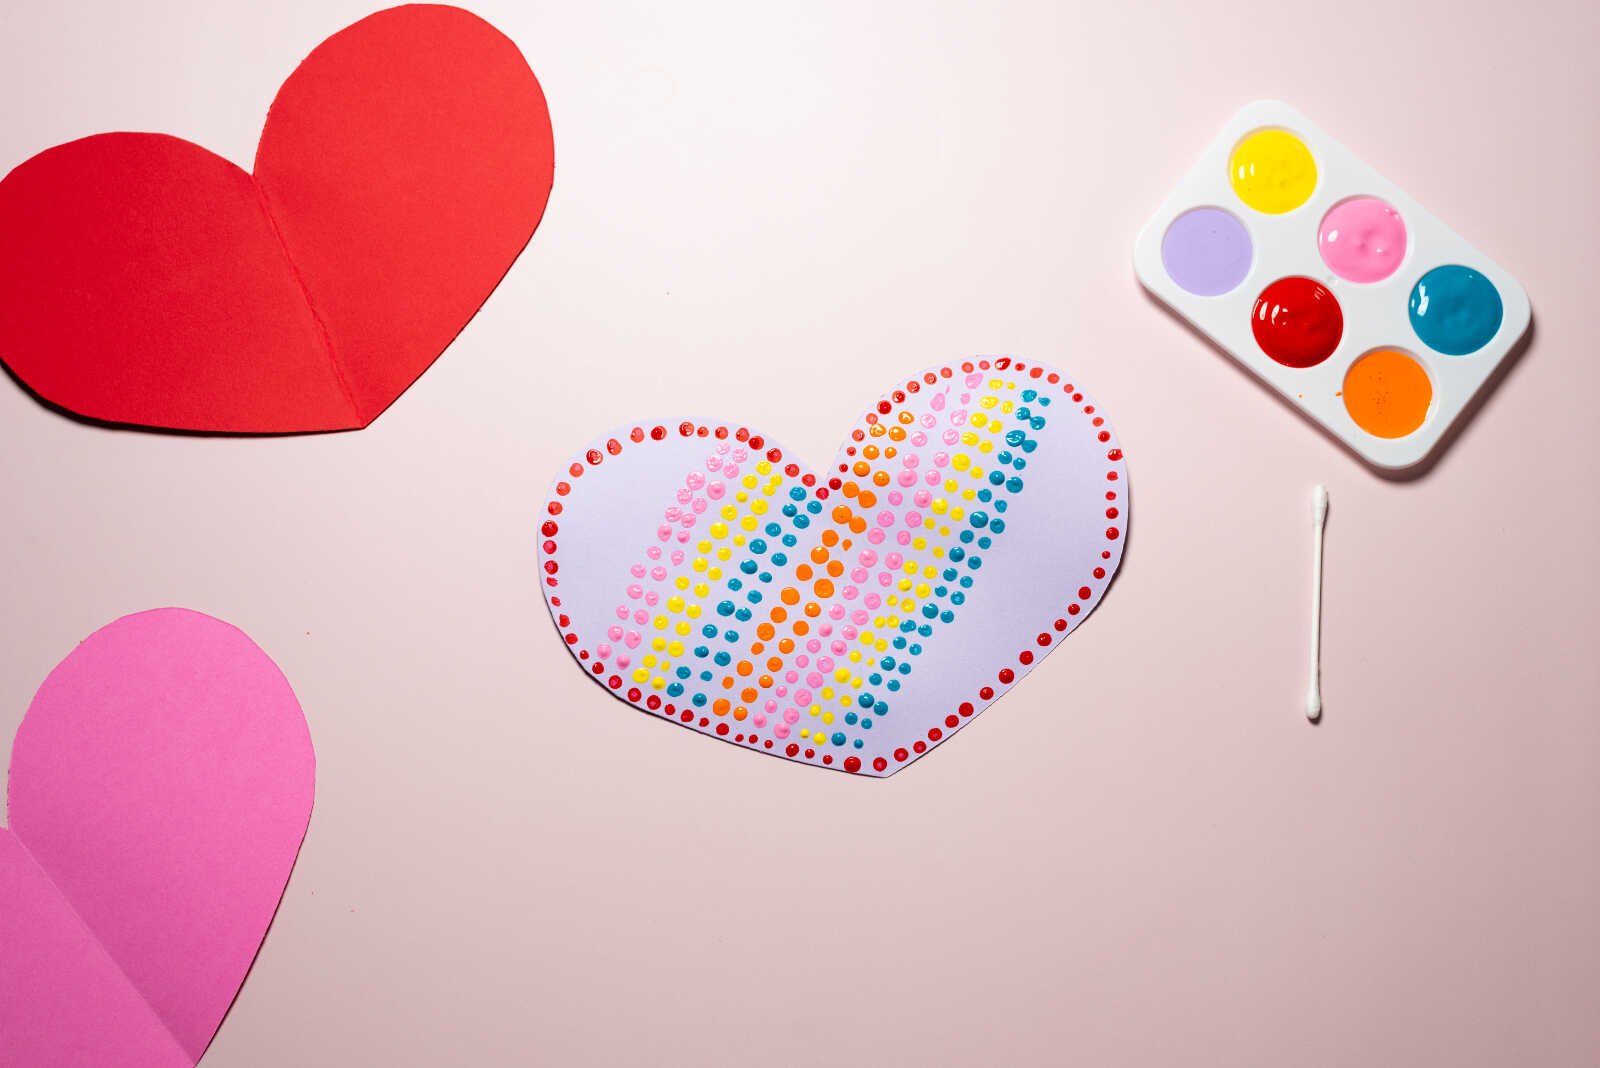
4. The Big Reveal
Here’s the most satisfying part!
Carefully lift the heart stencil off your paper. Underneath, you’ll reveal a clean, untouched heart shape surrounded by your colorful dotted design.
It’s always a “wow” moment—especially for kids!
5. Let It Dry
Allow your artwork to dry completely before moving or displaying it.
Depending on how thick your paint dots are, drying time can range from 30 minutes to a couple of hours.
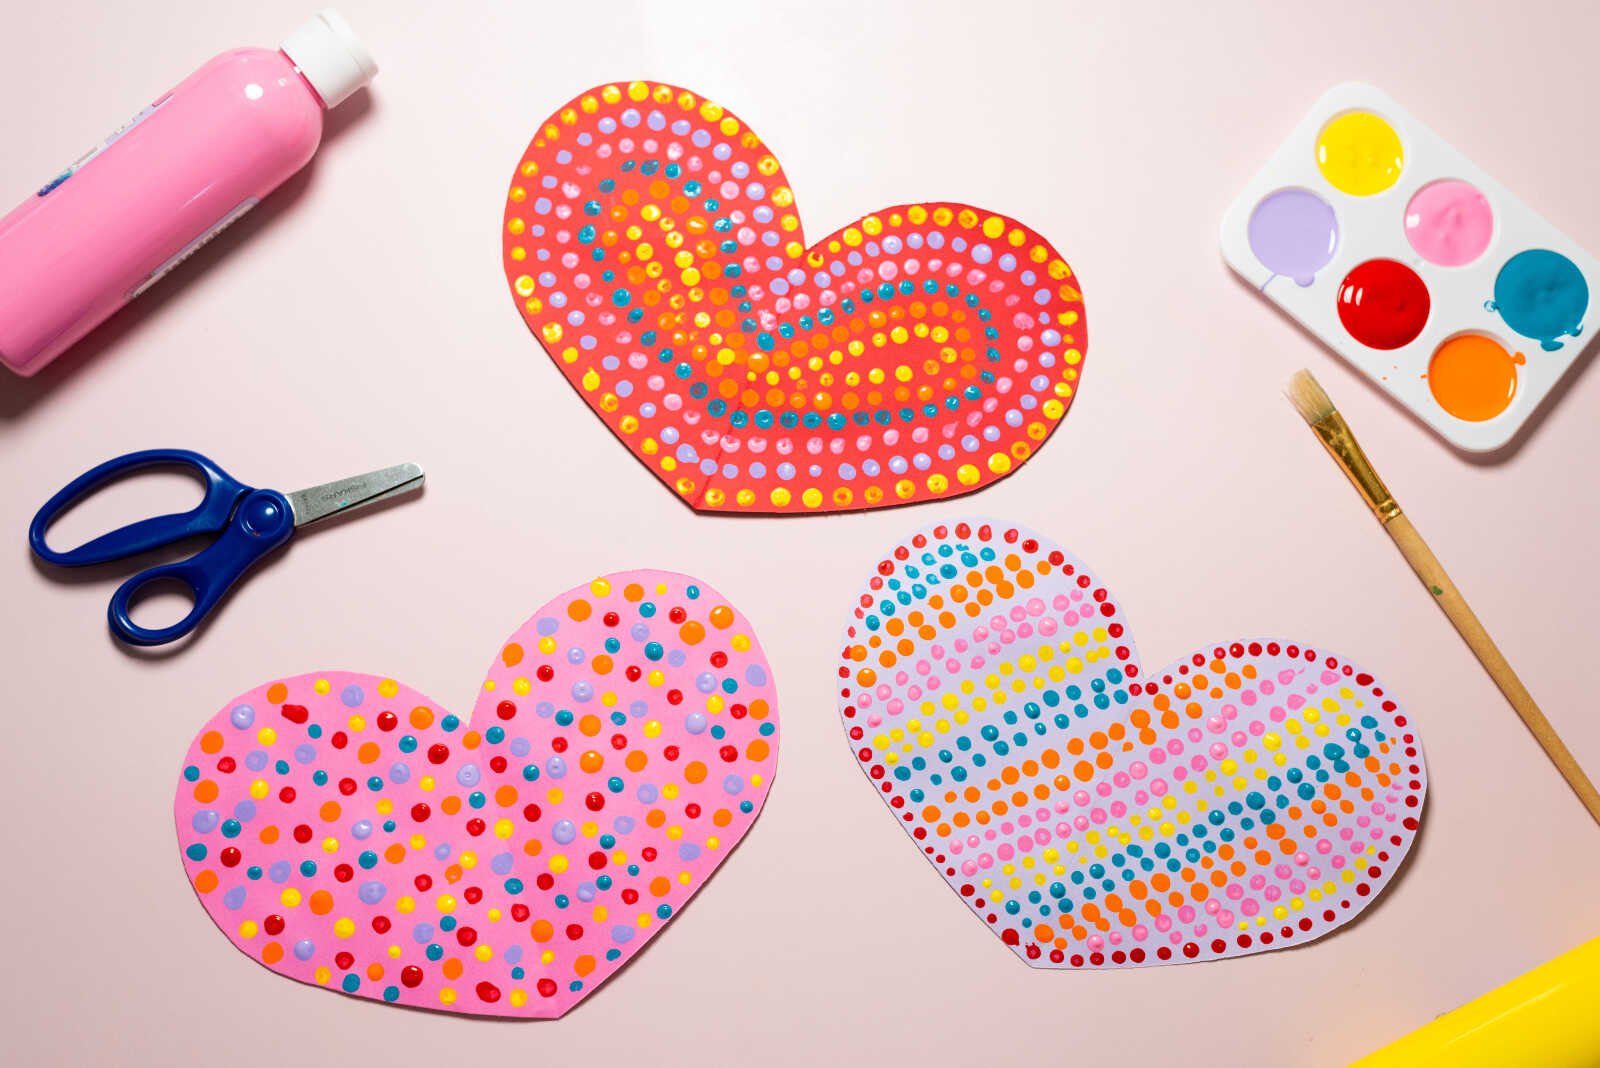
Creative Variations to Try
Once you’ve mastered the basic Heart Q-Tip Art, there are so many ways to make it your own.
Rainbow Heart
Use every color of the rainbow for a vibrant, cheerful design—perfect for spring or classroom displays.
Ombre Effect
Blend shades of the same color (light pink to dark red) for a trendy ombre look.
Galaxy Heart
Swap traditional colors for dark blue, black, and metallics to create a dreamy, outer space vibe.
Name or Initial Design
Add your child’s name or initials inside the heart using markers or stickers once the paint is dry.
Tips for Success
- Use multiple Q-tips at once for faster dotting (bundle 2–3 together!)
- Don’t oversaturate the paint—too much paint can cause smudging
- Work from the inside out to avoid accidental smears
- Keep wipes nearby for quick cleanup
- Let kids take the lead—perfection isn’t the goal, creativity is
Educational Benefits of This Craft
This isn’t just a fun activity—it’s also a great learning experience!
Fine Motor Skills
Dabbing with Q-tips helps strengthen hand-eye coordination and finger control.
Color Recognition
Kids can experiment with color combinations and learn how colors interact.
Creativity & Expression
Open-ended designs allow children to express themselves freely.
Focus & Patience
Dot painting encourages concentration and mindfulness.
Perfect Occasions for Heart Q-Tip Art
This craft is incredibly versatile and fits so many moments:
- Valentine’s Day cards
- Mother’s Day gifts
- Classroom art projects
- Birthday party activity stations
- Rainy day indoor fun
- DIY wall art for kids’ rooms
You can even turn these into handmade greeting cards by folding the paper in half!
How to Display Your Artwork
Once your masterpiece is dry, don’t let it sit in a pile—show it off!
- Frame it for a simple DIY wall display
- Hang it on the fridge with magnets
- Clip it onto a string for a garland
- Add it to a scrapbook or memory book
- Gift it to a loved one
These little creations often become treasured keepsakes.
Make It a Family Activity
One of the best parts of this craft is how easy it is to turn into a shared experience.
Set up a crafting station at your kitchen table, play some music, and let everyone create their own version of Heart Q-Tip Art. You’ll end up with a collection of unique designs—and some really sweet memories.
If you have multiple kids, encourage them to try different styles so they can compare results and get inspired by each other.
Final Thoughts
Heart Q-Tip Art is proof that you don’t need fancy supplies or complicated instructions to create something truly beautiful. With just a few basic materials and a little creativity, you can transform simple dots into a stunning piece of art.
Whether you’re crafting with toddlers, planning a classroom activity, or just looking for a relaxing creative outlet, this project delivers every time.
And the best part? Every single piece turns out completely unique—just like the little artists creating them.
So grab your Q-tips, pour your paint, and get ready to make something colorful, meaningful, and full of heart.
One Comment